LiftMaster Error Code 7: Urgent Diagnosis and Fixes
An urgent, practical guide to understanding liftmaster error code 7, diagnosing sensor and wiring causes, and applying fast fixes with safety notes and cost ranges to prevent repeat failures.

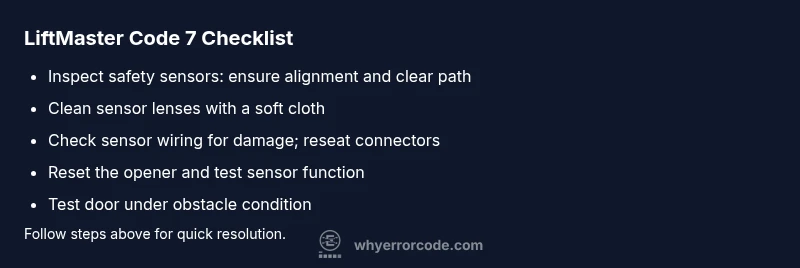
LiftMaster error code 7 usually signals a safety sensor communication fault. Quick checks include aligning and cleaning the photo-eye sensors, inspecting wiring for damage, and resetting the opener. If problems persist, a professional should diagnose sensor circuits and safety features to prevent injuries or door damage.
What LiftMaster Error Code 7 Means
LiftMaster error code 7 indicates a safety sensor communication fault that prevents the opener from closing or operating reliably. The complaint is usually a garage door that biases toward stopping mid-travel or refusing to actuate when the beam is interrupted. This safety feature protects people and pets from a closing door. In most installations, Code 7 points to the photo-eye sensors (the infrared beams near the floor) failing to communicate correctly with the control board. Root causes are typically mechanical misalignment, dirty sensor lenses, or loose wiring, though power fluctuations or recent firmware updates can also play a role. Addressing Code 7 quickly matters because repeated triggers can wear the opener and degrade safety features over time.
According to Why Error Code, this fault is often resolved by a focused inspection of the sensor alignment and wiring. If you notice blinking sensor LEDs or a red indicator near the sensors, start with the simplest fixes before escalating to more invasive diagnostics.
Symptoms That Signal Code 7 in Your Garage Door Opener
Code 7 is usually accompanied by one or more telltale symptoms. Expect the door to stop before reaching the floor, or to reverse unexpectedly when approaching the sensor beam. The garage door opener may also display a blinking LED on the unit or a code on a companion keypad or app. Remote controls and wall-mounted switches might momentarily work but fail to complete a safe closing cycle. If you hear the motor running without any audible or visible compliance with safety features, this is another sign to check the sensors. Inconsistent performance or intermittent failures are common precursors to a more persistent fault.
If you have recently installed or adjusted sensors, or you’ve moved the opener, these symptoms often indicate misalignment or loose connections. Document the exact behavior for the diagnostic flow and use it to prioritize fixes.
Quick Fixes to Try Right Now
Before diving into deeper repairs, try these rapid steps. First, unplug the opener or switch off the circuit for safety. Realign the photo-eye sensors so the beams face each other directly, ensuring no objects block the path. Clean both sensor lenses with a soft, dry cloth to remove dust and smudges. Check the wiring at both sensor and opener ends for loose connectors or damaged insulation and reseat any suspect connections. Restore power and test with a controlled approach: place a small, safe object in the beam path and verify that the door stops and reverses as intended. If the problem persists, perform a full reset of the opener according to the manufacturer’s instructions.
These are quick fixes that often resolve Code 7 without tools or professional service. If you’re unsure or the code remains after these steps, proceed to the diagnostic flow for deeper investigation.
Diagnostic Flow: Symptom → Causes → Fixes
Symptom: Door won’t close or stops before reaching the floor with Code 7 lit.
Causes:
- {"cause": "Misaligned safety sensors", "likelihood": "high"}
- {"cause": "Dirty sensor lenses or condensation on the beams", "likelihood": "medium"}
- {"cause": "Damaged or loose sensor wiring", "likelihood": "medium"}
- {"cause": "Control board glitch or outdated firmware", "likelihood": "low"}
Fixes:
- {"fix": "Realign the safety sensors and ensure the brackets point at each other", "difficulty": "easy"}
- {"fix": "Clean photo-eye lenses and remove any obstructions", "difficulty": "easy"}
- {"fix": "Inspect and reseat sensor wiring, replace damaged wires if needed", "difficulty": "easy"}
- {"fix": "Reset the opener and re-test sensor function", "difficulty": "easy"}
- {"fix": "If the fault persists, replace faulty sensors or consult a technician for board-level diagnostics", "difficulty": "hard"}
Step-by-Step Fix: Sensor Alignment and Wiring
- Safety first: unplug the opener and disconnect power.
- Visually inspect the photo-eye sensors near the floor for misalignment or damage.
- Loosen the mounting screws slightly, adjust the sensors so the beams line up directly across the doorway, then retighten.
- Wipe both sensor lenses with a clean, dry microfiber cloth.
- Verify wiring connections at both ends; reseat any loose connectors and inspect insulation for wear.
- Restore power and run a controlled test: close the door slowly while observing the sensor LEDs for correct behavior.
Tip: Take photos of the sensor alignment before making changes so you can revert if needed.
Other Possible Causes and Fixes
Beyond misalignment, several other issues can trigger Code 7. A degraded control board or firmware incompatibility can cause miscommunication between sensors and the opener. Ensure your LiftMaster model has the latest firmware if an update is available; perform a full reset if recommended by the manual. Damaged wiring or a short in the sensor circuit can also produce Code 7, necessitating part replacement. If a soft reset doesn’t clear the fault, you may need to test the sensor circuit with a multimeter or call a licensed technician to diagnose electronics safely.
Safety, Warnings, and When to Call a Professional
Code 7 touches safety-critical components. If you notice damaged wiring, burnt smells, or sizzling noises, stop work immediately and unplug the unit. Do not bypass safety sensors or disable the auto-reverse feature. If you cannot resolve Code 7 with the basic alignments and cleanings, it is wise to contact a pro—especially for sensor replacements or board diagnostics. Costs for professional diagnostic calls typically range from $75 to $200, with parts extra depending on the sensor or control board needs. Always prioritize safety and seek professional help when uncertainty remains.
Proactive Maintenance to Prevent Future Code 7
Regular maintenance helps prevent Code 7 from recurring. Schedule a quarterly sensor check to confirm alignment and cleaning, and inspect wiring for wear during seasonal maintenance. Keep the sensor lenses clean and free of dust, spiderwebs, or moisture. If your opener experiences frequent power fluctuations, consider installing a surge protector or a dedicated circuit to stabilize voltage. Document the entire process and ensure any firmware updates are performed through official channels. By maintaining the safety system, you reduce the chance of recurring faults and keep the door functioning safely and reliably.
Steps
Estimated time: 25-40 minutes
- 1
Power down and access the opener
Unplug the unit or switch off the circuit to prevent shocks while inspecting sensors and wiring. This is your safe starting point before any sensor work.
Tip: Always verify the power is off with a tester before touching any components. - 2
Inspect sensor alignment
Check that the photo-eye sensors are facing each other directly across the doorway. Brackets should be straight and stable; loosen and reposition if necessary.
Tip: Aim for a straight line between the two eyes, with no tilt in either sensor. - 3
Clean sensor lenses
Wipe both lenses with a soft, dry microfiber cloth to remove dust, moisture, or residue which can disrupt the beam.
Tip: Avoid using solvents that could damage the lens coatings. - 4
Check wiring and connections
Inspect the wires at both the sensor and opener ends for fraying, loose connectors, or pinched insulation. Reseat connections firmly.
Tip: If you see damaged insulation, plan for parts replacement rather than mere reseating. - 5
Reset and test the system
Plug the unit back in, perform a controlled close test, and observe the sensor LEDs. A solid pattern generally indicates a clear fix.
Tip: Test with a small object in the beam path to confirm safety reversal. - 6
Decide on next steps
If Code 7 persists after these steps, consider sensor replacement or professional diagnostics for the control board.
Tip: Keep a log of symptoms and dates for future reference.
Diagnosis: Error 7 displayed on LiftMaster garage door opener control panel or indicator LED
Possible Causes
- highMisaligned safety sensors
- mediumDirty sensor lenses or condensation on the beams
- mediumDamaged wiring or loose connections to sensors
- lowControl board glitch or firmware issue
Fixes
- easyRealign the safety sensors and ensure proper bracket positioning
- easyClean sensor lenses and remove obstructions
- easyInspect and reseat wiring to the sensors; replace damaged wires
- easyReset the opener and re-test sensor function
- hardReplace sensors or consult a technician for board diagnostics
Frequently Asked Questions
What does LiftMaster error code 7 indicate?
Code 7 signals a safety sensor communication fault between the photo-eye sensors and the opener. It usually points to alignment or wiring issues rather than a motor fault. Following guided sensor checks typically resolves the fault without major parts replacement.
Code 7 means the safety sensors aren’t talking to the opener. Check alignment and wiring first, and you’ll often fix it without tools.
Is Code 7 dangerous to ignore?
Yes. If left unresolved, the door safety features may fail, risking injury or property damage. Do not operate the opener until you confirm the sensors are working correctly.
Ignoring Code 7 can be risky because the door may not reverse safely.
Can I fix Code 7 myself?
In many cases you can fix Code 7 with basic checks: realign sensors, clean lenses, and reseat wiring. If you have persistent issues or suspect a board fault, call a professional.
Often you can fix it yourself, but if it persists, get a pro to check the electronics.
What tools do I need for fixes?
You typically need a soft cloth, a screwdriver, and basic inspection tools. For wiring checks, a multimeter may be required if you’re troubleshooting sensor circuits.
Just a few simple tools—power off, realign, clean, and reseat wires if needed.
When should I call a professional?
If sensor alignment, lens cleaning, and wiring reseating don’t clear Code 7, or if you notice damaged wires or a faulty control board, consult a technician.
Call a professional if the fault remains after basic fixes or you’re unsure about wiring.
Will Code 7 come back after fixes?
It can recur if underlying issues aren’t fully resolved (like a degraded sensor or loose wiring). Regular maintenance reduces the chance of recurrence.
It might come back if the problem isn’t fully fixed; maintain sensors to reduce repeats.
Watch Video
Top Takeaways
- Identify sensor misalignment as the first fix
- Clean and align sensors to reset Code 7 quickly
- Inspect wiring and connections for damage or looseness
- Do not bypass safety features; call a pro if unresolved