LiftMaster Error Code 24 Troubleshooting Guide
Urgent, actionable guide to diagnose and fix LiftMaster error code 24. Learn quick fixes, step-by-step repairs, diagnostic flow, safety notes, and prevention tips to get your garage door back on track fast.

LiftMaster error code 24 typically signals a safety sensor or limit-switch fault that blocks normal operation. The quickest fixes focus on the photoelectric sensors: clean, realign, and verify wiring integrity. If the door still won’t operate after these checks, a professional diagnosis may be required to rule out sensor hardware or control-board issues.
What LiftMaster Error Code 24 Means
LiftMaster error code 24 is a fault indicator tied to the safety sensor system installed on most sectional garage doors. The photoeye sensors, positioned near the door tracks, are designed to detect objects in the door’s path. When the control board detects a misalignment, obstruction, or wiring problem, it freezes operation to prevent injury or property damage and displays code 24. This is a safety-first alert, not a generic device fault, and it often has a quick, hardware-based fix rather than a full replacement.
Because the error is tied to sensors, you’ll typically see the garage door halting, the opener LED indicators behaving abnormally, or a constant error light on the sensor itself. If you ignore it, you risk further wear on the opener, a misaligned track, or repeated door reversals that can damage the door or opener.
This guide focuses on practical, immediate steps you can take to restore function while understanding why the error happened. Always prioritize safety: disconnect power if you must handle wiring, and avoid attempting repairs beyond your comfort level.
Why This Error Occurs: Common Causes
Error code 24 commonly arises from sensor-related issues, but there are multiple plausible root causes. Prioritize fixes by likelihood:
- Misaligned safety sensors (high): If the two photoeyes are not facing each other directly, the system won’t see a clear beam, triggering code 24. Both LEDs should be steady, not blinking.
- Dirty or obstructed sensors (high): Dust, spider webs, or dew can obscure the sensor lens and interrupt the beam.
- Damaged or loose wiring (medium): Wires connected to the sensors or the opener can become loose, frayed, or pinched by moving parts.
- Faulty sensor or control board (low): A bad sensor module or a failing control circuit can trigger the error even with clean hardware.
- Alignment drift after door movement or impact (low): Minor misalignment from daily use or a bump can reintroduce code 24.
If you’ve recently installed or moved the opener, re-check installation instructions for correct sensor placement and mounting height. Seasonal temperature swings can also affect sensor alignment, so revisit alignment after a cold snap or heat wave.
Quick Fixes You Can Try Right Now
These fixes are designed to be completed with minimal tools and without professional service. Start with the simplest option and move to more involved steps if the error persists:
- Power cycle the opener: unplug or switch off the breaker for 60 seconds, then restore power. This resets controller logic and may clear transient faults.
- Realign safety sensors: gently adjust each sensor until the LED indicators show solid both-sides illumination; misalignment is the most common cause of code 24.
- Clean sensor lenses: wipe lenses with a dry microfiber cloth, removing dust, spider webs, and condensation. Dirty lenses can block the beam even when alignment is correct.
- Check sensor wiring and connections: inspect cables for visible damage, secure every connector, and reseat plugs at both the sensor and the opener control board.
- Remove obstructions: ensure no objects or vehicles block the sensor path and that reflective surfaces or glass near the sensors are not interfering with the beam.
- Test with the remote and wall switch: after fixes, trigger the door using both the remote and wall control to confirm the issue is resolved across input methods.
In-Depth Diagnostics: When Quick Fixes Fail
If the quick fixes don’t restore function, proceed with a deeper diagnostic approach while maintaining safety:
- Inspect LED indicators: most LiftMaster sensors show a steady green when aligned and a red or blinking LED when misaligned or obstructed. Note any color changes after adjustments.
- Check for damaged wiring: look for cracked insulation, pinched cables, or corrosion at connectors. Replace damaged wiring rather than attempting band-aid fixes.
- Test sensor resistance (optional): with the power off, a technician may measure the eye’s output with a multimeter to verify the sensor circuit is within specification. Do not attempt this if you’re not comfortable with electrical testing.
- Evaluate the control board: if both sensors test fine but the opener still reports 24, the fault could be in the control logic or safety-reversing circuit. A professional diagnosis can confirm a sensor misread, a loose board, or a failed safety relay.
- Consider environmental factors: heat, cold, and moisture can affect sensor performance. If the problem occurs only in certain weather, plan for sensor recalibration after temperature changes.
Documentation: keep notes of all LED colors, mounting positions, and any changes you made. This helps a technician diagnose quickly and reduces time on site.
Safety, Costs, and When to Call a Pro
Safety should always come first. Do not bypass safety features or operate the door if you see damaged wiring, exposed conductors, or cracked sensor housings. If you are uncertain about disassembly or wiring, contact a certified technician.
Cost considerations:
- Sensor replacement parts: typically a range that covers parts only, depending on model and whether a direct LiftMaster part is used.
- Sensor installation: professional installation may add labor charges and possible recalibration of the door’s force and limit settings.
- Control board or motor replacement: higher-cost repairs, often requiring professional service.
- Diagnostic visit: professional service calls can range from modest to higher fees depending on your region and time required.
In general, expect to spend less when a quick sensor realignment resolves the issue and more if you need sensor replacement, the control board, or a full opener upgrade. While numbers vary by region and model, plan for a total in the low hundreds for more complex repairs, not including upgrades.
Prevention: How to Avoid Error Code 24 in the Future
Take these preventive steps to reduce the likelihood of code 24 recurring:
- Regular sensor cleaning: establish a simple quarterly or semi-annual cleaning routine for the photoeyes to keep them free of dust and debris.
- Check alignment after major trips or impacts: if the door has a bump or a major wind gust, re-check sensor alignment as a precaution.
- Secure wiring: ensure cables are routed away from moving parts to prevent wear or pinching.
- Maintain a tidy sensor area: avoid placing objects that could reflect or block the infrared beam, including large decorative items near the sensors.
- Schedule annual professional tuning: a technician can calibrate safety gaps, door balance, and sensor performance to minimize false alarms.
FAQ-Linked Note: Common Questions About Error Code 24
- Error code 24 can appear on LiftMaster units with both older and newer sensors; the fix generally involves the safety beam, not the door motor. Always check alignment and obstruction first. If in doubt, seek a professional assessment to avoid injury or property damage.
Steps
Estimated time: 30-45 minutes
- 1
Power cycle the opener
Turn off power to the opener at the breaker or unplug the unit. Wait 60 seconds, then restore power and re-test the door operations. This resets the logic and can clear minor faults.
Tip: Avoid touching live components while powered. Use a non-conductive object if testing manually. - 2
Check sensor alignment
Visually align the photo eyes so they face each other directly. When aligned, the boundary LEDs should be steady green on both eyes, not blinking.
Tip: Use a level or a straight edge to ensure straight alignment along the track. - 3
Clean sensor lenses
Wipe each photo eye lens with a dry microfiber cloth. Remove dust, spider webs, or moisture that could obscure the beam.
Tip: Do not use solvents; they can damage plastic housings. - 4
Inspect wiring and connectors
Power down the unit again and examine the sensor cables for wear, cracks, or loose connectors. Reseat plugs firmly and replace damaged wires as needed.
Tip: While inspecting, look for signs of pinching or chafing along the door track. - 5
Test door operation
With power restored, test the door both from the remote and the wall switch. If the door still stops with code 24, proceed to a professional evaluation.
Tip: Document LED behavior to share with a technician. - 6
Consider professional diagnostics
If the issue persists, a technician can test sensor outputs and assess the control board and safety relay to confirm a sensor or board fault.
Tip: Request a written estimate and clarify whether part costs, labor, and diagnostic fees are included.
Diagnosis: Garage door opener displays error code 24 and won’t operate
Possible Causes
- highMisaligned safety sensors (photo eyes)
- highDust, dirt, or condensation on sensor lenses
- mediumDamaged, loose, or pinched wiring to sensors
- lowFaulty sensor module or control board
Fixes
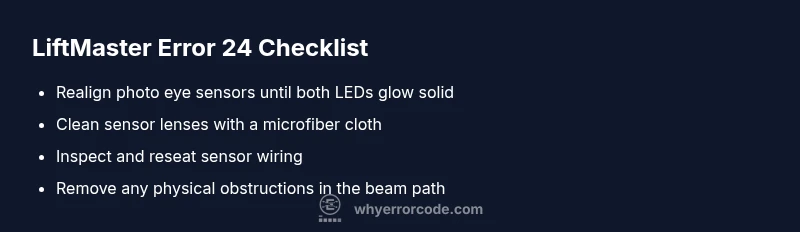
- easyRealign sensors until LEDs indicate solid both sides
- easyClean sensor lenses and remove obstructions
- mediumInspect and reseat sensor wiring; replace damaged cables
- hardReplace faulty sensor or controller board if tests indicate electronics failure
Frequently Asked Questions
What does LiftMaster error code 24 indicate?
Code 24 signals a fault in the safety sensor system or related wiring. It stops operation to prevent injury. Start with sensor alignment and cleaning before seeking professional help.
Code 24 points to a safety sensor issue or wiring fault. Start by realigning and cleaning the sensors, then call a technician if it persists.
Can I fix code 24 myself?
Yes, for many units you can fix it by realigning and cleaning the photo eyes and checking wiring. If the error remains after these steps, a professional diagnosis is recommended to avoid injury.
You can try realigning and cleaning the sensors, but if it doesn’t clear, consult a professional.
What are the quick signs the sensors are misaligned?
Steady LEDs on ambos eyes are typical. Blinking LEDs or no light indicate misalignment or obstruction. Always re-check for debris and proper alignment.
Look for blinking LEDs or no light on the sensors; that's a sign to re-align and clean.
Is there a safety risk to ignoring code 24?
Yes. Ignoring the fault can cause repeated door reversals or entrapment hazards. Address the issue promptly to protect occupants and property.
Ignoring it can be dangerous; fix it quickly to avoid injuries.
What costs should I expect for a sensor repair?
Sensor parts typically range with installation costs varying by region. Expect more for full sensor or board replacements. Get a written estimate before work begins.
Sensor repairs usually range in price; ask for an estimate first.
When should I call a pro for LiftMaster code 24?
If sensor cleaning and realignment don’t resolve the issue, or if wiring is damaged, contact a qualified technician for a definitive diagnosis and safe restoration.
Call a pro if simple fixes don’t work or wiring looks damaged.
Can environmental conditions trigger code 24?
Temperature changes, humidity, or condensation can affect sensor performance. If the problem happens with weather shifts, revisit alignment and cleaning after weather changes.
Weather changes can affect the sensors; recheck alignment when the weather shifts.
Will resetting the opener help permanently?
Resetting can clear transient faults but won’t fix worn parts. If the fault recurs after a reset, prioritize inspection of sensors and wiring or consult a pro.
Resetting might clear a fault, but it’s not a lasting fix if parts are worn.
Watch Video
Top Takeaways
- Start with sensor alignment and cleaning
- Wiring integrity matters and may require professional repair
- Costs vary; expect sensor work to be cheaper than board replacement
- Prioritize safety and call a pro if unsure