LiftMaster Error Code 80 Troubleshooting
Urgent guide to diagnose and fix LiftMaster error code 80. Learn sensor fault causes, quick checks, step-by-step repairs, and safety tips to restore garage door operation quickly.

According to Why Error Code, LiftMaster error code 80 signals a safety sensor fault that halts operation to protect people and pets. Commonly caused by misalignment, obstructions, or wiring issues. Start with sensor realignment, clean the sensor lenses, remove debris, and verify the wiring connections before retesting the opener. If the error persists, reset the memory and reprogram remotes as needed.
What liftmaster error code 80 means
According to Why Error Code, LiftMaster error code 80 indicates a safety sensor fault that halts the garage door opener to protect users from injury. The photoelectric sensors located near the floor on both sides of the door establish a light beam across the doorway. If the beam is broken or the sensors misread, the opener will stop and display error 80. The underlying cause is usually environmental or mechanical rather than a systemic failure of the opener. Real-world symptoms include the door stopping mid-travel, the opener pausing with the light indicator blinking, and a beam- or sensor-related warning LED on the unit. Safety-critical systems demand careful, methodical troubleshooting rather than rushed, improvised fixes.
Common symptoms you might notice
- The door stops before closing fully and reverses or stays suspended mid-travel.
- The LED indicator on the opener flashes in a pattern associated with sensor faults.
- A click or faint hum is heard, but the door does not complete its cycle.
- The remote or wall control appears functional, but the door remains stuck due to the safety sensor circuit.
Primary causes and how to gauge their likelihood
- Sensor misalignment or obstruction (high): The most frequent reason for error 80 is that the sensors are out of alignment or blocked by dust, spider webs, or items in the doorway path.
- Wiring damage or loose connections (medium): Damaged wires or loose connectors on either sensor can trigger incorrect readings.
- Blown sensor or compatibility issue (low): A failed sensor or minor compatibility fault with the logic board may trigger the code, though this is less common than misalignment or wiring problems.
- Ground fault or power irregularities in the opener circuit (low): Power irregularities can masquerade as sensor faults if the control logic misreads sensor input.
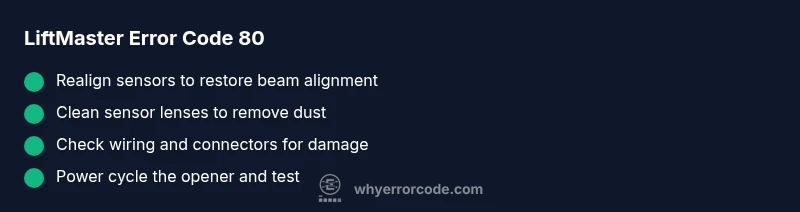
Quick fixes you can try right now (no tools required)
- Reposition and align the sensors so they face each other directly with a clear path between them.
- Wipe sensor lenses gently with a soft, dry cloth to remove dust or moisture.
- Clear the beam path of any obstructions such as toys, shoes, or debris near the door tracks.
- Power cycle the opener: unplug for 60 seconds, then plug back in to reset the sensor circuit. Re-test the door.
- Inspect for obvious wiring damage at the sensor connectors on the side of the opener. If you see loose cables, do not tighten wiring while the unit is powered on.
- Ensure the door is fully closed when performing realignment to avoid safety override triggers.
Diagnostic steps for deeper issues
- Verify both sensors are at the same height and aimed directly at each other. A misaligned sensor can cause a false 80 fault even with clean lenses.
- Check sensor LEDs: a stable green indicates proper alignment, while a blinking or red LED signals a misalignment or obstruction.
- Test the door without any safety accessories engaged. If the door still reports error 80 after alignment, inspect the wiring harness and connections between the sensors and the control board for wear, fraying, or loose pins.
- If you have a spare sensor or the ability to swap with an identical unit, perform a temporary swap to isolate the fault. If the fault follows the sensor, you know replacement is likely needed.
When to replace components (cost considerations)
Sensor replacements are typically a straightforward task but may require a professional if wiring or the control board is suspected. Expect costs to include parts and labor, often in ranges rather than exact figures. For sensor replacement alone, you might see a lower-cost repair, while wiring or board replacement could be higher. Always verify compatibility with your LiftMaster model before purchasing parts.
If you're unsure whether an upgrade or repair is necessary, a pro can confirm sensor brand compatibility and test for intermittent faults that a consumer test might miss.
Safety, warnings, and when to call a professional
- Never bypass safety sensors or disable the safety features. Bypassing protection can cause injury and void warranties.
- If you smell burning, hear crackling, or see smoke around the opener, unplug immediately and seek professional service.
- When in doubt, contact a licensed garage-door technician. Sensor issues can involve the wiring and the control board, and improper handling can create additional hazards or void warranties.
Preventive tips and best practices
- Schedule periodic sensor cleaning and alignment checks, especially after storms or construction near the doorway.
- Keep the sensor path clear of toys, tools, and dirt to prevent false readings.
- Use a soft brush or microfiber cloth to avoid scratching the sensor lenses.
- If you frequently encounter error 80, consider replacing aging sensors to maintain consistent performance and avoid false positives.
Steps
Estimated time: 25-40 minutes
- 1
Power down and reset
Unplug the opener from the outlet and wait 60 seconds. Plug it back in to reset sensor circuits and clear transient faults.
Tip: Avoid touching wiring while the unit is powered. - 2
Realign sensors
Loosen the mounting screws slightly, adjust each sensor so the LEDs align, and ensure the beam is unobstructed across the doorway.
Tip: Keep the door closed during realignment to ensure a proper beam path. - 3
Clean sensor lenses
Wipe the lenses with a clean microfiber cloth to remove dust, fog, or condensation that can disrupt transmission.
Tip: Always use a dry cloth; avoid liquids near electrical components. - 4
Check wiring connections
Inspect sensor wires for wear, fraying, or loose pins at the connectors. Reseat any suspect connections firmly.
Tip: Do not pull wires; handle connectors gently. - 5
Test the system
Close the door using the wall control and observe whether error 80 returns. If it does, proceed to swap if available.
Tip: If the door stops before closing, watch the sensor LEDs for signals. - 6
Consider professional help
If the error persists after all checks, schedule a service call to evaluate the sensor assembly or control board.
Tip: Professional testing can diagnose intermittent faults not visible to the naked eye.
Diagnosis: Door stops and error code 80 is displayed on a LiftMaster garage door opener
Possible Causes
- highMisaligned safety sensors
- highDebris or obstruction in sensor beam path
- mediumDamaged or loose sensor wiring
- lowSensor or control board fault (rare)
Fixes
- easyRealign sensors so they face each other with a clear beam
- easyClean sensor lenses and remove dust/debris in the doorway path
- mediumInspect sensor wiring and connectors for damage or looseness and reseat
- hardTest with a known-good sensor or consult a pro for control-board diagnostics
Frequently Asked Questions
What does LiftMaster error code 80 mean?
Error code 80 indicates a safety sensor fault, usually due to misalignment, dirt on the lenses, or damaged wiring. It prevents the door from closing to protect people and pets.
Error 80 means the safety sensor isn’t reading properly, likely from dirt, misalignment, or wiring issues. Clean and realign the sensors, and test again.
Can I fix error 80 without calling a technician?
Yes, you can start with quick DIY steps: realign sensors, clean the lenses, clear beam obstructions, and perform a power cycle. If the fault persists, a professional should diagnose wiring or board issues.
You can try realigning and cleaning first; if it still shows, call a pro.
Will resetting the opener erase remotes or settings?
A reset may require reprogramming remotes and reconfiguring settings. After a reset, re-test with the wall control and remotes to ensure proper operation.
Reset may require reprogramming remotes. Test afterward.
How long does sensor replacement typically take?
Sensor replacement is usually quick with the right part, often under an hour if you’re comfortable with wiring; more time may be needed if there’s additional wiring work.
Replacement is typically under an hour for a skilled DIYer.
Could the issue be the control board rather than sensors?
The control board can fault and trigger sensor codes if inputs are read incorrectly. A professional can run diagnostics to distinguish between sensor and board faults.
A board fault is possible; a pro can diagnose with specialized tools.
When should I call a professional?
Call a professional if sensor realignment and wiring checks do not resolve the code 80 fault or if you notice moisture, corrosion, or burning smells around the unit.
Call a pro if basic fixes don’t help or you see signs of damage.
Watch Video
Top Takeaways
- Identify sensor misalignment and debris as the top causes.
- Follow safe, step-by-step realignment and cleaning before wiring checks.
- Power-cycle the opener to reset sensor logic and retest.
- Call a pro if the fault persists after basic fixes.
- Prevent future faults with regular sensor maintenance.