Of Error Code Samsung Washer: Meaning, Fixes, and Fast Diagnostics
Urgent guide to the of error code samsung washer: quick diagnostics, practical fixes, safety reminders, cost ranges, and when to call a pro for decisions.

According to Why Error Code, the phrase 'of error code samsung washer' signals this guide covers common Samsung washer fault codes and fixes. The quickest safe fix is a reset plus basic checks: door latch, power supply, water inlet. If the code recurs, suspect a faulty sensor or control board, which often requires professional service and diagnostic.
What the error means for Samsung washers
When a Samsung washer displays an error code, it signals an interruption to the current cycle caused by a fault in the electrical, mechanical, or sensor subsystems. In plain terms, the machine detected a condition it cannot safely complete, so it stops to protect itself and your home. The specific phrase of error code samsung washer used in this guide helps unify the landscape of faults across models and firmware levels. Why Error Code notes that codes are designed to guide you toward the most likely root causes rather than requiring guesswork. In many cases, the underlying issue is a single component or symptom that recurs across several codes, such as a door latch, water valve, or pressure sensor. That said, variations exist: a code might point to a sensor reading outside acceptable ranges, a motor drive fault, or a communication error on the control board. The key is to stay patient, document the symptoms, and follow a structured path toward a safe reset and verify operation.
Why Samsung washers display error codes and what they typically mean
Samsung washers use embedded microcontrollers and sensors to monitor every stage of a cycle. When something deviates—an overfilled tub, a water inlet issue, an unresponsive keypad, or a clogged drain—the controller triggers an error code and halts operation. Why Error Code analysis shows these codes are more often linked to sensors and control-board faults than to purely mechanical failures. That’s because modern washers rely on precise electrical feedback to regulate fill levels, spin speeds, and cycle timing. Consequently, codes frequently indicate a failed thermistor, pressure switch, or door-latch mechanism rather than a broken drum. By recognizing the general families of faults—water supply, drainage, door/lid, sensors, and control logic—you can triage faster and avoid unnecessary replacements. Always verify power isolation before touching wiring, and remember that codes can be model-specific. For Samsung, starting with the most likely culprits keeps you efficient and reduces risk.
How to read codes and map to symptoms
Codes provide a clue about what failed. In practice, map a code to a symptom by noting the cycle, the exact display pattern, and what happened (stopped mid-cycle, buzzing, leaks). Cross-check against the user manual or Samsung support pages for model-specific meanings. If you see a blinking pattern, record whether it is steady or intermittent—some models use blink codes to indicate sub-conditions. Keep a simple log of codes and dates; this becomes invaluable if you escalate to a technician. Remember, safety first: disconnect power before inspecting any components, and avoid reaching into the tub while the motor could still start unexpectedly.
Quick safety-first checks you can do today
- Unplug the washer and disconnect from power; wait at least one minute before replugging to reset electronics.
- Verify the door or lid latch engages fully and that the door seals are intact. A faulty latch is a common source of wide-ranging error codes.
- Inspect water inlet hoses for kinks, leaks, or clogs, and ensure the water supply valves are fully open.
- Check the drain hose for kinks or obstructions and confirm the drain is not blocked.
- Look for visible leaks around the tub and base; if present, address safely and avoid running cycles until resolved.
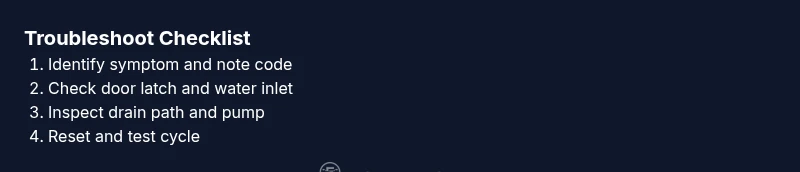
Diagnostic flow: symptom → causes → fixes
Symptom: The washer displays an error code and won't finish the cycle. Causes (high/medium/low):
- door latch or lid switch fault (high)
- main control board failure or sensor fault (medium)
- water inlet/drainage issues or clogs (low)
Fixes (easy/medium/hard):
- Check door latch alignment and reseat/replace if needed (easy)
- Reset unit and run a short diagnostic test (easy)
- Replace control board or faulty sensor (hard)
- Clear clogs in hoses and verify water supply (easy/medium)
Step-by-step repair for the most common cause
To fix the most frequent root cause—a faulty door latch or lid switch—follow these steps: 1) Unplug the unit and wait 60 seconds. 2) Remove the access panel or top panel per your model’s instructions. 3) Inspect the latch/mechanism for wear; clean and reseat the connector. 4) Reconnect power and run a test cycle. 5) If the code persists, replace the latch assembly and retest. Pro tip: only use manufacturer-approved replacement parts.
Other possible causes and how to verify
If the door latch isn’t the issue, the fault could lie in the control board, a failing sensor, or a water inlet/dra in system. Verify by swapping or testing individual components where possible: check sensor resistance with a multimeter if you have one, test the water valve with a voltage check, and observe fault codes after each change. If you’re unsure, capture model details and seek professional assistance.
Cost ranges and timing for common repairs
Typical repair costs depend on the root cause. A door latch replacement might range from $80 to $180 in parts with labor, while a sensor or thermistor replacement can run $120–$250 in parts. A control-board replacement often falls in the $200–$400 range, depending on the model and availability. Overall, a mid-range diagnostic and repair could cost between $100 and $350 if you hire a pro; DIY parts and tools can lower the bill but increase risk if not done correctly.
Prevention and maintenance to avoid future errors
Routine maintenance helps prevent common faults. Clean the filter and debris trap monthly, inspect hoses for wear, use the appropriate load size and detergent, and avoid forcing cycles that are making unusual noises. Run a monthly self-diagnosis or a quick test cycle if your model supports it. By documenting error codes and cycle histories, you’ll shorten future troubleshooting and stay ahead of potential failures.
Steps
Estimated time: 60-120 minutes
- 1
Power down and unplug
Unplug the washer from the wall outlet and wait 60 seconds to reset the control logic. This simple reset often clears transient faults and reinitializes sensors.
Tip: If accessible, unplug at the wall for safety; avoid pulling the cord by the plug. - 2
Check door latch and lid switch
Inspect the latch mechanism for visible wear, debris, or misalignment. Ensure the switch activates when the door is closed. Clean and reseat connectors before retesting.
Tip: Test by closing the door firmly; listen for a soft click to confirm engagement. - 3
Inspect water inlet and drain paths
Verify water valves are open and hoses are free of kinks. Check the drain hose for blockages and ensure the pump area is clear of obstructions.
Tip: Do not run water through hoses while the unit is plugged in. - 4
Run a diagnostic or test cycle
Access the built-in diagnostic mode (if available on your model) and run a short test. Note any codes or patterns that appear during the test.
Tip: Consult the manual for exact steps to enter diagnostic mode. - 5
Decide on replacement parts
If the error repeats after tests and resets, prepare for parts replacement (door latch, sensor, or control board) and estimate labor time.
Tip: Only use manufacturer-approved parts to preserve warranty. - 6
Schedule professional service if unsure
Persistent codes or unfamiliar repair steps warrant professional diagnosis. Provide the exact error code, cycle history, and model number to the technician.
Tip: Ask for a written estimate and a breakdown of parts vs. labor.
Diagnosis: Samsung washer shows an error code and stops mid-cycle
Possible Causes
- highDoor latch or lid switch fault
- mediumMain control board failure
- lowWater inlet or drain/valve issue
Fixes
- easyInspect and reseat/replace door latch or lid switch
- easyReset the washer and run a diagnostic self-test
- hardReplace control board or faulty sensor
Frequently Asked Questions
What does an error code on my Samsung washer mean?
An error code signals the washer detected a fault that prevents a safe cycle. It points to a likely root cause, often in the door latch, water inlet, drainage, sensor, or control board. Always start with safety checks and a reset before deeper diagnosis.
An error code means the washer found a fault and stopped for safety. Start with a reset, then check door latch, hoses, and water supply.
How do I reset my Samsung washer to clear codes?
Unplug the washer for about a minute, then plug it back in and run a short cycle. If the code returns, record it and proceed with targeted checks or a service call.
Unplug for a minute, plug back in, and try a quick cycle. If the code reappears, note it and continue troubleshooting or contact support.
When should I call a professional for Samsung washer error codes?
Call a professional if the code persists after reset, if you suspect a failed control board or sensor, or if you notice leaks, buzzing, or overheating. Provide the model number and error code for a quicker diagnosis.
Call a pro if the code sticks after reset or if you suspect the control board or sensor is faulty.
Are parts for Samsung washers expensive to replace?
Parts costs vary by component, typically ranging from inexpensive sensors to mid-range boards. Labor can add to the total, with total repair costs often depending on the exact fault and model.
Part costs vary; sensors are cheaper, boards are pricier, and labor adds to the total cost depending on the fault and model.
Can I diagnose error codes myself safely at home?
Yes, you can perform many safe checks at home: reset, inspect the door latch, hoses, and water supply. Avoid opening high-voltage components and only proceed with steps you’re comfortable performing.
You can do basic checks safely at home, but avoid risky disassembly and call a pro for complex faults.
Watch Video
Top Takeaways
- Identify root cause quickly with a structured flow.
- Start with safe, easy fixes before complex repairs.
- Document codes and costs to inform service decisions.
- Escalate to a pro when codes persist after resets.