Canon Error Code 9: Urgent Troubleshooting Guide
Urgent guide to canon error code 9: diagnose causes, apply quick fixes, and follow a step-by-step repair path for Canon printers and cameras.

Canon error code 9 typically signals a hardware initialization fault in Canon devices, often tied to the printer or camera’s internal module. The quickest path to relief is a hard reset, verified cable connections, and a firmware update if available. If the issue persists, proceed with guided diagnostics and professional service to prevent data loss or warranty voiding.
What canon error code 9 Means
canon error code 9 appears on Canon devices when the system cannot complete a required startup sequence. This is not a mere nuisance; it can stop a printer from feeding paper, a camera from powering up, or a scanner from initializing. The Why Error Code team emphasizes urgency: treating Code 9 promptly reduces the risk of downtime and potential data loss. In many cases, Code 9 signals a recoverable hardware initialization fault, but firmware or cabling problems can mimic a physical failure and must be ruled out quickly to avoid unnecessary repairs.
Across Canon product lines, the underlying principle is consistent: the device expects a healthy boot path, and Code 9 means something in that path is failing to respond. Acting fast minimizes the chance of cascading faults that complicate diagnostics later on. This is exactly where Why Error Code’s guidance helps: isolate the issue, then apply targeted fixes rather than wide, costly repairs.
Symptoms and Immediate Impact
If you encounter canon error code 9, you’ll notice the following urgent symptoms across Canon devices:
- The device fails to boot or complete initialization, stopping all work.
- LED indicators flash in a specific pattern or beep in a warning rhythm.
- A printer stalls before the first page is fed; a camera shows an initialization error on the LCD.
- Power cycling yields the same result, suggesting a persistent fault rather than a temporary glitch.
- In networked setups, the device may announce the error via connected PC software or the print server.
These symptoms trigger immediate action to prevent longer downtime and protect stored data. According to Why Error Code, early intervention tends to limit escalation and the risk of warranty disputes when service is eventually required.
Likely Causes (High to Low Likelihood)
In our diagnostic experience, the following causes are ordered by likelihood:
- Power supply issues and loose cables (high): A fluctuating or insufficient power signal can prevent a clean startup.
- Faulty firmware or corrupted boot loader (high): A corrupt boot sequence can present as Code 9 despite hardware being sound.
- Hardware component failure (medium): Faults in the mainboard, sensors, or boot ROM can trigger initialization errors.
- Overheating or thermal shutdown (low): Prolonged heat can intermittently cause boot failures that resemble Code 9.
- Improper recent changes (low): Unauthorized modifications or incompatible peripherals can provoke startup errors.
If you’re seeing Code 9 after a recent update or installation, the firmware path becomes a strong suspect, and the first fix should address software integrity alongside hardware checks.
First Pass Fixes You Can Try Right Now
Quick, non-destructive steps are worth trying before deeper diagnostics:
- Perform a full power cycle: unplug, wait 60 seconds, plug back in, and power on. For cameras, remove the battery during power-down and reinsert after re-seat.
- Check all external connections: USB/Thunderbolt cables, network cables, and power adapters should be secure and correct for your model.
- Update firmware or drivers: connect the device to a reliable network or computer and install any official firmware updates.
- Remove recently added peripherals: disconnect any non-essential accessories that could interfere with startup.
- Inspect memory cards or cartridges: reseat or remove media that could affect boot, then try booting again.
These quick fixes can restore normal initialization in many Canon devices and reduce the need for service.
How to Diagnose: Narrowing Down the Cause
A structured approach helps isolate the fault more efficiently:
- Note when Code 9 appears: during startup, after a specific operation, or after a firmware update.
- Check device logs or onboard diagnostics if available; these records often reveal the root cause.
- Isolate hardware from software: boot into safe/diagnostic mode if your model supports it, or try a minimal configuration with no peripherals.
- Model-specific checks: some Canon devices have known patterns for Code 9 related to the boot ROM or security modules—confirm against model documentation.
- Compare hardware and software versions: mismatches or end-of-life firmware can create persistent initialization issues.
Following a disciplined diagnostic flow minimizes unnecessary replacements and accelerates a repair path.
Step-by-Step Fix for the Most Common Cause (Power/Software Path)
- Power cycle and reset: unplug power, wait 60 seconds, reconnect, and perform a cold reboot. This clears temporary faults.
- Verify power and cables: ensure the power brick, adapter, and any breakout cables are for your exact model and free of damage.
- Update firmware: use the official Canon software updater or device admin to install the latest firmware—not a beta release.
- Factory reset (if available): restore factory defaults to clear misconfigurations, but back up settings where possible.
- Re-test with minimal configuration: power on with only essential components connected; gradually reintroduce peripherals.
If the issue persists after these steps, prepare for professional service to avoid further damage.
Alternatives and When to Consider Professional Help
If Code 9 remains after the above steps, professional diagnosis is recommended, especially if:
- The device is under warranty and the issue might be covered.
- There are signs of physical damage, burning smells, or unusual warmth.
- You encounter data loss risk or ongoing boot failures that prevent normal use.
Service centers can perform in-depth hardware testing, ROM re-flash, board diagnostics, or component replacement. Always verify the service scope, turnaround time, and warranty implications before authorizing work.
Safety, Warnings, and When to Call a Professional
Safety first: unplug devices before handling internal components. Do not open sealed assemblies beyond the manufacturer guidelines. If you’re unsure about disassembly, or if the device is under warranty, contact official support first. Attempting repairs without proper tools can void warranties and increase the risk of permanent failure. If you notice heat, smells, or visible damage, stop and seek professional help immediately.
Prevention and Best Practices to Avoid Code 9
Preventive measures reduce the chance of Code 9 recurring:
- Keep firmware up to date with official releases.
- Use stable power sources and clean, undamaged cables.
- Avoid frequent power cycling; perform controlled shutdowns instead.
- Regularly back up data to protect against loss during failures.
- Follow model-specific maintenance schedules and use only official accessories.
- Document changes or updates that could affect startup behavior for future troubleshooting.
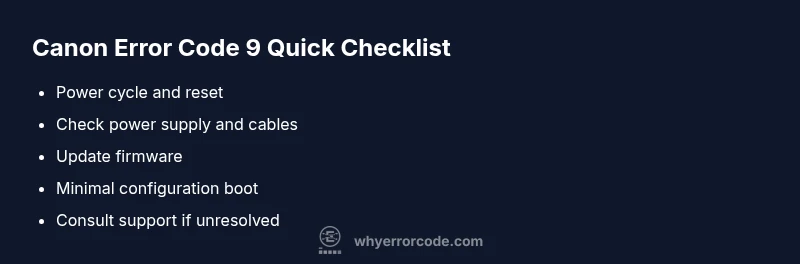
Steps
Estimated time: 60-90 minutes
- 1
Power cycle and reset
Unplug the device from power, wait 60 seconds, then reconnect and perform a cold reboot. This clears transient faults that can trigger Code 9.
Tip: If a battery is present, remove and re-seat it before powering back on. - 2
Check power supply and cables
Inspect the power brick, adapter, and any cables for damage or wear. Replace any frayed cables and ensure connections are snug.
Tip: Use only the original power supply recommended by Canon for your model. - 3
Update firmware
Connect to the official Canon updater or device software to install the latest firmware version. Avoid beta releases unless explicitly supported.
Tip: Back up essential settings before updating if possible. - 4
Factory reset (if available)
Restore the device to factory defaults to eliminate misconfigurations. Note that user data and custom settings may be erased.
Tip: Record network or account settings prior to reset. - 5
Minimal configuration test
Power on with only essential peripherals connected to see if Code 9 still appears. Gradually reintroduce components to locate the culprit.
Tip: Document a successful minimal boot to compare with failures. - 6
Seek professional help if unresolved
If Code 9 persists after all steps, contact Canon support or an authorized service center for deeper diagnostics.
Tip: Check warranty status before paying for service.
Diagnosis: Device shows Canon error code 9 during startup
Possible Causes
- highPower issue or loose cables
- highFirmware corruption or failed boot loader
- mediumHardware component failure (mainboard, ROM, sensor)
- lowOverheating during boot
Fixes
- easyPower cycle/reset and verify all cables
- easyUpdate firmware via official updater
- mediumReset to factory settings if available
- hardInspect hardware or replace faulty components
Frequently Asked Questions
What does canon error code 9 mean?
Canon error code 9 signals a startup initialization fault. It often points to hardware or firmware issues that block the device from booting. Quick checks usually resolve the problem, but persistent failures require deeper diagnostics.
Canon error code 9 means the device couldn't complete startup. Start with a power cycle and firmware update, then seek professional help if it persists.
Can firmware updates fix Code 9?
Yes, firmware updates can resolve Code 9 if the fault is caused by corrupted boot code or compatibility issues. Always use the official updater and back up data first.
Firmware updates can fix Code 9 when the problem is software-based. Use the official Canon updater and back up your data.
Should I attempt DIY repairs for Code 9?
Only perform non-invasive steps described in the guide. If hardware replacement or disassembly is required, contact Canon support or an authorized service center to avoid warranty voiding.
Stick to the safe steps and don’t crack open the device unless you’re trained and authorized.
How long does service typically take?
Service duration varies by diagnosis complexity and parts availability. Expect a few business days for a standard assessment and potential repair, longer for on-site work.
Service times depend on the fault, but you’ll usually hear back within a few days after diagnostic testing.
Is Code 9 covered under warranty?
Warranty eligibility depends on the device’s status and the fault’s origin. Hardware failures from manufacturing defects are often covered, while user-caused damage may not be.
Warranty coverage depends on the device and fault origin—check your warranty terms with Canon.
Watch Video
Top Takeaways
- Identify whether Code 9 is hardware- or software-related
- Start with safe, non-destructive fixes first
- Firmware updates can resolve boot issues
- Call a professional if the fault persists after steps