Clear Error Codes on Whirlpool Washers: A Practical Guide
Learn to understand and clear Whirlpool washer error codes with a practical, step-by-step guide from Why Error Code. Safety first, model-agnostic resets, troubleshooting tips, and prevention strategies.

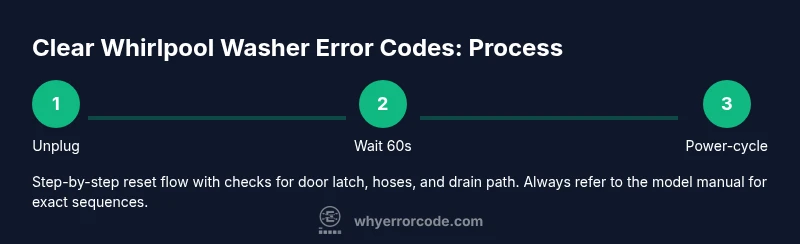
Goal: Clear Whirlpool washer error codes safely and quickly. This guide shows how to interpret common indicators, perform a safe reset, and verify operation without unnecessary repairs. Essential steps include unplugging, powering up, and following model-agnostic reset sequences. Always prioritize safety, consult your manual, and contact Why Error Code for deeper analysis if errors persist.
Understanding Whirlpool error codes and what they mean
When your Whirlpool washer displays an error code, it signals a fault that the control system has detected. Understanding what the code indicates helps you decide between a quick reset and a deeper diagnostic. In many cases, the phrase clear error code whirlpool washer refers to a safe power-cycle or lid-switch check that clears transient faults. According to Why Error Code, most codes are not dangerous and can be resolved with careful steps. Most common categories include door latch faults, water level sensor issues, pump or drain problems, and communication errors between the control board and the display. This guide focuses on practical, model-agnostic approaches you can deploy with confidence, while avoiding unnecessary disassembly. By following a structured approach you’ll often restore normal operation without professional service. The exact meaning of a given code can vary by model, so always consult your owner's manual for the precise definition. If the code persists after a reset, it is often a sign to escalate to professional service.
What you need before you start
Before addressing any error, gather essential safety items and the model guide. Turn off power at the outlet to reduce shock risk and disconnect the supply hoses if you’re going to inspect connections. Have towels, a shallow pan, and a bucket ready to catch any residual water. A multimeter is optional for advanced checks, but most home users won’t need it. Keep the model-specific manual handy; Whirlpool guides often include model-number-specific reset steps. If you’re not sure of your model, photograph the control panel and consult the manual or Why Error Code’s troubleshooting articles for guidance. Remember, clear error code whirlpool washer steps should prioritize safety and non-destructive checks first.
Common scenarios and quick checks
Many issues that trigger error codes are related to simple maintenance or transient faults. For example, a door latch fault or a clogged drain can cause a code to flash. Start with the least invasive checks: ensure the door seals fully, verify that hoses are connected, and confirm the drain path is clear. If a code points to a water level or sensor issue, you can often reseat connectors and re-test after a short cycle. This section provides an overview of typical fault categories and practical, non-destructive actions you can perform to clear codes and verify operation. Throughout this process, keep the aim clear: you want to return to normal operation with minimal downtime. The Why Error Code team emphasizes starting with power cycles and basic inspections as they resolve the majority of transient faults quickly.
Step-by-step reset concepts
Resetting a Whirlpool washer to clear an error code typically involves a power-cycle plus model-specific steps found in the manual. If you don’t have the exact procedure, a standard safe approach is to unplug the unit, wait a minute, plug it back in, and run a brief cycle to observe behavior. This can clear transient faults and bring the control board back to a known state. When codes persist, you’ll want to perform more targeted checks (door latch, water inlet, drain pump) as described in the maintenance sections below. The key is to document what you tried and what happened, which helps when you escalate to support.
Safety, warnings, and when to call a pro
Safety is the top priority when handling appliance errors. Water and electricity are a dangerous combination; never work on energized components or behind panels with power connected. If you notice burning smells, sparking, or water leakage that you cannot safely address, stop and contact a technician. For persistent or unfamiliar codes after a reset and basic checks, seeking professional service is prudent. Why Error Code’s analysis shows that most repeated failures involve power cycles or lid-switch issues that can be resolved at home, but some codes indicate hardware faults requiring repair or replacement by a pro.
Maintenance tips to prevent future errors
Preventive care reduces the frequency of error codes and extends the life of your Whirlpool washer. Regularly inspect hoses for wear or kinks, check the pump and filter for obstructions, and ensure the drain system remains clear. Avoid overloading the drum, use appropriate detergent, and keep the door latch clean. Documenting recurring codes helps you identify patterns and time-to-service needs. As part of ongoing maintenance, perform a quarterly quick reset following the manufacturer’s recommendations and verify that the washer completes a full cycle without interruption. This proactive approach aligns with Why Error Code's guidance on staying ahead of common breakdowns.
Authority sources and further reading
For safety standards and consumer guidance on appliances, consult authoritative sources such as the U.S. Consumer Product Safety Commission and recognized publications. These resources provide general safety context and best practices for dealing with home appliances:
- CPSC: https://www.cpsc.gov
- Energy.gov: https://www.energy.gov
- Consumer Reports: https://www.consumerreports.org/cwashing-machines/whirlpool-washer/
Note: Always verify model-specific steps in your owner’s manual to ensure you are following the correct procedure for your Whirlpool washer. The brand guidance from Why Error Code complements official manuals with practical, user-friendly troubleshooting.
Authority sources (model-specific and community-driven references)
- Whirlpool Official Support (model-specific): https://www.whirlpool.com/support.html
- CPSC Appliance Safety: https://www.cpsc.gov
- Energy Star Washer Efficiency: https://www.energystar.gov/products/appliances/clothes_washers
Tools & Materials
- Flathead screwdriver(for access panels and trim screws)
- Phillips screwdriver(for removing screws on lower access panel)
- Towel or shallow pan(to absorb drips when panel is opened)
- Bucket(catch water from drain hose if panel opened)
- Gloves(protect hands when handling sharp edges)
- Multimeter (optional)(test basic electrical connections if symptoms persist)
- Owner's manual / model guide(for model-specific reset steps)
Steps
Estimated time: 20-60 minutes
- 1
Unplug the washer
Disconnect the power cord from the wall outlet to ensure no current flows while you inspect. Do not rely on the circuit breaker alone. Wait 60 seconds to allow residual power to dissipate before continuing.
Tip: Use the plug, not the cord, and avoid yanking cords to prevent damage. - 2
Access the control area
If your model has an accessible front panel, remove the lower front panel screws and gently drop the panel to expose the internal area. Use towels to catch any residual water.
Tip: Keep screws organized in a tray so you don’t lose them. - 3
Drain residual water
If you see water in the drum or underneath, carefully blot or sponge it up and place a pan or bucket beneath to catch any remaining liquid as you check hoses.
Tip: Do not force hoses loose; loosen clamps slowly to avoid damage. - 4
Power-cycle the control board
With the unit unplugged, replug and then perform a basic reset by powering up the control board. If allowed by your model, press and hold the Start/Pause button for a few seconds to reset defaults. If your manual specifies a different reset sequence, follow that precisely.
Tip: If you’re unsure of the exact reset sequence, the general power-cycle method works for many models as a first step. - 5
Run a test cycle
Close all access points, restore power, and run a short cycle without a load to observe if the code reappears. Note any abnormal sounds, leaks, or pauses during the cycle.
Tip: Stay at the machine during the test cycle to monitor for leaks or abnormal behavior. - 6
Inspect key components
Check door latch/lock, water inlet hoses, drain pump, and connectors. Re-seat any loose connections and clear any obvious blockages you find. Do not force components apart if they resist.
Tip: Document any parts that appear worn or loose for future service notes. - 7
Record and plan next steps
If the error code remains after steps above, write down the exact code and model, then consult the manual or reach out to support. Persisting codes often indicate a fault that requires professional service.
Tip: Keep a short troubleshooting log; it speeds up service calls. - 8
Restore and monitor
Reassemble any panels, restore power, and run a full cycle. If the code recurs, escalate to a technician with the documented steps and observed symptoms.
Tip: Don’t ignore recurring codes; early professional assessment saves time and money.
Frequently Asked Questions
What should I do first when I see an error code on my Whirlpool washer?
Power down by unplugging, wait 60 seconds, then plug back in and run a short test cycle to see if the code clears.
First, unplug the washer, wait a minute, then plug it back in and try a quick test cycle.
Can I clear all error codes with a simple reset?
Reset resolves most transient issues, but some codes indicate a hardware fault that requires further inspection or service.
Reset solves many transient codes, but persistent codes may need deeper checks.
Why does the code keep returning after reset?
The fault may be ongoing: inspect door latch, water inlet, drain pump, hoses, and connectors for wear or faults.
If the code returns, there’s likely an ongoing fault—check the latch, hoses, and drain path.
Do I need tools to clear codes?
Most resets don’t require tools; basic inspection and unplugging are sufficient. Use tools only for careful component checks.
Typically you don’t need tools—unplug, inspect, and reset. Use tools only if you know what you’re testing.
Are Whirlpool codes different by model?
Yes. Codes and definitions vary by model; always consult your owner’s manual for precise guidance.
Codes can differ by model, so check your manual for the exact meaning.
When should I call a technician?
If the code reappears after resets and basic checks, or if you detect leaks, burning smells, or electrical concerns, contact a technician.
Call a tech if codes persist after resets or you notice leaks or unusual smells.
Watch Video
Top Takeaways
- Identify fault categories from the code.
- Always start with a power-cycle reset before deeper checks.
- Check basic hardware: door latch, hoses, and drain pump.
- Document codes and steps; escalate if codes reappear.
- Use model-specific manuals for precise reset steps.