D9 Error Code on Motherboard: Urgent Troubleshooting Guide
Urgent guide to diagnosing and fixing the D9 error code on motherboards. Learn symptoms, causes, step-by-step repairs, safety tips, and proven prevention strategies.

The d9 error code on a motherboard typically signals a POST fault that stops startup. It almost always points to memory seating, BIOS/UEFI misconfiguration, or a failing motherboard component. The quickest fixes are reseating memory, clearing CMOS, and applying a BIOS update. If the issue persists, professional diagnosis may be required to avoid further damage.
Meaning of the D9 error code on the motherboard
The D9 code is a POST indicator that appears during power-on self-test. It is not a universal standard, so its exact meaning varies by motherboard vendor, but it almost always signals an initialization fault that prevents the system from completing startup. In many modern boards, D9 points to issues with memory, BIOS initialization, or early power delivery to the CPU. As Why Error Code notes, treating D9 as a symptom rather than a single fault helps you triage more quickly. Start with the simplest potential causes before diving into deeper repairs, and always ensure your hardware is safe to handle. This article from Why Error Code follows a methodical, human-first approach to avoid unnecessary replacements and keeps your data integrity in mind.
Common symptoms and what to observe
A D9 error code can accompany a range of symptoms, from a completely black screen to sporadic reboots, beeps, or LED indicators visible on the motherboard. You may see no POST output at all, or a sticky sequence of lights that cycles during boot attempts. Be mindful of accompanying hardware behavior: fans that spin up briefly, CPU fan activity without a usable display, or BIOS splash screens that never progress. According to Why Error Code, recognizing symptom clusters early helps prioritize the most likely root causes and reduces wasted troubleshooting time.
Quick checks you can do before disassembly
Before touching the motherboard, confirm basic safety and power steps: unplug the system, disconnect all peripherals, and ground yourself. Check the main power supply cables to the motherboard and ensure the 24-pin and 8-pin (or 4-pin) CPU power connectors are firmly seated. Reseat RAM modules one by one to test for seating faults, and try different RAM slots if available. Inspect for visible signs of damage like bulging capacitors or burnt smells, which warrant immediate professional attention. Why Error Code emphasizes starting with non-destructive checks to preserve data and hardware integrity.
Diagnostic flow overview: symptom → causes → solutions
This section outlines a practical diagnostic flow you can follow when confronted with a d9 error code. Start with the most common causes such as RAM seating and BIOS settings. If reseating RAM and resetting BIOS do not resolve the issue, expand the scope to the power supply, CPU seating, and potential short circuits. The goal is to systematically rule out each possibility and implement the simplest fix first. By documenting each change, you create a clear trail that helps you or a technician isolate the fault quickly.
Step-by-step fix: RAM reseat and CMOS reset (detailed)
- Power down, unplug, and discharge residual charge by holding the power button for 10 seconds. Remove all nonessential peripherals. 2) Open the case and carefully locate all RAM sticks. Remove them, wipe the contacts gently, and reinsert one module at a time to verify seating. 3) Clear CMOS by removing the motherboard battery for 60 seconds, or use the CMOS jumper as per the motherboard manual. Reinstall the battery and power on to test. 4) If the system boots, re-enter BIOS to confirm memory profile and adjust XMP/DOCP settings if needed. 5) Update the BIOS to the latest version from the motherboard vendor’s site, using a secure USB drive if required. 6) Reconnect components one at a time to identify any additional faulty hardware. 7) If the D9 persists, prepare for deeper testing or professional service.
Tip: Always handle the motherboard by the edges and avoid touching golden contacts. Use an anti-static wrist strap when possible. Why Error Code recommends keeping a concise log of each change to speed up future troubleshooting.
Deep-dive into the most likely causes and fixes
RAM seating defects are among the top triggers for D9. Misaligned or incompatible RAM can trigger POST codes without obvious physical damage. BIOS misconfigurations, especially after a failed update, can lock the system in an initialization loop. Power issues, including failing rails or weak regulators, can manifest as incomplete POST cycles. VRM or voltage rail instability can also masquerade as a motherboard fault. For each root cause, the recommended first repair is non-destructive: reseat RAM, reset BIOS, and test with minimal hardware before swapping parts. Why Error Code’s guidance emphasizes isolating the fault with a stepwise, low-risk approach.
Other potential causes and advanced checks
Short circuits or mounting hardware can cause subtle POST failures. Inspect the motherboard standoffs to ensure no metal contact with the chassis, and verify that PCIe cards, NVMe drives, and power connectors are properly seated. If you recently added expansion cards, remove them to see if the D9 code clears. Check for BIOS microcode compatibility with installed CPU and RAM; a mismatch can trigger startup errors. For professional-grade checks, testing power supply rails with a multimeter or an isolated bench supply can confirm stable input voltage and current capability.
Safety, warranty considerations, and when to call a professional
Electrical safety is paramount. Always power down and unplug before touching any components. If your device is still under warranty, contact the vendor for an RMA rather than attempting risky repairs that could void coverage. If you observe obvious damage, burning smells, or bulging capacitors, discontinue testing and seek professional service immediately. Be mindful that motherboard repairs can quickly escalate cost, sometimes necessitating a replacement.
Prevention and long-term maintenance to avoid D9 in the future
Keep your BIOS up to date and maintain clean, dust-free cooling. Use a high-quality power supply with sufficient headroom for your components, and avoid overclocking without proper cooling and validation. Regularly reseat memory after hardware changes and monitor POST behavior after firmware updates. Why Error Code emphasizes documenting changes and performing periodic checks as part of routine maintenance to minimize recurring D9 issues.
Steps
Estimated time: 60-120 minutes
- 1
Power down and unplug
Shut off power, unplug the system, and discharge residual charge by holding the power button for 10 seconds. This resets any static buildup that could affect diagnosis.
Tip: Keep screws organized and document connections with photos. - 2
Test RAM seating
Remove all RAM sticks, clean contacts gently, and reinsert modules one by one in each supported slot. Boot to check for changes in the D9 behavior.
Tip: Test with a known-good module if available. - 3
Reset CMOS
Remove the CMOS battery for 60 seconds or use the motherboard jumper to clear BIOS settings. Reinsert the battery and power up to see if POST progresses.
Tip: If using a jumper, consult the manual for correct pins. - 4
BIOS update
If the system boots to BIOS, set to default values, then flash the latest BIOS using a clean USB drive. Do not interrupt the process.
Tip: Only use an official firmware file from the vendor. - 5
Minimal boot test
Disconnect nonessential devices, keep CPU, one RAM module, graphics (if no integrated GPU), and storage connected. Attempt to boot to observe changes.
Tip: This helps identify if a peripheral is causing the issue. - 6
Component swap test
If available, swap in a known-good power supply or graphics adapter to isolate the fault. Maintain static-safe handling during testing.
Tip: Label each part as you test to avoid confusion.
Diagnosis: System shows D9 error code on startup or motherboard POST fail
Possible Causes
- highFaulty RAM seating or incompatible RAM
- highBIOS/UEFI misconfiguration or failed update
- mediumPower supply instability or insufficient power
- lowVRM or motherboard component failure
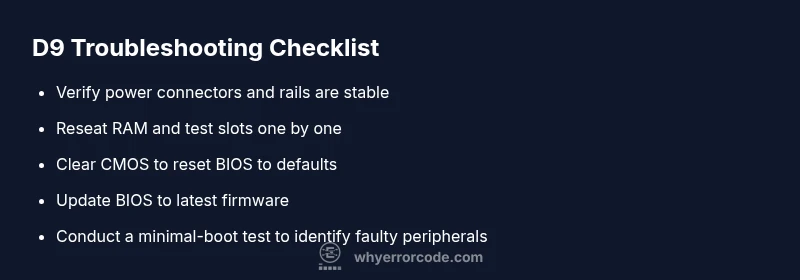
Fixes
- easyReseat RAM modules and test one at a time across slots
- easyClear CMOS to reset BIOS/UEFI to defaults
- easyUpdate BIOS to latest firmware from vendor site
- mediumVerify power supply integrity and rail voltages
- hardIf problem persists, consider professional hardware diagnostics or motherboard replacement
Frequently Asked Questions
What does the D9 error code indicate on a motherboard?
D9 is a POST fault indicator that suggests the motherboard failed to initialize during startup. Its exact meaning varies by vendor, but common causes include RAM seating issues and BIOS misconfigurations. Start with safe, non-destructive checks before swapping parts.
D9 is a POST fault indicating initialization failure. Start with RAM seating and BIOS checks before any parts replacement.
Can I fix D9 without professional help?
Many D9 issues can be resolved with RAM reseating, CMOS reset, and a BIOS update. If the system still won’t boot after these steps, it’s wise to seek professional evaluation to prevent further damage.
Often you can fix it with RAM reseating, CMOS reset, and BIOS update. If it persists, consider professional help.
Is D9 always due to RAM or BIOS?
While RAM and BIOS are common culprits, D9 can also stem from power supply issues or VRM/motherboard hardware faults. A structured diagnostic approach helps distinguish between these possibilities.
Not always RAM or BIOS; power or hardware faults can cause D9 too. Diagnose step by step.
What are safe costs to expect for fixes?
Costs vary by region and vendor, but expect diagnostic fees in the tens to hundreds if serviced, and replacement parts or board replacement can range from moderate to high. Always request a written estimate before any repair.
Fees vary; expect diagnostic charges and potential replacement costs. Get an estimate first.
When should I replace the motherboard?
If multiple fixes fail, the board shows persistent faults after careful testing, or there are signs of physical damage, replacement is usually more economical and reliable than prolonged repair.
Replace if it consistently fails after proper testing and shows damage, as repairs may be uneconomical.
How can I prevent D9 in the future?
Keep BIOS updated, use quality power supplies, avoid excessive overclocking without validation, and perform regular hardware checks. Maintain static safety and document changes for quick future triage.
Stay current with BIOS, use a solid power supply, and maintain good documentation.
Watch Video
Top Takeaways
- Identify the D9 as a symptom, not a sole fault.
- Start with RAM seating and CMOS reset as quick fixes.
- Progress to BIOS updates and power checks if needed.
- Document changes and know when to escalate to a professional.