Motherboard A6 Error Code: Urgent Troubleshooting Guide
A comprehensive, urgent guide to diagnosing and fixing the motherboard A6 error code. Learn interpretation, quick fixes, and step-by-step repairs to restore POST and prevent future failures.

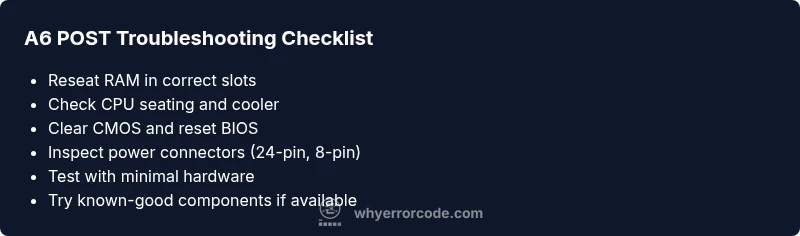
The motherboard A6 error code signals a POST/BIOS hardware initialization fault detected during startup. It indicates the system couldn’t complete the Power-On Self-Test. Start with quick checks: reseat RAM, reseat expansion cards, verify all power cables, and clear CMOS. If the code repeats, the fault likely involves memory, CPU seating, or the motherboard itself—escalate to professional diagnostics.
What the motherboard A6 error code means
The A6 POST code is a signal from the motherboard’s firmware that the system failed to complete the early hardware initialization during the POST sequence. Because BIOS POST codes are vendor-specific, A6 can have different meanings across brands, services, and motherboards. In most consumer boards, A6 points to a fault detected while the CPU, memory, or chipset were being initialized, before any video output is produced. In practice, common culprits include memory modules that aren’t seated properly, incompatible or failing RAM, a loose CPU cooler or mis-seated CPU, power delivery problems from the PSU, or a motherboard PCB fault. If your board shows A6, observe the surrounding symptoms: no POST beeps, fans spinning but no BIOS screen, or intermittent resets. It’s important to distinguish between a transient fault and a persistent failure: if you’re still seeing the code after CMOS clear and component reseating, the fault is more likely hardware-level and needs deeper testing or professional evaluation. Document any changes you make and which components you tested, so you can report them to support or a repair shop.
Steps
Estimated time: 60-90 minutes
- 1
Power down and unplug the system
Shut down the PC, unplug the mains supply, and press and hold the power button for several seconds to discharge residual power. Move the computer to a static-free work area and gather the needed tools.
Tip: Always unplug before handling internal components to avoid electric shock. - 2
Ground yourself and prepare the workspace
Wear an anti-static wrist strap or periodically touch a grounded metal surface to discharge static. Remove the side panel and give yourself gentle, clean access to the motherboard.
Tip: Work on a non-conductive mat and avoid touching CPU pins or socket contacts. - 3
Test RAM by reseating and isolating
Remove all RAM modules, reinsert one module into the primary slot, and attempt to boot. If no POST, swap to the other RAM modules and slots one by one.
Tip: Test modules individually to identify a faulty DIMM. - 4
Inspect the CPU seating and cooler
Check that the CPU is properly seated and that the cooler is firmly mounted with correct thermal paste. Re-seat if necessary and ensure fans spin after reseating.
Tip: A loose CPU or poor cooler contact can trigger POST issues. - 5
Clear CMOS to reset BIOS settings
Power off, unplug, and use the CMOS jumper or clear CMOS button for 10–20 seconds, then reassemble and power on. This can reset any misconfigured BIOS that contributes to A6.
Tip: Note any previous BIOS settings you may need to reapply after reset. - 6
Boot with a minimal configuration
Remove nonessential PCIe cards, storage drives, and peripherals. Try a minimal setup to see if POST advances past A6.
Tip: Fewer variables reduce the chance of a secondary fault masking the primary issue. - 7
If still unresolved, test with alternative components
If available, test with a known-good PSU and, if possible, a spare motherboard or RAM. Persistent A6 after these tests strongly suggests a board-level fault.
Tip: Document tests and component SKUs to share with a technician.
Diagnosis: System won't complete POST; A6 code displayed during startup
Possible Causes
- highLoose or improperly seated RAM
- mediumPower delivery issues or faulty PSU
- lowCPU seating or cooling issues
Fixes
- easyReseat RAM modules in correct slots and test one at a time
- easyCheck all power connectors and swap PSU if available
- easyClear CMOS using board jumper or CMOS button
- hardInspect CPU/socket and cooler mounting, reseat CPU if comfortable
Frequently Asked Questions
What does the A6 error code mean on a motherboard?
A6 is a generic POST code indicating a hardware initialization fault detected during startup. The exact interpretation varies by motherboard vendor, but common culprits include RAM seating, CPU seating, and power delivery.
A6 is a hardware initialization fault shown during startup. Common causes are RAM seating, CPU seating, and power delivery.
Can software updates fix an A6 error code?
Software updates rarely fix a POST error like A6 because it is primarily a hardware-level issue detected before the operating system loads. BIOS updates can address firmware bugs, which may help in rare cases where firmware flaws trigger A6.
Software updates usually don’t fix POST codes like A6; it’s hardware-level. BIOS updates can help if a firmware issue is involved.
Is the A6 code specific to a brand?
POST codes, including A6, are platform and vendor specific. The exact meaning can differ between motherboard manufacturers and BIOS implementations, so always check your motherboard manual for your model.
POST codes are brand-specific, so check your manual for your exact model.
Should I replace RAM first when I see A6?
RAM is a common culprit for A6. Start by reseating or swapping RAM modules and testing one module at a time to identify if a faulty stick or slot is causing the issue.
RAM is a frequent cause; test RAM sticks individually to identify the faulty one.
How do I safely clear the CMOS?
Power down and unplug, locate the CMOS jumper or button on the motherboard, and follow the manual to clear it. Wait a few seconds, reinsert the jumper or release the button, then power up again.
Power off, unplug, clear CMOS using the jumper or button, then power on to test.
What other codes might appear with A6?
A6 can appear with other POST codes indicating different stages of hardware checks. If you see companion codes, document them and follow the manufacturer’s troubleshooting flow.
A6 might appear with other codes; note them and follow the board’s guide.
Watch Video
Top Takeaways
- Start with quick hardware checks, especially RAM seating and CMOS reset
- A6 often points to RAM/CPU seating or power delivery; test methodically
- Use minimal configurations to isolate the fault quickly
- If unresolved after structured diagnostics, seek professional repair or board replacement planning