Motherboard Error Code 67: Urgent Fixes & Diagnostics
A practical, urgent guide to diagnosing and fixing motherboard error code 67. Learn quick checks, RAM seating, CMOS reset, BIOS updates, and when to call a professional.

Motherboard error code 67 is a vendor-specific POST fault indicating a failure in early initialization. Because POST code meanings vary by manufacturer, always reference your board manual for the exact definition. The quickest path to relief is to reseat memory, reset CMOS, and update the BIOS if available; if the code persists, suspect RAM, power, or firmware issues.
What motherboard error code 67 means
On startup, the BIOS/UEFI runs POST to verify essential hardware before handing control to the operating system. The exact meaning of code 67 varies by manufacturer, so the number alone is not universal. In practice, code 67 signals a fault or timeout in one of the core subsystems during early initialization, and it urges you to start with the simplest checks first. The fastest path to resolution is to consult your motherboard manual or the vendor’s POST code table to map 67 to the correct subsystem for your specific board. Regardless of brand, treat this as a system‑level diagnostic rather than chasing a single component. By approaching it as a POST fault, you can systematically verify hardware, connections, and firmware without guessing.
Quick checks you can perform right now
Power down, unplug, and discharge static before touching components. Open the case and visually inspect for loose cables or visibly damaged parts. Reseat the memory modules (RAM sticks) and, if available, try one stick at a time in the correct slot. Remove unnecessary peripherals or expansion cards to reach a minimal test configuration. Reset CMOS by removing the motherboard battery for 5–10 minutes or using the CMOS clear jumper per your manual. If the board has dual BIOS, switch to the backup profile. Finally, verify all power connectors (24‑pin and CPU 8‑pin) from the power supply and test with a known‑good supply if possible. These steps cover the majority of POST code 67 scenarios and are safe for most consumer hardware.
Diagnostic flow at a glance
Symptom: The system shows POST code 67 during boot and stalls before loading the OS. Causes range from RAM seating or faulty RAM (high likelihood), to power rail issues from the PSU (medium likelihood), to BIOS misconfiguration or outdated firmware (low likelihood but possible). Fixes progress from simple, non‑destructive actions to more invasive repairs. Start with RAM tests and CMOS resets, then verify power stability, and finally consider firmware updates. If the problem persists after these steps, you may be facing a failing motherboard or a more complex power issue.
Deep dive into the most common cause: RAM & memory subsystem
RAM issues dominate POST code 67 in many systems. Improper seating or a defective module can halt initialization. Start by removing all RAM, then reinstall a single stick in the primary slot according to the manual. If the code changes, test additional sticks one by one to identify the faulty module. If all sticks fail in the same slot, the issue could be the slot or the memory controller on the CPU/board. Use a known‑good standby RAM if available. After RAM tests, conduct a CMOS reset to clear any misconfigurations that could trigger POST errors. These steps usually resolve the majority of 67 scenarios without disassembling major components.
Other potential causes and how to verify them
Power supply issues can mimic RAM faults by failing to deliver stable rails during POST. Check 24‑pin and CPU connectors, try a different PSU if you have one, and test with minimal peripherals attached. A failing CPU or motherboard socket can also show POST codes without obvious external symptoms. BIOS misconfiguration, such as overclock profiles or risky memory timings, can trigger 67; revert to default settings or flash a known‑good BIOS version if you can do so safely. Finally, overheating during POST is rare but possible; ensure CPU fans are connected and heatsinks are secure. Systematic testing across subsystems helps isolate the root cause without unnecessary component replacement.
Safety, data protection, and when to hire a pro
Always power off and unplug before touching any internals. Ground yourself to avoid static damage. Back up data before attempting major hardware work whenever possible. If you encounter uncertain CPU reseating, frozen firmware, or you lack a known‑good test bench, it’s wise to consult a professional technician. Cost considerations vary by region and component availability, with typical ranges for parts and service that can help you budget without surprises. The sooner you validate the exact cause, the lower the risk of secondary damage.
Prevention: how to minimize POST code 67 occurrences
Regularly update BIOS from the OEM, but only with a stable power source and a fail‑safe recovery plan. Maintain clean, dust‑free internals and secure all connectors. Keep memory and expansion cards properly seated, and document changes you make during troubleshooting. If you recently added hardware, revert to your prior configuration to confirm the new component isn’t the trigger. Establish a baseline with a minimal boot board so you can quickly detect changes and prevent recurring POST codes.
Steps
Estimated time: 30-60 minutes
- 1
Prepare for safe troubleshooting
Power down completely, unplug the system, and discharge static. Ground yourself and organize components on an anti-static mat. Have a known‑good RAM module ready for testing.
Tip: Always work with a non-conductive surface and avoid touching CPU pins. - 2
Isolate the ROM memory subsystem
Remove all RAM modules except one in the recommended slot per the motherboard manual. Power up to see if POST code 67 still appears. Repeat with other slots and sticks to identify a faulty module or slot.
Tip: Test one module at a time to pinpoint the faulty RAM. - 3
Clear CMOS and reset BIOS
Power down, unplug, and remove the CMOS battery for 5–10 minutes, or use the clear CMOS jumper. This returns BIOS defaults and can clear misconfigurations triggering 67.
Tip: If you have dual BIOS, switch to the backup profile before clearing. - 4
Check power and minimal configuration
Verify 24‑pin and CPU power connectors are secure. Boot with only the essential components (CPU, one RAM stick, motherboard, and GPU if needed).
Tip: A minimal config helps determine if another component is contributing to the fault. - 5
Update BIOS and assess next steps
If the system boots, update to the latest stable BIOS version from the vendor. If the code reappears, compare against a known‑good configuration and decide on repair or replacement.
Tip: Ensure you have a recovery plan in case the BIOS update fails.
Diagnosis: POST code 67 during startup
Possible Causes
- highRAM seating or faulty RAM
- mediumPower supply or PSU rails issue
- lowBIOS/UEFI firmware misconfiguration or bug
Fixes
- easyReseat RAM modules and test with known-good sticks
- mediumInspect and reseat all power connectors; try a tested PSU
- easyClear CMOS to reset BIOS to defaults
- hardUpdate BIOS/UEFI to the latest stable version from the vendor
Frequently Asked Questions
What does motherboard error code 67 mean across vendors?
Code 67 is vendor-specific; consult your motherboard manual or vendor POST code table to map 67 to the exact subsystem. Use conservative troubleshooting to avoid unnecessary component replacement.
Code 67 varies by manufacturer; check your board’s manual for the precise meaning and follow the standard POST troubleshooting steps.
Is code 67 dangerous to the computer?
The code itself isn’t dangerous, but continued power‑on without diagnosis can risk further hardware damage. Power down safely and perform systematic checks before re‑powering.
No, the code isn’t dangerous, but don’t run it blind. Shut down and troubleshoot step by step.
What is the quickest fix for code 67?
Power off, unplug, reseat RAM, clear CMOS, and boot with a minimal configuration. If the issue persists, test different RAM and verify power delivery.
Reseat RAM, reset BIOS defaults, and boot with minimal hardware to quickly identify the culprit.
Should I replace RAM if code 67 persists?
Test with known‑good RAM modules. If issues persist across multiple modules and slots, the fault may lie with the motherboard or power supply rather than RAM alone.
If testing RAM with good modules still shows 67, consider motherboard or PSU as the next likely culprits.
Can BIOS updates resolve code 67?
A BIOS update can fix firmware bugs that trigger POST codes, but perform updates only with a solid recovery plan and power stability.
Sometimes a BIOS update clears the error, but only if you can complete the update safely.
What are typical costs to fix code 67?
Costs vary by part and region. RAM replacement: $20–$120; PSU: $40–$120; motherboard replacement: $100–$350; professional service: $50–$150.
Costs depend on parts and labor; budgeting for RAM, PSU, or motherboard replacement plus service is common.
Watch Video
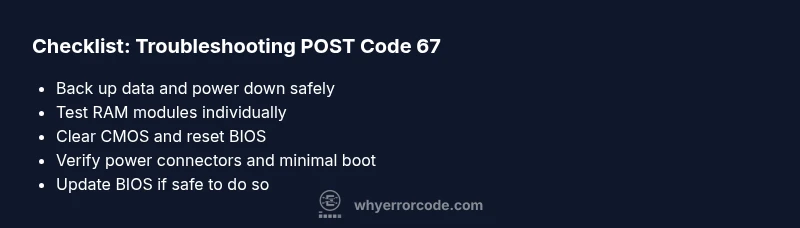
Top Takeaways
- Identify vendor-specific meaning of code 67.
- Start with RAM seating and CMOS reset.
- Boot with minimal configuration to isolate faults.
- Update BIOS only with safe recovery options.
- Consult a professional if replacement seems likely.