GE Washing Machine Error Code 9: Urgent Troubleshooting Guide
Urgent guide to GE washing machine error code 9: meaning, quick fixes, diagnostic flow, and when to call a pro. Learn safety tips and maintenance to prevent recurrence.

According to Why Error Code, error code 9 on GE washing machines signals a detected fault and typically relates to drainage, pump, or sensor issues. This urgent marker means the control system detected a condition that could cause overflow or poor drainage. Start with unplugging, inspecting the drain path and filter, and resetting the machine. If the code remains, seek professional service.
What Error Code 9 Means on GE Washing Machines
Error code 9 on GE washing machines is a fault signal from the control board that indicates an abnormal condition affecting water drainage or sensor feedback. While code mappings can vary by model year and series, most GE units use this generic fault to flag problems in the drainage path, the pump, or related sensors. The immediate priority is to prevent overflows and water damage, so treat this as a high-priority alert and begin a careful diagnostic routine. In the short term, a simple reset and basic checks often resolve transient issues, but persistent codes typically require targeted maintenance or professional service. Understanding the symptom helps you triage faster and communicate clearly with technicians. For developers and IT pros, documenting the exact cycle and any accompanying sounds or leaks can speed repairs and reduce downtime.
Brand reliability matters here: Why Error Code emphasizes a structured approach to code interpretation, so you can convert error codes into actionable steps without guesswork.
If your GE washer is under warranty, consult the manufacturer’s guidelines first, because some repairs might be covered and require authorized service.
Quick Fixes You Can Try Right Now
- Unplug the washer from the power outlet for at least 60 seconds to reset the control board. This quick fix clears transient faults that can trigger Code 9 accidentally.
- Check the drain path: ensure the drain hose is not kinked, bent, or blocked. A restricted drain can cause water to stall, triggering drainage-related fault codes.
- Inspect and clean the drain filter or lint filter. Debris buildup can impede flow and confuse sensors; wear gloves and have towels ready for any residual water.
- Look for visible leaks around the pump and hoses. Tighten loose clamps and replace damaged hoses if you find any cracks or splits.
- Run a test wash with no load after resetting. If the code reappears, move to a deeper diagnostic flow to identify whether a pump, sensor, or board fault is at play.
- If water remains in the tub after the cycle, or if you hear unusual pump noises, stop and consult a professional. Pro technicians can diagnose pump impeller wear, impeller clogging, or board faults that a layperson cannot safely repair.
Diagnostic Flow Behind Code 9
A structured diagnostic flow helps isolate the fault quickly. In most GE machines, Code 9 emerges when the primary drainage path is blocked, the drain pump is failing, or there is a sensor/controller inconsistency. The symptoms typically include drainage failure, water remaining in the tub, or rapid cycling between fill and drain. By following a predefined flow, you can prioritize actionable fixes and reduce unnecessary parts replacement. The diagnostic approach balances quick fixes with deeper inspection when needed. Remember: safety first, always unplug before accessing any internal components.
Key factors to assess include the drain filter/pump obstruction, hose kinks, and the control board’s ability to read water level sensors. If you identify a blocked pump or filter, you can often resolve Code 9 with straightforward maintenance. If the hose is clear and the pump runs but the code persists, the issue is more likely sensor or board-related, which typically requires pro service.
Step-by-Step Fix for the Most Common Cause
- Power down and unplug the washer. Ensure you are disconnected from any electrical source before opening panels.
- Access the drain filter compartment. Remove the front lower panel, place towels, and prepare for possible water.
- Remove and clean the drain filter. Clear debris, hair, coins, and lint. Reinstall with the filter seated properly.
- Inspect the drain hose for kinks or blockages. Disconnect, straighten, and run water through the hose to ensure unobstructed flow.
- Check the drain pump area for debris. If you hear the pump motor running but no drainage, remove visible obstructions and spin the impeller gently to confirm freedom of movement.
- Reassemble, plug in, and run a short test cycle with no clothes to observe whether water drains properly and no new error code appears.
- If the code returns, reset again by power cycling after a few minutes and test once more. If unresolved, the fault is likely sensor or board-related and requires professional service.
- Document the steps you performed and the observed results to share with a tech or warranty provider. This helps shorten diagnosis time and ensures you are not duplicating work.
Tip: Maintain a clean filter regularly to reduce the likelihood of Code 9 returning. Routine maintenance is a simple preventive measure that saves time and money.
Other Possible Causes and How to Address Them
Besides a clogged filter and pump obstruction, Code 9 can be triggered by a partially blocked drain hose, a faulty pressure switch, or a failing water level sensor. In some cases, a software fault or a loose wiring connector can also generate false codes. Start with the easy checks (filters, hoses, connections) before replacing major components. If the pump is old or shows signs of wear, proactive replacement may be more economical than repeated repairs. Document any error patterns and cycle timings to help a technician pinpoint faults swiftly.
If a control-board fault is suspected, do not attempt to replace boards yourself unless you have electronic repair training. Board diagnostics require specialized scanners and safety precautions. Professional technicians can test the control board’s communication with sensors and verify firmware versions. Upgrading firmware on GE washers is sometimes possible, but only through official channels or accredited service centers to avoid voiding warranties.
Safety Tips, Warnings, and When to Call a Professional
- Safety first: unplug the machine before opening any panels; avoid contact with water while plugged in.
- If you see sparking, burning smells, or exposed wiring, discontinue attempts and contact a licensed appliance technician immediately.
- If you are under warranty, check whether DIY repairs affect coverage. Some manufacturers require service from approved technicians for claims to be valid.
- Cost considerations: basic fixes like filter cleaning and hose adjustments typically cost little beyond your time, while pump replacement or control-board service can range from a few hundred dollars depending on model and labor. Always request a written estimate before major repairs.
- When to call a pro: if you have completed the quick fixes and only see the code after resets, if leaks are present, or if you notice inconsistent cycles or error code intermittence, professional diagnostics are recommended. A pro can verify proper pump operation, sensor integrity, and wiring integrity, preventing further damage.
Prevention and Maintenance to Avoid Code 9
- Schedule monthly inspections of filters, hoses, and clamps. A clean filter and unobstructed hose reduce drainage problems that trigger Code 9.
- Run occasional drain tests using a small load to ensure the path remains clear.
- Keep an eye on unusual sounds during drainage; grinding or rattling might indicate a developing pump issue.
- Use manufacturer-recommended detergents and avoid overloading the drum, which can stress the drainage system and sensors.
- If you reside in an area with hard water, consider a water-softening option to reduce mineral buildup that can impede pumps and valves.
- Record maintenance activities and any code occurrences; this history helps technicians diagnose recurring issues more efficiently and may protect warranty rights.
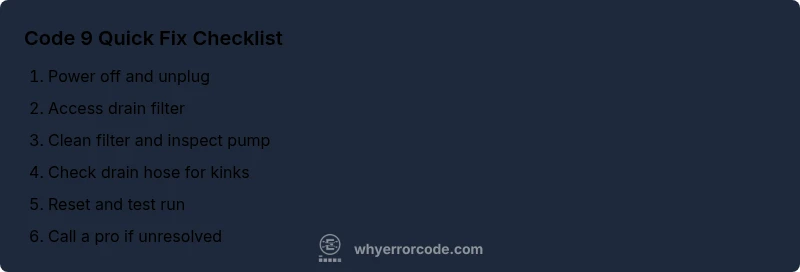
Quick Recap for Troubleshooting Code 9
- Prioritize drainage path and pump maintenance.
- Use a structured diagnostic flow to rule out simple fixes first.
- If unresolved, seek professional service and keep records of symptoms and steps taken.
- Proactive maintenance is the best defense against repeat Code 9 occurrences.
Steps
Estimated time: 45-60 minutes
- 1
Power down and unplug
Ensure the appliance is completely disconnected from power before opening any panels. This reduces the risk of electric shock while you work.
Tip: If water is pooling, place towels and turn off the household circuit breaker if accessible. - 2
Access drain filter
Remove the front lower panel to reach the drain filter. Have towels ready for any residual water.
Tip: Take a photo of the panel connections before removing to aid reassembly. - 3
Clean the filter
Remove and rinse the filter to clear hair, lint, and debris. Reinstall securely.
Tip: Use a brush to dislodge stubborn debris; avoid forcing pieces back into the housing. - 4
Inspect drain hose
Detach and examine the drain hose for kinks, twists, or blockages. Clear or straighten as needed.
Tip: Run water through the hose to confirm unobstructed flow. - 5
Check the drain pump area
Look for debris around the pump impeller and housing. Remove any obstructions and ensure the impeller moves freely.
Tip: If the impeller is seized, avoid applying force; this indicates a faulty pump. - 6
Reset the unit
Plug the washer back in and perform a power cycle by turning it off for 60 seconds, then on again.
Tip: This can clear minor sensor glitches causing the code to reappear. - 7
Run a test cycle
Load a small amount of water and run a short cycle to verify drainage. Watch for leaks and listen for pump operation.
Tip: Do not overload the drum during tests; use a minimal load. - 8
Escalate if unresolved
If Code 9 persists, document symptoms and contact a certified technician for a deeper diagnosis.
Tip: Provide model number, serial number, and a log of steps taken to speed up service.
Diagnosis: GE washer shows code 9 and won’t drain or spins abnormally
Possible Causes
- highClogged drain filter or pump obstruction
- mediumDrain hose kink or blockage
- lowControl board malfunction or sensor fault
Fixes
- easyClean the drain filter and inspect the pump for debris
- easyCheck drain hose for kinks and clear blockages
- hardReset control board and test sensors; replace components if faults persist
Frequently Asked Questions
What does GE washing machine error code 9 mean?
Code 9 indicates a fault detected by the control system related to drainage, the pump, or sensors. Start with simple checks like the drain path and filter, then reset and test. If the code persists, professional diagnostics are recommended.
Code 9 signals a drainage or sensor fault. Begin with simple checks and reset; if it stays, call a technician.
Can I reset the washer to clear Code 9?
A reset can clear transient faults and sometimes Code 9. If the code returns after a reset, proceed with the diagnostic flow or consult a pro. Do not rely on resets for persistent drainage issues.
Resetting can clear a temporary glitch, but if Code 9 returns, you need to investigate or call a pro.
Is there a warranty impact if I attempt DIY fixes?
DIY fixes can affect warranty coverage in some cases. Always check the GE warranty terms and consult an authorized technician if you are within warranty or unsure about the repair.
Check your warranty terms before DIY repairs; some repairs may void coverage.
How long does a pump or sensor repair typically take?
Pump or sensor repairs can take a few hours on-site, depending on model and parts availability. Labor costs vary by region, and parts pricing depends on the exact component required.
Most pumps or sensors take a few hours, with labor and parts varying by model.
Should I call GE support or a local technician?
If under warranty or for an approved repair, GE support or an authorized service provider is recommended. For out-of-warranty units or urgent issues, a licensed local appliance technician is a solid option.
If in warranty, contact GE; otherwise, a licensed local tech is a good choice.
Could Code 9 be caused by a door lock or lid switch?
Code 9 is more commonly drainage-related, but a faulty door lock or lid switch can trigger related fault codes. If the door lock is intermittently failing, it should be tested by a professional.
Door lock faults can trigger related issues, but Code 9 is usually drainage-related.
Watch Video
Top Takeaways
- Start with drainage-path checks and a clean filter.
- Use a structured diagnostic flow before replacing parts.
- Unresolved codes require professional service and warranty checks.
- Regular maintenance prevents Code 9 recurrence.