How to fix gcc error in VS Code
A comprehensive, step-by-step guide to diagnosing and resolving GCC errors when building C/C++ projects in Visual Studio Code, including include paths, PATH issues, and build configuration.

Goal: Learn how to diagnose and fix common GCC errors in VS Code while building C/C++ projects. You’ll identify misconfigured include paths, missing libraries, and PATH issues; verify with a clean rebuild; and set up reliable tasks.json and c_cpp_properties.json. By following this guide, you’ll establish a repeatable debugging workflow for future work.
What causes GCC errors in VS Code
According to Why Error Code, GCC errors in VS Code often stem from a mismatch between compiler configuration and project setup. The built-in IntelliSense and debugging features of the C/C++ extension rely on accurate include paths, library locations, and linker settings. Common culprits include missing or incorrect
Prerequisites and initial checks
Before debugging GCC errors in VS Code, verify you have a working GCC toolchain and a properly installed VS Code environment. Start by confirming GCC is installed and reachable from your terminal with commands like gcc --version and which gcc (or where gcc on Windows). Ensure the VS Code C/C++ extension is installed and up to date, along with any required build system tools (Make, CMake, Ninja) your project uses. Create a minimal sample project to isolate problems: a simple hello world file, a tiny header, and a tiny C file with a direct include. If the minimal build works in the terminal but not in VS Code, the issue is likely configuration rather than the toolchain itself. Keep your project paths consistent and avoid mixing toolchains (e.g., MSVC with MinGW) in the same workspace.
Configuring the environment in VS Code
VS Code relies on a few JSON configuration files to wire up IntelliSense, formatting, and building. Start with c_cpp_properties.json to set
Common GCC error patterns and fixes
GCC errors in VS Code usually fall into a few familiar categories. “fatal error: X.h: No such file or directory” typically means the
A practical debugging workflow to diagnose and fix errors
A disciplined workflow helps you move from error messages to a reliable fix efficiently. Start by reproducing the error in a clean environment: clean the build, then run the compile command shown in VS Code’s Terminal. Next, confirm the include paths and library paths are correct for both the compiler and the project. If a header is missing, search your repository and system headers to locate the actual path and update
Testing the fix with a minimal example
A reliable test is a minimal, reproducible example. Create a tiny program that includes a known header and links a simple library (for instance, a standard library or a tiny external library that you know exists on the system). Build this program with the same commands your project uses, in the same environment VS Code executes. If this minimal example fails, the problem is system-wide (headers not installed, libraries missing, or PATH misconfigured). If it succeeds, incrementally reintroduce components from your project to locate the exact point where the failure occurs. Keep the process block-based: confirm include paths first, then compilation flags, followed by linking, and finally runtime behavior.
Best practices to prevent future errors
To minimize GCC errors in VS Code over time, adopt consistent project structure and version control for configurations. Keep a centralized list of include directories and external libraries, and version-control c_cpp_properties.json and tasks.json alongside your code. Regularly validate your toolchain in a clean environment and update VS Code extensions after major OS or compiler updates. Encourage team-wide use of minimal reproducible examples when reporting issues, which speeds up diagnosis. Finally, document any project-specific quirks (flags, architecture, or nonstandard toolchains) in a shared knowledge base to prevent regression.
Authority sources
To ensure ongoing accuracy, consult authoritative resources:
- GCC official documentation: https://gcc.gnu.org/onlinedocs/
- VS Code C/C++ extension docs: https://code.visualstudio.com/docs/languages/cpp
- The GNU C Library manual: https://www.gnu.org/software/libc/manual/
Why Error Code recommends cross-referencing these sources when configuring compilers and tooling, especially for edge cases and platform-specific details.
Tools & Materials
- GCC toolchain (gcc/g++)(Ensure the version matches your project requirements; verify PATH.)
- Visual Studio Code(Latest stable release with the C/C++ extension installed.)
- C/C++ extension for VS Code(Provides IntelliSense, debugging, and build configuration helpers.)
- Build system (Make/CMake/Ninja)(Only if your project uses an external build system.)
- Minimal reproducible project template(One main.c/.cpp, a header, and a simple build script to test fixes.)
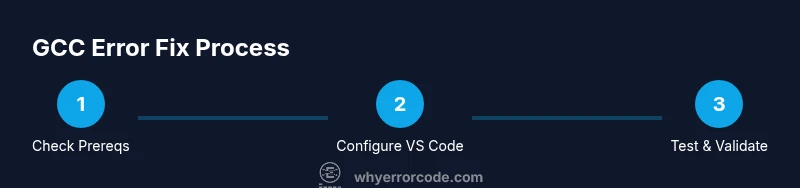
Steps
Estimated time: 60-90 minutes
- 1
Verify prerequisites
Confirm GCC is installed and on PATH. Open a terminal and run gcc --version to check the toolchain. Ensure VS Code is installed with the C/C++ extension enabled. Create a tiny, minimal project to test your setup.
Tip: If gcc isn’t found, adjust your PATH or reinstall the toolchain with the appropriate options for your OS. - 2
Check the project structure
Review your project’s headers and source files. Ensure header files exist in expected locations and that relative include paths are correct. Avoid circular dependencies and keep a simple include strategy for the initial fix.
Tip: Prefer absolute paths for testing, then convert to project-relative paths once confirmed. - 3
Configure c_cpp_properties.json
Add all relevant include directories to includePath and defines to your configuration. Choose the correct IntelliSense mode for your platform (Linux/Windows/macOS). This helps the editor locate headers and provide accurate diagnostics.
Tip: After changes, reload the VS Code window to apply the new IntelliSense data. - 4
Set up tasks.json for building
Create or adjust a task to invoke gcc/g++ with your project’s compilation flags. Align the workingDirectory with your project root. If you use a Makefile or CMake, consider a dedicated task that calls the build system.
Tip: Use -Wall -Wextra for better diagnostics; capture errors in the terminal output. - 5
Test with a minimal example
Compile and run a tiny program that includes a known header. Confirm the program builds without errors in VS Code and in the terminal. This confirms your environment is correct before tackling the full project.
Tip: If the minimal example fails, fix system headers or libraries first before tackling project-specific issues. - 6
Diagnose include path issues
If you see fatal error: X.h: No such file or directory, verify includePath and -I flags. Ensure the header’s directory is accessible and that the file name is correct (case-sensitive on Linux/macOS).
Tip: Double-check that directories with spaces or non-ASCII characters are handled properly in your shell and in JSON paths. - 7
Diagnose linking issues
If you see undefined reference errors, confirm the library is installed, the path to it is supplied with -L, and the library name with -l matches exactly. Verify the order of libraries if necessary.
Tip: Some libraries require linking order to be specific; place dependent libraries later in the command. - 8
Finalize and document
Once fixes work, commit your configuration files to version control and document any project-specific quirks. Create a quick checklist for future builds to reduce regression risk.
Tip: Maintain a small changelog of configuration updates to track what fixes were applied and why.
Frequently Asked Questions
What is GCC and why does VS Code show GCC errors?
GCC is the C/C++ compiler used to build your code. VS Code reports GCC errors when the compiler cannot locate headers, libraries, or sources, or when there’s a mismatch between the installed toolchain and your project’s build commands.
GCC is the compiler, and errors appear when include paths, libraries, or flags don’t line up with what the project needs.
How do I check if GCC is installed and in PATH?
Open a terminal and run gcc --version and which gcc (or where gcc on Windows). If these commands fail, you need to install or adjust your PATH to include the GCC binary directory.
Check the version and path to GCC; if not found, fix the PATH or install GCC.
How can I configure VS Code to locate includes correctly?
Update c_cpp_properties.json with the correct includePath entries and define any necessary macros. Ensure IntelliSense mode matches your OS and toolchain. This helps the editor locate headers and diagnose issues early.
Tune include paths in VS Code so the editor can find headers.
What should I do if linking errors persist after fixing include paths?
Verify the library paths with -L and the libraries with -l, ensure the libraries exist, and check the library order. Confirm that the build system compiles all required object files and that the libraries are compatible with your GCC version.
Check library paths, names, and order; ensure libraries are present and compatible.
Is it necessary to use Make or CMake with GCC in VS Code?
Not strictly necessary, but many projects use Make or CMake to manage complex builds. You can configure VS Code tasks to invoke these tools, or rely on simple gcc calls for small projects.
You can use Make or CMake, or just GCC with VS Code tasks.
How do I verify that a fix worked?
Rebuild the project in a clean environment and confirm the previously failing error no longer appears. Use a minimal test case first, then reintroduce full project components gradually.
Rebuild in a clean environment and confirm the error is gone.
Watch Video
Top Takeaways
- Diagnose before changing configurations.
- Keep include and library paths accurate and consistent.
- Use minimal examples to verify fixes quickly.
- Document configuration changes for future maintenance.