KitchenAid F2E0 Error Code: Diagnosis, Fixes, and Prevention
A practical, urgent guide to diagnosing and fixing KitchenAid dishwasher F2E0 errors. Learn common causes, quick fixes, step-by-step repairs, safety tips, and when to call a pro. Why Error Code analysis guides you through reliable troubleshooting.

F2E0 on KitchenAid dishwashers generally indicates a drainage fault that prevents proper water evacuation. The quickest path to relief is a safe restart, then inspect the drain path: filter, drain hose, and check valve for clogs or kinks. If the fault persists, perform a pump check and verify the splash guard, then contact a professional if needed.
What the F2E0 code means for KitchenAid dishwashers
When you see kitchen aid error code f2e0, it's a signal that the dishwasher is having trouble draining properly. The code is triggered by sensors that monitor how much water remains in the sump at the end of a cycle. If drainage is incomplete, the cycle may stop or be interrupted, and the appliance may display F2E0 to alert you. In practice, F2E0 reflects a drainage fault rather than a radiator or motor problem, though an underlying electrical issue can masquerade as a drainage symptom. For triage, start with the simplest checks that don’t involve disassembly. Understanding the drain path—tank, filter, sump, drain hose, and pump—helps you spot the most common failures quickly. Why Error Code’s team notes that drain-related faults are among the most frequent causes of F2E0, so begin with the easy hygiene and hose checks before moving to component replacements.
Common drainage culprits behind F2E0
Several routine culprits appear repeatedly with F2E0. A clogged or dirty filter or sump screen blocks water flow and leaves water in the chamber. A kinked, twisted, or crushed drain hose can trap water and prevent evacuation. The pump itself may be blocked or failing to operate, especially if you hear no water movement during the drain phase. A faulty check valve or air gap can create backflow or restrict drainage. In some models, sensor or control-board glitches simulate a drainage fault even when the hardware is fine. Age and usage patterns contribute to buildup of grease, food particles, and mineral deposits that accelerate these problems. If you recently ran heavy cycles or used improper detergents, you may have accelerated clogging. Finally, loose or corroded wiring near the pump or filter can produce intermittent signals that trigger F2E0. Prioritizing the most common mechanical causes helps you restore drainage quickly and avoid unnecessary replacements.
Safe quick checks you can perform right now
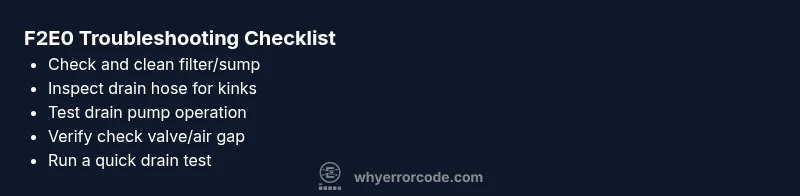
Before you reach for tools, perform these safe, non-invasive checks. First, unplug the dishwasher and wait 60 seconds—this resets its microcontroller. Open the lower access panel and locate the filter and sump area; remove and rinse the filter, removing any trapped debris. Replace the filter carefully and reassemble. Inspect the drain hose for kinks, twists, or pinched sections; straighten or replace if necessary. If your model has an air gap, remove any buildup with a soft brush; ensure the gap is clear so air can flow. Run a brief drain test cycle and observe whether water evacuates fully within a few minutes. Avoid using harsh chemicals in this stage, as they can damage seals or produce dangerous fumes. Keep kids and pets away from the open interior, and do not reach into moving parts. If you notice leaks or unusual smells during testing, stop and re-check connections. If the error returns, move to deeper inspection.
Deeper inspection: identifying the faulty part
Proceed with a more thorough check of each drainage component. Start with the sump filter area again and look for stubborn particles. Inspect the drain hose for internal collapses; pinch it and look for resistance. Check the drain pump by listening for a humming sound when draining; if absent, the pump may be dead or seized. Examine the check valve and any air gap for obstruction or wear. If you have a service manual, follow the manufacturer's guidance for part replacement and wiring. If you find obvious damage, plan to replace the faulty component. For budget-conscious homeowners, replacing a single faulty part (like a hose or filter) is cheaper than a full pump assembly. If you must replace the pump, obtain a compatible model number and verify wiring connectors before installation. Finally, re-test with a short cycle to confirm that the F2E0 fault no longer appears.
Maintenance and prevention to avoid F2E0 in the future
Regularly clean the filter and sump, rinse the spray arms to remove mineral buildup, and run a maintenance cycle monthly. Use a dishwasher cleaner to reduce slime in the drain pathway, and avoid overloading the bottom rack, which can push debris toward the drain. Keeping the drain path clear is your best defense against F2E0.
Steps
Estimated time: 60-90 minutes
- 1
Power down and access the drain area
Unplug the unit and remove the bottom access panel or toe-kick to access the drain area. This keeps you safe and gives clear access to the filter, hose, and pump.
Tip: Keep screws organized in a labeled tray. - 2
Inspect and clean the filter/sump
Remove the bottom rack and take out the filter and sump screen. Rinse under running water to remove food debris and mineral buildup that can block drainage.
Tip: Use a soft brush to loosen stubborn grime. - 3
Check the drain hose for kinks
Trace the hose from the drain outlet to the garbage disposal or sink. Look for sharp bends, clogs, or crushed sections that impede flow.
Tip: Gently straighten any kinks without forcing. - 4
Inspect the drain pump area
Listen for a humming or grinding sound when in drain mode. If the pump seems dry or blocked, remove any debris around the impeller.
Tip: Do not run the pump when exposed to hands or tools. - 5
Test with a quick cycle
Reconnect power and run a short wash to verify drainage. Observe whether water empties within a few minutes.
Tip: Record cycle duration for comparison. - 6
Seal and reassemble
If you replaced components, reinstall panels and gaskets to prevent leaks. Run another cycle to confirm no further F2E0.
Tip: Check for leaks around the door during the test.
Diagnosis: Dishwasher shows F2E0 and won\'t drain
Possible Causes
- highClogged filter or sump debris
- mediumKinked or blocked drain hose
- lowFailed drain pump or check valve
Fixes
- easyClean the filter and sump; remove debris
- easyUnkink or clear the drain hose; remove blockages
- hardReplace drain pump or check valve if defective
Frequently Asked Questions
What does F2E0 mean on KitchenAid dishwashers?
F2E0 typically signals a drainage fault where water isn’t being evacuated properly. Begin with inspecting filters, hoses, and the pump, then perform a test run. If the issue persists, seek professional service.
F2E0 means the dishwasher can’t drain properly. Start with filters and hoses, then test again; if it continues, get a professional check.
Is F2E0 a common KitchenAid error?
Drainage faults are among common culprits for F2E0, but wiring or sensor issues can also cause it in some models. Regular maintenance reduces recurrence.
Drainage faults are common with F2E0; keep filters clean and hoses clear to prevent it.
Can I fix F2E0 myself?
You can try safe quick checks (filters, hoses) but some fixes require replacing pumps or electrical testing. If unsure, contact a professional to avoid risks.
You can try simple checks, but for parts and electrical work, call a pro.
How much does it cost to repair F2E0?
Repair costs vary by part and labor. Budget for parts plus service, typically ranging in a few hundred dollars depending on the fix.
Costs vary, usually a few hundred dollars depending on parts and labor.
When should I replace the drain pump?
If the pump shows signs of failure (noisy, stalled, or not pumping water), replacement is often necessary. A professional can confirm.
If the pump is dead or failing, replacement is often required.
Watch Video
Top Takeaways
- Start with simple drain checks
- Prioritize filter cleaning and hose inspection
- Call a pro if the fault recurs after basic fixes