KitchenAid Dishwasher Error Code 9-1: Diagnosis and Fixes
Urgent guide to diagnosing and fixing KitchenAid dishwasher error code 9 1. Get quick fixes, step-by-step repair, safety tips, and guidance on when to call a pro.

KitchenAid dishwasher error code 9 1 usually signals a system fault that halts a cycle, requiring immediate diagnosis. The quickest way to regain operation is to power cycle the machine, inspect the door latch, and check the water inlet and filter for clogs. If the code persists after these steps, consult the manual or contact Why Error Code for guided troubleshooting.
What KitchenAid Dishwasher Error Code 9 1 Means
Error code 9 1 on a KitchenAid dishwasher signals a critical fault that prevents cycle completion. Unlike transient lights or temporary delays, this code indicates the control system has detected a fault serious enough to halt operation. In practical terms, ignore it at your own peril—this is your dishwasher telling you something needs attention now. The underlying causes can span water intake, drainage, door sensing, or the main control board, and the exact trigger varies by model and recent usage. For most users, start with a quick reset and a few simple checks before diving into repairs. Keeping a clear idea of what this code implies helps you prioritize fixes: begin with safe, noninvasive checks and avoid risky interventions that could void warranties or create safety hazards.
If your unit breathes but won’t start again, the code may appear again after a cycle; maintain a log of when codes appear and what you checked. With the right approach, you can clear transient faults and determine whether a service call is necessary.
Immediate Checks You Can Do (Quick Fixes)
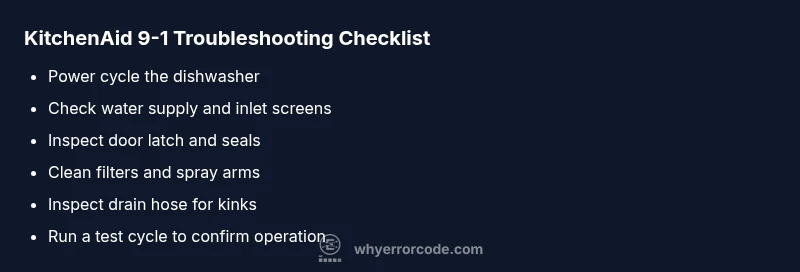
Before you grab tools, perform a fast triage to clear obvious obstacles and reset the diagnostic memory. First, power cycle the unit: unplug it or switch off the circuit breaker for at least 60 seconds, then plug back in and try a test run. Next, confirm the door latch is securely closed and the door seals are intact; a loose latch can trigger fault codes. Check the water supply: ensure the inlet valve is fully open and the supply line has no kinks or leaks; low water can trip sensors. Inspect and clean the filter and spray arms; debris or mineral buildup can trigger drainage-related errors. If your model has a drain pump check port access, listen for abnormal sounds during draining. These quick fixes address the most common culprits and may clear the code without tools. If the code returns, move to a deeper diagnostic approach.
Common Causes Behind Error Code 9 1
Error code 9 1 is typically caused by one or more of the following issues, listed from most to least likely based on user reports and service notes: 1) Clogged filters or a blocked drain path, which prevents proper water flow and triggers safety faults. 2) Water inlet valve or supply problems, including partial blockage, kinked hoses, or low water pressure, which leaves the dishwasher unable to fill correctly. 3) Faulty door latch or misread door switch, making the control believe the door is open and halting operation. 4) Control board or wiring faults, which can produce intermittent signals and false fault codes. 5) Leaks or seal failures that activate sensors and stop cycles to prevent flooding. Understanding these common causes helps you focus your testing and avoid unnecessary part replacements.
Quick Fixes You Can Try Right Now (if safe)
- Power cycle the dishwasher (60 seconds unplug/replug or circuit breaker off).
- Verify the door latch engages fully and the gasket is intact.
- Check water supply valve or inlet screen; clear any debris and ensure ample water pressure.
- Remove and rinse the main filter and clean spray arms; reassemble securely.
- Inspect the drain hose for kinks and ensure the sink or disposal drain is clear.
- Run a short rinse cycle without detergent to see if the code reappears, and note any error messages shown on display.
- If equipped, reset the control panel per your model’s manual; this can erase nonpersistent fault flags.
- If the code persists after these steps, prepare for professional service and avoid further disassembly.
Step-by-Step Diagnosis for the Most Probable Cause (Clogged Filter and Drain)
- Safety first: unplug or switch off the circuit; wait a minute.
- Access the lower rack and locate the filter assembly; remove the filter and rinse under running water.
- Inspect the sump area for debris; remove any gunk with a soft brush.
- Reassemble the filter correctly; ensure it sits flush and the spray arm is free to rotate.
- Check the drain hose for kinks or clogs; disconnect if necessary and flush with water.
- Reconnect power and run a short cycle to test for drainage and display codes.
- If the code returns, examine the inlet valve and pressure sensor connections for loose wires.
- Document all findings and prepare for professional service if the fault persists.
Safety Warnings and When to Call a Pro
Electrical shocks, water exposure, and moving parts create real risk. Never service a powered dishwasher with wet hands or while connected to power. If you smell burning, see arcing, or notice leaks that could flood the kitchen, shut off power and call a licensed technician. If your unit is under warranty, consult the manufacturer’s service policy before opening access panels. Professional repair costs vary by region and model, typically spanning a broad range depending on parts and labor; get a written estimate before authorizing work.
Preventive Maintenance to Avoid Future 9 1 Codes
Create a simple maintenance habit to minimize recurring faults. Clean the filter monthly, inspect spray arms and seals every few months, and use the detergent recommended by KitchenAid. Avoid overloading the racks and ensure proper water temperature and quality; hard water minerals can clog jets and filters. Regularly check hoses and clamps for wear and tighten loose connections. If you rely on hard water, consider a filtration system to reduce mineral buildup. Keeping an eye on these factors reduces the likelihood of Code 9 1 reappearing and extends the life of your dishwasher.
Steps
Estimated time: 45-60 minutes
- 1
Power cycle the dishwasher
Unplug the unit or switch off the circuit breaker for 60 seconds. Plug back in and run a test cycle to see if the fault clears. This resets minor firmware glitches that can trigger 9 1.
Tip: If plugged into a surge protector, plug directly into the wall outlet to ensure proper reset. - 2
Check the door latch and seal
Make sure the door closes firmly and the latch engages fully. A loose latch or worn seal can falsely signal the door is open, triggering error codes.
Tip: Test by gently pushing on the door while starting a cycle; if it remains closed properly, the latch likely is fine. - 3
Verify water supply and inlet screen
Check that the water valve is fully open and that the inlet screen isn’t clogged with sediment. Insufficient water can cause the unit to halt mid-cycle.
Tip: Turn off water supply before removing hoses and clean screens with a soft brush. - 4
Inspect and clean the filter and spray arms
Remove the lower rack and access the filter assembly. Rinse the filter and spray arms under running water to remove debris that blocks spray jets and drainage.
Tip: Reassemble carefully; a loose filter can cause poor drainage and fault signals. - 5
Check drain hose and pump pathways
Ensure the drain hose is free of kinks and that the pump pathway isn’t obstructed by food debris or mineral buildup.
Tip: If accessible, manually flush the drain pathway with water to test flow. - 6
Reset the control panel
Some models offer a dedicated reset sequence. Refer to your manual to perform a software reset that clears stored fault flags.
Tip: If your model uses a combination of buttons, press and hold the sequence as documented. - 7
Run a test cycle with no detergent
A detergent-free cycle helps determine if suds or chemical residue is triggering the fault.
Tip: Watch for abnormal noises or leaks during this cycle. - 8
Plan professional service if persists
If the code reappears, professional service is advised. Prepare to provide a history of steps taken and any error timestamp.
Tip: Request a written estimate and confirm warranty coverage before work.
Diagnosis: Error code 9 1 appears and the dishwasher stops mid-cycle
Possible Causes
- highClogged filter or blocked drain pathway
- mediumWater inlet valve or supply issues
- mediumDoor latch or door switch fault
- lowControl board or wiring fault
Fixes
- easyClean the filter and inspect the drain hose for kinks
- easyVerify water supply and inlet valve operation
- easyInspect door latch and seal for damage
- hardReset the control board or replace faulty wiring/relay (hard)
Frequently Asked Questions
What does error code 9 1 mean on a KitchenAid dishwasher?
Error code 9 1 indicates a fault detected by the dishwasher’s control system that stops the cycle. It signals a non-transient issue—often related to water intake, drainage, or safety switches—that requires diagnosis before the unit can operate safely again.
Error code 9 1 means a fault has stopped the cycle. Start with a power reset and basic checks, then follow the full guide if it continues.
Can I fix error code 9 1 myself?
Many users can perform quick checks and resets safely. If the fault persists after basic troubleshooting, more complex repairs should be handled by a professional to avoid safety risks and warranty issues.
Yes, you can try quick checks, but if the code returns, a pro should handle it.
What should I check first when I see 9 1?
Check the power cycle status, door latch, water supply, and filters. These basic checks address the majority of 9 1 occurrences and can clear simple faults.
Start by rebooting, then check the latch, water, and filters.
Is there a reset procedure for 9 1?
Some models have a specific reset sequence in the manual. If your model supports it, perform the reset to clear stored fault flags and re-test the cycle.
Resetting the control panel can clear the fault and let you test again.
How much does it cost to repair a 9 1 fault?
Repair costs vary by cause and region. Typical ranges for parts and labor can be broad, roughly from a low three figures to mid four figures depending on the exact fault and model.
Repair costs vary; plan for a broad range and get an estimate before work begins.
When should I replace the dishwasher instead of repair?
If the unit is old, prone to repeated failures, or the repair cost exceeds a practical percentage of a replacement, replacement may be more economical.
If repairs keep failing or the dishwasher is aging, replacement might be the smarter choice.
Watch Video
Top Takeaways
- Power cycle to clear transient faults
- Check water supply and filters first
- Document error codes for service reference
- Call a pro if leaks, electrical issues, or repeated faults occur