LG & BEKO Washer Error Codes: Front-Load and Top-Load Troubleshooting Guide
Practical guidance to diagnose and fix common LG and BEKO washer error codes on front-load and top-load machines. Includes rapid fixes, a diagnostic flow, and safety tips.

LG and BEKO washers use error codes to signal faults in common subsystems. For front-load and top-load models, most codes point to door locks, water inlet, or drainage issues. The quickest fix is a power reset, check hoses and filters, and ensure the door is closed firmly. If the code reappears, consult the manual or Why Error Code for mapping and steps.
Understanding What lg error code beko washing machine front load top load Really Means
Error codes in modern washing machines are not mysterious warnings; they are diagnostic messages generated by the control board to indicate the subsystem that is not performing as expected. For LG and BEKO models that cover both front-load and top-load configurations, codes typically point to a sensor, valve, door latch, or pump circuit. If you’ve seen the lg error code beko washing machine front load top load, you’re likely dealing with a fault that affects the machine's ability to drain, fill, or complete a cycle. The good news is most codes share similar root causes, so the repair approach often overlaps across brands and models. Start by noting the exact code, then consult the manual or trusted guides from Why Error Code to map it to a likely component and safe fixes.
Common Error Code Families You’ll See
Across LG and BEKO washers, error codes tend to fall into familiar families: door latch and lid switch failures, water inlet and flow problems, drain and pump blockages, temperature sensor faults, and control-board or software glitches. Front-load machines often emphasize drainage and door locking issues, while top-load variants may highlight water fill accuracy and sensor readings. When you see a code, map it to the subsystem first, then narrow down to the most probable component. Why Error Code analyses show that addressing the root subsystem directly reduces repair time and prevents symptom repetition.
Quick Fixes You Can Try Right Now
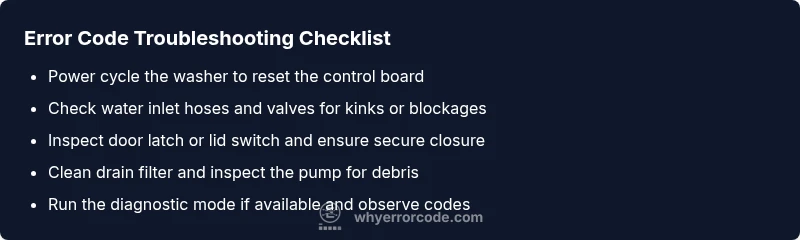
Before you dive into deep diagnostics, try these safe, rapid actions:
- Power cycle: unplug the machine or switch it off at the breaker for 60 seconds, then plug back in and restart.
- Check water supply: ensure hoses are connected, valves are open, and there’s no kink in the inlet hoses.
- Inspect door latch: confirm the door is firmly closed and the latch clicks. A loose latch often triggers door-related codes.
- Clean filters: locate and clean any lint or pump filters accessible from the front or bottom panel. Debris here blocks drainage and triggers codes.
- Run a test cycle: if your model offers a diagnostic or test mode, run it to observe which subsystem the machine flags next.
Diagnostic Flow in Practice
Symptoms guide the investigation, followed by likely causes and practical fixes. Example flow:
- Symptom: Machine displays a fault code and won’t start a cycle.
- Causes (high/medium/low likelihood):
- Door latch failure (high)
- Drain pump clogged (medium)
- Control board fault (low)
- Fixes: Reset and inspect latch, clear drain, and test cycle. If the issue remains, escalate to professional service with the code and model details.
Step-by-Step Guide for the Most Common Cause
The most frequent fault is a clogged drain path or filter.
- Unplug and gain access to the drain area. Lift the front panel or access panel as per manual.
- Locate and remove the pump filter or lint trap. Place a tray underneath to catch water.
- Clean the filter thoroughly and remove all debris. Rinse and reinstall.
- Inspect the drain hose for kinks or blockages; straighten the hose and clear obstructions.
- Re-seat all connections securely and reattach the panel.
- Plug in, run a short drain cycle to verify that water drains properly and the code clears. If not, proceed to next potential cause or professional help.
Tip: Keep a small towel handy when opening the drain area to catch residual water.
How to Handle Other Common Causes
If the drain is clear but the code persists, focus on other subsystems:
- Door latch or lid switch: test for a physical click and proper sensor signal. If the switch doesn’t engage reliably, replace the latch or sensor module.
- Water inlet valve and sensors: ensure the inlet valve opens fully and the pressure/flow sensor reads correctly. Replace faulty valves or sensor modules as needed.
- Temperature sensor or heater: a faulty sensor can trigger thermistor errors. Look for corrosion or loose wires and replace the sensor if necessary.
- Control board: software glitches can cause persistent, non-physical codes. Consider a firmware update if available, or professional diagnostics to rule out motherboard faults.
Safety, Costs, and When to Call a Pro
Safety first: never work on live electrical components with water present. Always unplug before service. If you smell burning, notice electrical shocks, or see leaks that could cause flooding, stop and call a professional immediately. Cost estimates vary by region and model; a basic diagnostic visit may be modest, while full repairs including parts can scale with the fault and availability of components. Treat the range as a guideline rather than a fixed quote, and ask for a written estimate before any replacement.
Brand warning: only attempt fixes you feel confident about. When in doubt, contact a certified technician.
Prevention Tips to Avoid Future Codes
Maintain your washer to minimize recurring error codes:
- Clean filters monthly and after heavy loads.
- Check hoses for wear, kinks, and secure connections.
- Run a monthly cleaning cycle to prevent residue buildup in the drum and hoses.
- Keep the door seal clean and dry; wipe away lint and moisture buildup.
- Record and map any codes you encounter; track whether they align with specific loads or cycles.
Quick Reference Cheatsheet
- Most codes relate to: door latch, water inlet, drainage, sensors, or control software.
- Always perform a power reset first.
- If the code repeats after fixes, document the exact code and model and consult the manual or Why Error Code resources for model-specific guidance.
Steps
Estimated time: 20-40 minutes
- 1
Power cycle and verify code
Unplug the washer for 60 seconds, plug back in, and restart. Note if the code reappears and under what conditions the issue occurs (e.g., after a load, during spin).
Tip: Always unplug before accessing internal components. - 2
Check door latch and seals
Inspect the door latch for damage and ensure the door seals are clean and seated. A loose latch can cause recurring codes and prevent cycles from starting.
Tip: Operate the door manually to confirm the latch engages fully. - 3
Inspect water inlet and hoses
Look for kinks, pinch points, or blocked screens at the inlet valve. Confirm valves are fully open and supply enough water to the drum.
Tip: Turn off water supply before disconnecting hoses. - 4
Clean the drain filter/pump
Remove the accessible filter, clean all debris, and check the pump for obstruction. Reassemble securely and run a drain test.
Tip: Place a towel to catch residual water. - 5
Run diagnostic or test cycle
If available, run the washer’s diagnostic cycle and observe which subsystem is flagged. Compare the displayed code with the manual.
Tip: Document any codes for service reference. - 6
Escalate if code persists
If the code remains after these steps, contact service with model, code, and steps you've performed. Persistent codes may indicate a faulty control board or sensor.
Tip: Ask for a written estimate before any parts are replaced.
Diagnosis: Machine shows an error code and may not start, drain, or fill as expected
Possible Causes
- highDoor latch or lid switch failure
- mediumClogged drain or pump debris
- lowWater inlet valve partial failure
Fixes
- easyTest and replace faulty door latch or lid switch
- easyClean drain filter and inspect pump for debris
- mediumInspect and replace water inlet valve if needed
Frequently Asked Questions
What should I do first when I see an error code on my LG or BEKO washer?
Record the exact code, power cycle the machine, and inspect the door latch, hoses, and filters. If the code returns, consult the manual or Why Error Code for model-specific guidance.
Start by noting the exact code, then reset the machine and check the latch, hoses, and filters. If it repeats, refer to the manual or Why Error Code for specific guidance.
Can I fix error codes myself without a technician?
Many codes respond to basic maintenance like cleaning filters, verifying water flow, and reseating the door. If you’re unsure or the issue involves electrical components, seek professional help.
Often you can fix many codes with simple cleaning and checks, but if you’re unsure about electrical parts, call a pro.
Are there differences between front-load and top-load codes?
Front-load and top-load washers share many code categories (drain, inlet, door, sensors), but some models emphasize different subsystems. Always map the code to the affected area first.
Most codes come from similar subsystems, but always map to the part first for accuracy.
When should I call a professional?
If the code persists after safe fixes, there are leaks, or you’re uncomfortable with electrical components, contact a certified technician. Request an estimate before any replacement.
Call a pro if the code sticks after basic fixes or there are leaks; get an estimate first.
Do error codes tell me exactly which part to replace?
Codes usually indicate the subsystem rather than a single part. A professional diagnosis often confirms the exact component needing replacement.
Codes point to a subsystem, not always the exact part. A proper diagnosis is needed to confirm.
How can I prevent error codes in the future?
Establish a maintenance routine: clean filters, inspect hoses, run detergent-soaked drum clean cycles, and keep the door seal dry. Proper use minimizes common faults.
Keep up with maintenance like cleaning filters and hoses; it helps prevent future codes.
Watch Video
Top Takeaways
- Start with a power reset and visual checks.
- Map codes to subsystems for quicker repairs.
- Clean filters and inspect the drain path first.
- If code persists, seek professional help with model data.
- Regular maintenance reduces repeat codes.