LiftMaster Error Code 4-2 Reset Guide
Discover how to diagnose LiftMaster error code 4-2 and perform a safe reset. Reddit tips paired with steps, common causes, quick fixes, safety, and when to call a pro

LiftMaster error code 4-2 points to a safety/limit fault that can stop the door. A quick fix is to power cycle the opener, realign safety sensors, and reset from the wall switch or remote. If the code remains, inspect wiring or call a pro.
Understanding LiftMaster error code 4-2
LiftMaster error code 4-2 appears on the keypad, app, or wall control when the opener detects a safety or limit fault. In plain terms, the garage door safety sensors or the encoder mechanism are signaling an abnormal condition that stops the door from a full forward or reverse action. According to Why Error Code analysis, this error is frequently triggered by sensor misalignment, damaged wiring, or a stuck door that prevents the safety features from verifying the path. Because the system errs to protect people and property, ignoring 4-2 can leave you with a door that won’t operate or surprises when it starts closing suddenly. The urgency is real: until the fault is resolved, the door may not respond to remote commands, and test safety rev operations might fail. This article focuses on practical, safe steps you can take to reset and verify the core safety checks.
Primary Causes Behind LiftMaster Error 4-2
The 4-2 code has several plausible triggers. The most common is sensor misalignment, where the safety eyes aren’t facing each other or aligned with the doorway. Wiring faults—loose connectors, frayed cables, or damaged insulation—can also trigger the fault. A misadjusted door close/reverse limit or a stuck door that lingers can mimic a sensor fault. Finally, a rare but possible culprit is a control board glitch or firmware mismatch. Why Error Code analysis shows sensor misalignment as a frequent trigger, so start there when diagnosing. If you confirm alignment and connections are solid, you can often clear the code with a reset.
Quick Checks You Can Do Before Calling a Pro
Before you dive into deeper repairs, perform these safe checks. Power down the unit, inspect the track for obstructions, verify rail alignment, and confirm the safety sensors are clean and pointing at each other. Use a flashlight to inspect the sensor eyes for dirt or misalignment. If the LED indicators on the sensors are off or blinking out of sequence, address those indicator patterns first. Do not bypass safety features or force the door to move when the sensor LEDs indicate a fault. These quick checks can save time and money and help you decide whether to proceed with a DIY reset or call a technician.
How Safety Sensors Impact 4-2 and Why Alignment Matters
The safety sensors are the primary gatekeeper for the 4-2 fault. When the eyes are misaligned, dirty, or blocked, the opener assumes a risk and halts operation. This section explains how to check alignment, moisture exposure effects, and how tilt or misplacement can cause the fault to reappear after a reset. Keep in mind that small misalignments can cause big problems, and the sensors should be clean, free of condensation, and calibrated per the user manual. A proper realignment is often enough to clear the 4-2 fault.
Wiring, Encoder, and Control Board: What to Inspect
If alignment and obstruction checks don’t clear the fault, wiring issues are a likely suspect. Inspect the sensor wires for cracks or loose connections, test continuity if you have a multimeter, and verify that the encoder and control board connections are secure. A loose wire or corroded terminal can cause intermittent signals that trip the 4-2 fault. If you notice visible damage, replace or repair the wiring with manufacturer-approved parts. Firmware mismatches can also trigger faults; check for updates if your model supports them. Remember, complex electrical work should be performed with the power off for safety.
Step-by-Step Preview: How to Approach the 4-2 Reset (Most Common Cause)
This section outlines a practical, safe sequence to address the most common cause—sensor misalignment—without specialized tools. Follow the steps in order and test after each one. If at any point the door behaves oddly or you detect burning smells, stop and call a pro immediately.
Step 1: Power Cycle the Opener
Power down the opener at the wall control and the circuit breaker if accessible. Wait 60 seconds, then restore power. This quick reset can clear temporary faults and reinitialize the logic. After re-energizing, test the door using both the wall control and remote to see if the 4-2 code reappears.
Step 2: Realign Safety Sensors
Physically adjust the safety eyes so they face each other directly across the doorway. Clean the lenses and verify both LEDs indicate a healthy alignment (steady green in most models). Position the sensors per manufacturer guidelines and retest with the door moving slowly to confirm correct reversal behavior. If the LED indicators still flicker, replace the sensors.
Step 3: Check Wiring and Connections
Inspect the wires leading to the safety sensors for wear or damage. Ensure wire nuts are tight and terminals are clean and secure. If you find damaged insulation, replace the run or segment and recheck. Loose connections can recreate intermittent faults. After fixing wiring, run another reset and test sequence.
Step 4: Reprogram Remotes and Reset the Opener
Reset the opener’s memory if your model supports it, then reprogram the remotes and keypads. This ensures that stale or conflicting signals aren’t triggering the fault. After reprogramming, perform multiple open/close cycles to verify stability.
Step 5: Decide on the Next Step: DIY vs Pro
If the 4-2 code persists after these steps, the issue may involve the encoder or a marginal control board. In that case, budget for a professional service call to diagnose and replace faulty hardware. Typical service calls and minor sensor work can range from moderate to substantial depending on parts and labor, so prepare for a range. The Why Error Code team recommends documenting your findings and requesting a written estimate before authorizing repairs.
Prevention: Keeping LiftMaster 4-2 from Recurring
Preventive maintenance is key. Regularly inspect and clean safety sensors, check for loose wiring, and perform a quarterly reset test to ensure correct function. Keep the garage area dry and free of dust, which can affect sensors and electronics. Finally, schedule routine checks after any power outages or after replacing a battery in a related device to prevent recurrence.
Quick Recap: What to Do Now
If you encounter 4-2, start with a power cycle, then verify sensor alignment and wiring. A controlled reset often clears the fault, but if the error persists, consult a professional to avoid unsafe conditions. Stay proactive with regular maintenance to minimize future faults.
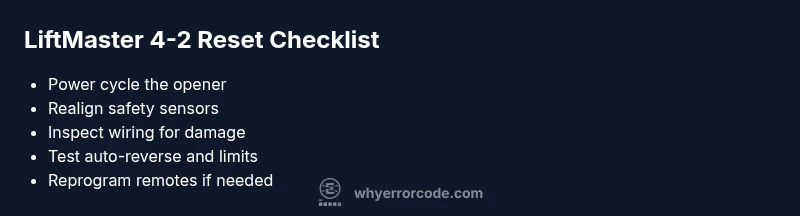
Steps
Estimated time: 30-60 minutes
- 1
Power cycle the opener
Turn off the opener at the wall control and disconnect power at the circuit breaker if accessible. Wait 60 seconds, then reconnect power and test operation with both wall control and remote.
Tip: This is the simplest, fastest way to clear transient faults without tools. - 2
Realign safety sensors
Position the sensors so they face each other directly across the doorway. Clean the lenses, check LED indicators, and adjust until both LEDs indicate proper alignment.
Tip: Even small misalignment can trigger 4-2; recheck after every adjustment. - 3
Inspect wiring to sensors
Look for loose connections, frayed wires, and damaged insulation near the sensor terminals. Tighten terminals and replace damaged wiring as needed.
Tip: Only handle wiring with the power off to prevent shocks. - 4
Test door reversal and limits
With power on, manually test the door’s auto-reverse feature and ensure the close limit is correctly set to avoid pinching.
Tip: Use a light object to simulate an obstruction to verify safety responses. - 5
Reprogram remotes and reset memory
If your model supports it, erase existing remotes and reprogram them. This ensures clean signals after a reset.
Tip: Refer to your model manual for exact button sequences.
Diagnosis: LiftMaster error code 4-2 is displayed and the door won’t operate
Possible Causes
- highSafety sensor misalignment or blockage
- mediumLoose or damaged safety sensor wiring
- lowControl board fault or firmware mismatch
Fixes
- easyPower cycle the opener and reset
- easyRealign safety sensors and clean lenses
- easyCheck wiring and connections to sensors
Frequently Asked Questions
What does LiftMaster error code 4-2 mean?
Error 4-2 indicates a safety or limit fault that prevents the door from operating safely. It usually points to sensor alignment issues, wiring faults, or a control-board irregularity. Don’t ignore it—resolve the fault before testing the door again.
Error 4-2 means a safety or limit fault. It’s often caused by sensor alignment or wiring issues, which you should fix before trying the door again.
Can I reset LiftMaster 4-2 myself?
Yes, you can attempt a safe DIY reset starting with a power cycle and sensor realignment. If the fault persists after these steps, consider professional diagnostics to avoid safety risks.
You can try a safe reset first, but if it keeps coming back, it’s best to get a professional to check it.
What are the common causes of 4-2?
The most common causes are misaligned safety sensors, loose or damaged wiring, and occasional control-board glitches. Less frequent triggers include misadjusted limits or a stuck door that prevents safety checks from passing.
Common causes include misaligned sensors and wiring issues; a few other times it’s a board glitch.
How much does a professional repair cost for 4-2?
Professional repairs typically involve a service call plus parts and labor. Expect a broad range depending on location and parts; a sensor realignment or wiring fix is usually on the lower end, while board replacement can be higher.
Costs vary, but sensor work and wiring fixes are usually cheaper than board replacements.
Is this issue safety-critical?
Yes. Until the fault is cleared, the door may not reverse properly or could close unexpectedly, posing injury risk. Do not operate the door if you notice any sensor issues.
Yes, it can be safety critical—stop and fix the fault before using the door.
Watch Video
Top Takeaways
- Address 4-2 with a structured diagnostic approach
- Sensor misalignment is the most common trigger
- Follow a safe DIY sequence before calling a pro
- If unresolved, trust professional service and document findings