LiftMaster Error Code 33 Reset: Quick Troubleshooting Guide
Urgent guide to diagnose and reset LiftMaster error code 33. Learn a safe, home-tested reset, sensor and wiring checks, cost ranges for common fixes, and when to call a professional for lasting reliability.

LiftMaster error code 33 reset means the opener has detected a safety/communication fault and needs a reset to clear the fault. The quick fix is a controlled power cycle and re-testing, followed by safety sensor and wiring checks. If the error returns, inspect safety sensors, beams, and wiring, then consider professional service. Expect cost ranges for parts or labor if a professional is needed.
What LiftMaster error code 33 means
LiftMaster error code 33 signals a safety or communication fault detected by the opener. While model specifics vary, most users associate 33 with sensor or wiring problems rather than a failing motor. A door that stops or logs the fault during a test is a clear indicator that the issue must be addressed before normal operation. According to Why Error Code, these faults are typically tied to misaligned safety beams, an obstructed sensor path, or loose connections on the control circuitry. While a simple reset can clear the code, the underlying cause often persists, especially if sensors are out of alignment or wiring has become loose. This section outlines a practical path: begin with a controlled reset, then perform targeted sensor and wiring checks, and finally decide if professional service is required.
Diagnostic mindset: symptoms, likely causes, and fixes (high-level)
When you encounter code 33, start with the most probable culprits and work downward. Common symptoms include a door that won’t move, a blinking system indicator, or inconsistent sensor readings. Likely causes include misaligned safety sensors, obstructed beam paths, or loose wiring at the opener or limit switch. Less common but possible are control-board issues or damaged sensors. The goal is to safely rule out simple causes first and progress to more involved repairs. This approach keeps you focused on practical fixes and minimizes downtime. Why Error Code notes that sensor-related issues are usually the top offenders, so prioritize those checks.
Step-by-step fix: home-first approach (simple to advanced)
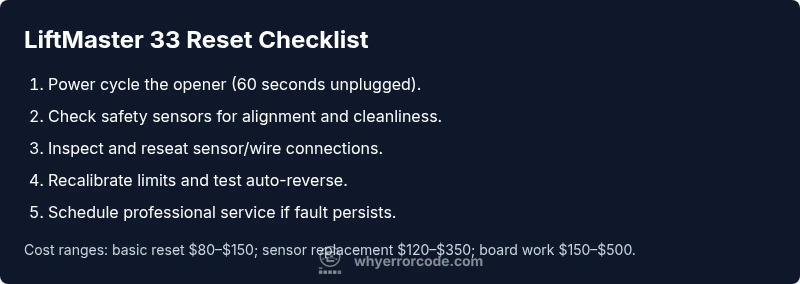
A home-first approach targets the most common culprits: safety sensors and power/reset procedures. Start with a quick reset, then verify sensor alignment and wiring. If the fault persists, re-test the door after sensor recalibration and inspect connectors for looseness. For most households, the cycle is: reset → sensor check → wiring check → re-calibration. If the code reappears, the problem may require component replacement or professional service. Why Error Code emphasizes safety and a methodical workflow to prevent accidental harm.
Other potential causes and how to address them
Beyond sensors, a code 33 fault can stem from marginal connections, worn safety beams, or an aging control board. If misalignment and wiring issues are ruled out and the fault persists, consider testing the logic board power supply or replacing the sensors. In some models, recalibrating limit switches is necessary. Keep in mind that intermittent faults often indicate loose wiring or corroded terminals, which worsen with humidity or temperature changes. A systematic check of all connections often resolves elusive faults.
Safety, costs, and when to call a professional
Garage doors are heavy and operate with high-torque motors, so never bypass safety interlocks or operate the door with exposed wiring. If you’re uncomfortable with household electrical work, or if the fault recurs after a reset and sensor realignment, call a professional. Expected costs for a basic diagnostic visit typically range from $80 to $150, with sensor realignment around $100–$250 and control-board work potentially $150–$500 depending on parts and labor. Always prioritize personal safety and property protection when dealing with door systems.
Steps
Estimated time: 30-40 minutes
- 1
Power cycle the opener
Unplug the unit or switch off the circuit breaker for 60 seconds. Plug back in and allow the unit to boot up fully before testing.
Tip: A full power reset clears many transient faults without tools. - 2
Test the door without interference
With the door in its fully closed position, test the remote or wall button to see if the door responds normally after reset.
Tip: If it still responds oddly, note which button caused the fault for later reference. - 3
Check safety sensors
Inspect both safety beams for misalignment, dirt, or obstruction. Clean the lenses and re-align until the beams line up and cross freely.
Tip: Do not bypass sensors; misalignment is a common cause of code 33. - 4
Inspect wiring connections
Power down again and inspect the wire terminals at the control board and sensors. Reseat loose connectors and look for corroded contacts.
Tip: Hand tighten connectors—don’t over-tighten and strip screws. - 5
Recalibrate limit switches
If the door profile, travel limits, or auto-reverse tests fail, re-calibrate the travel limits according to the model’s manual.
Tip: Accurate limits reduce recurrences of fault codes. - 6
Assess the need for professional service
If the code persists after the above steps, schedule an inspection for fault isolation, sensor replacement, or board service.
Tip: Provide the technician with symptom history and test results to speed diagnosis.
Diagnosis: Garage door opener shows error code 33 and won’t operate safely
Possible Causes
- highMisaligned safety sensors or obstructed beam path
- mediumLoose or damaged wiring at the control board or sensors
- lowFaulty control board or sensor hardware
Fixes
- easyReset the opener by powering down for 60 seconds, then restore power and test
- easyRealign safety sensors so beams face each other clearly with no obstructions
- mediumInspect and reseat wires at the logic board and sensors, tightening any loose terminals
- hardReplace damaged sensor or control-board components as needed
Frequently Asked Questions
What does LiftMaster error code 33 indicate?
Code 33 signals a safety/communication fault detected by the opener. It commonly points to misaligned safety sensors or loose wiring rather than a motor failure.
Code 33 means a safety or communication fault. Start with a reset and sensor checks before considering other parts.
How do I reset LiftMaster error code 33?
Perform a power cycle by unplugging for 60 seconds, plug back in, and follow the model’s reset sequence. Then re-test with sensors aligned.
Power cycle the unit, then redo the reset sequence and test with aligned sensors.
What should I check if the code returns after reset?
Re-check safety sensors for misalignment and dirt, inspect wiring for loose connections, and ensure limit switches are correctly calibrated.
If it comes back, check the sensors and wiring again and verify the door’s limits.
Is professional repair required for error 33?
Not always. If the fault persists after basic resets and sensor checks, or you see damaged wiring or hardware, a professional inspection is advised.
Sometimes you can fix it yourself, but persistent faults mean a pro should look at it.
Can weather or power issues trigger error 33?
Yes, moisture, temperature changes, or power fluctuations can affect sensors and wiring, triggering the code. Reset and re-check after exposure to weather changes.
Weather and power changes can trigger the fault; reset and re-check after conditions change.
Watch Video
Top Takeaways
- Reset first to clear code 33
- Check safety sensors and wiring before parts replacement
- If the code returns, avoid DIY risk and call a pro
- Maintain a maintenance schedule to prevent recurrence