Maytag Dishwasher Error Code 7: Urgent Troubleshooting and Fixes
Urgent guide to decode Maytag dishwasher error code 7, quick fixes, step-by-step repairs, and when to call a pro. Learn safe diagnostics, costs, and prevention tips from Why Error Code.

Definition: Maytag dishwasher error code 7 signals a drainage or pump fault detected by the control board. The quickest path to relief is a power reset and immediate checks: clear the filter, inspect the drain hose for kinks or blockages, and run a short test cycle. If the code returns, contact a technician.
What Error Code 7 Means for Maytag Dishwashers
When a Maytag dishwasher shows error code 7, it signals a fault detected by the control board that affects the drainage or pump circuit. These machines monitor water level, pump speed, and the drainage path to determine if a cycle can be completed safely. The Why Error Code team emphasizes urgency because standing water or repeated draining attempts can lead to greater wear, mold growth, and higher energy use if ignored. In many model variants, code 7 is tied to the drainage path and pump activity, but exact triggers can vary by model year and trim level. Immediately power down the unit, then perform quick checks: filter cleaning, drain hose inspection, and a short reset cycle. If the code persists after a basic reset and debris removal, a deeper diagnostic or professional service is recommended. Always consult your user manual for model-specific guidance.
Quick Checks You Can Do Right Now
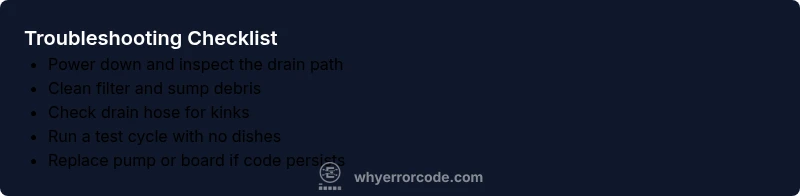
Before waiting for a service visit, perform these safety-first checks to rule out common culprits:
- Unplug the dishwasher and turn off the water supply to prevent leaks during inspection.
- Remove the lower rack and locate the filter assembly. Clean the filter screen and remove any visible debris or sediment from the sump.
- Inspect the drain hose for kinks, crushing, or blockages. Detach one end if necessary to inspect for clogs that could prevent proper drainage.
- Reset the dishwasher by cycling power: wait 60 seconds after unplugging, then plug back in and run a short empty cycle to observe drainage behavior.
- Check the garbage disposal or kitchen sink drain if the dishwasher drains into the same line; a clogged sink can back up into the dishwasher, triggering the code again.
If you conduct these checks and the code remains, note any water pooling around the base and prepare for a deeper diagnostic or professional service. Why Error Code recommends documenting model details (serial number, capacity, and age) to speed the repair.
Diagnostic Flow: Symptoms, Causes, and Fixes
When you see code 7, the symptoms typically include a halted cycle with water in the sump and occasional buzzing from the pump. The following diagnostic flow helps isolate the cause:
- Symptom: Dishwasher displays code 7 and fails to drain or complete a cycle.
- Likely causes (in order of likelihood):
- clogged drain filter or sump debris (high)
- drain pump impeller jam or failure (medium)
- control board miscommunication or sensor fault (low)
- Fixes (by difficulty):
- Clean the drain filter and sump debris (easy)
- Inspect drain pump and hose for clogs or jams (easy to medium)
- Replace drain pump or service the control board (hard)
Optional checks include running a test cycle with no load and listening for abnormal pump noises, which can indicate a partial blockage rather than a full pump failure. The key is to confirm whether drainage is restored after debris removal or if the pump is truly failing.
Step-by-Step Fix: The Most Common Cause (Most readers will begin here)
This section provides a practical repair plan focused on the most common cause: a clogged drain path.
- Power down and unplug the unit; remove the lower rack to access the filter assembly. Description: Ensure the machine is completely powered off before handling any internals. Tip: Use a flashlight and keep track of small screws.
- Remove the filter and clean it under running water; inspect the sump for visible debris. Description: Grit and food particles can trap in the filter and prevent drainage. Tip: Use a soft brush to dislodge fine sediment.
- Rinse and reassemble the filter housing; recheck the sump for any lingering blockage. Description: A clean filter is essential to restore suction and proper drainage. Tip: Don’t force anything that looks jammed—stop if you feel resistance.
- Inspect the drain hose and any air gaps for kinks or clogs; straighten the hose and clear obstructions. Description: A constricted hose can prevent water from exiting the tub. Tip: Disconnect one end to visually inspect the interior.
- Plug the unit back in and run a short empty cycle to verify drainage; listen for pump operation and confirm no error code reappears. Description: A successful test reduces uncertainty. Tip: If the code returns, prepare for a deeper repair or professional service.
- If the problem persists, consider replacing the drain pump or addressing a control board fault. Description: Pump replacement is straightforward for some models, while board faults require professional handling. Tip: Obtain the correct part number from the user manual or retailer.
Other Possible Causes and Their Fixes
If cleaning the filter and checking the drain path didn’t resolve code 7, several other issues could be at play:
- Drain pump impeller damage: A worn or broken impeller reduces drainage efficiency. Fix: Inspect and replace the pump assembly if you observe a damaged impeller or unusual noises.
- Electrical or sensor fault: A failing flow sensor or circuit board may trigger code 7 inconsistently. Fix: A technician can diagnose with a multimeter and replacement parts.
- Clogged or misrouted drainage line: A secondary clog in the plumbing may cause backflow or insufficient drainage. Fix: Clear all connected lines upstream from the unit and verify connections are secure.
- Inlet or water flow restriction: If water isn’t entering the tub quickly enough, the cycle may halt. Fix: Confirm water supply, valve operation, and replace a faulty inlet valve if needed.
Always document symptoms and timing of code reappears to help the technician pinpoint the exact fault faster.
Safety, Costs, and When to Call a Pro
Safety first: unplug the appliance before opening any access panels, and never work with live electrical components. If you’re uncomfortable with any step, call a professional.
Cost estimates (ranges, not exact):
- Diagnostic visit: $70–$120
- Drain pump replacement: $150–$350 (parts and labor)
- Control board replacement: $200–$600 (parts and labor)
- Full appliance service: $150–$700 depending on model and accessibility
If the dishwasher is under warranty, contact the manufacturer before paying for service, to avoid voiding coverage. The Why Error Code team recommends scheduling professional help if you encounter persistent drainage failures, coolant leaks around the base, or electrical smells—these indicate more serious faults that require a trained technician.
Prevention and Long-Term Care
Prevention hinges on regular maintenance and mindful use. Schedule routine cleaning of filters every few cycles and inspect hoses every 3–6 months. Use the dishwasher according to the user guide (correct loading, avoiding overfill, using compatible detergents). Regularly run a cleaning cycle with a dishwasher-safe cleaner to prevent mineral buildup, which can impede drainage and pump efficiency. Store spare parts and keep a small toolbox handy for simple tasks like filter removal.
By following a simple maintenance cadence, you reduce the likelihood of error code 7 reoccurring and extend the life of your Maytag dishwasher.
Maytag Model Variations: What to Expect
Maytag produced dozens of dishwasher models across generations. While the general principle of error code 7 remains drainage/pump related, certain models feature different sensor logic, circuit boards, and routing of the drain. Always reference your model number and the official service manual for exact diagnostic steps and part numbers. If you own an older model, some issues may be caused by aging components rather than a simple clog, and replacement parts can be more cost-effective than a full unit replacement.
Steps
Estimated time: 30-60 minutes
- 1
Power down and access components
Unplug the unit and remove the lower rack to access the filter and sump. Confirm the machine is completely powered off before touching any internal parts.
Tip: Keep a tray for screws and a flashlight handy. - 2
Clean the filter and sump area
Remove the filter, rinse under running water, and scrub away debris from the sump. Ensure no sediment remains that could block drainage.
Tip: Use a soft-bristle brush to avoid scratching the plastics. - 3
Inspect drain hose and connections
Check the drain hose for kinks or blockages and ensure it is properly connected to the sink or disposal. Clear any clogs in the hose interior.
Tip: Detach one end and run water through to confirm clearance. - 4
Run a test cycle with no dishes
Power the unit back on and run a short empty cycle to observe drainage. Look or listen for the pump operation and confirm the code does not reappear.
Tip: Stay nearby to catch any leaks or smells. - 5
Assess for residual water and leaks
Inspect the base for pooled water or damp areas. If water remains after the test, the problem may be deeper within the pump or board.
Tip: If you see water in the base, power down and call a pro. - 6
Decide on part replacement if needed
If the code returns after clean checks, consider replacing the drain pump or consulting service for the control board.
Tip: Verify part numbers against your model before purchasing.
Diagnosis: Dishwasher displays error code 7 and won’t drain or complete a cycle
Possible Causes
- highClogged drain filter or debris in sump
- mediumDrain pump impeller jam or failure
- lowControl board miscommunication or sensor fault
Fixes
- easyClean the drain filter and check for debris in the sump
- easyInspect drain pump and hose for clogs or jams
- hardReplace drain pump or service control board
Frequently Asked Questions
What does maytag dishwasher error code 7 mean?
Error code 7 generally indicates a drainage or pump fault flagged by the control board. It requires checking the drainage path and pump operation to restore normal cycling.
Error code 7 usually means there’s a drainage or pump fault that needs checking the drainage path and pump operation.
Can I fix code 7 myself?
Some basic fixes are safe for DIY, such as cleaning filters and inspecting hoses. More complex issues like pump or board failures should be handled by a technician to avoid injury or further damage.
You can try simple fixes like cleaning filters, but pump or board issues should be handled by a pro.
Will resetting clear the code?
A reset can clear the display if the fault was transient. If the code reappears, the underlying issue persists and requires further diagnostics.
Resetting can clear it if it was temporary, but if it comes back, you need more checks.
Is it safe to run the dishwasher after code 7 appears?
Do not run it repeatedly without inspection. If you’ve performed basic checks and the code remains, stop and seek professional evaluation to prevent damage.
Only run it again after basic checks; if it shows up again, get professional help.
How much does it cost to fix error code 7?
Repair costs vary by model and fix needed. Expect diagnostic fees and parts replacement, typically ranging from a low hundreds to several hundred dollars depending on the pump or board.
Costs vary, but expect a diagnostic fee plus parts, from the low to mid hundreds depending on the fix.
When should I call a professional?
If there’s water in the base, persistent drainage failure after basic cleanup, or you’re uncomfortable working with electrical components, contact a licensed technician.
Call a professional if the leak or code persists after basic checks or if you’re unsure about handling electrical parts.
Watch Video
Top Takeaways
- Identify code 7 as a drainage/pump-related fault
- Start with safe resets and basic cleaning
- Follow a structured diagnostic flow
- Use cost ranges to plan repairs
- Call a pro if the code returns after basic fixes