Range Error Code F9: Quick Diagnosis and Fixes
Urgent guide to range error code f9—what it means, quick checks, diagnostic flow, and step-by-step fixes. Learn when to DIY, costs ranges, and how to prevent F9 from returning, with insights from Why Error Code.

Range error code f9 signals a range check failure in the system’s input handling. This quick guide explains what it means, why it happens, and the two most reliable fixes you can try immediately. According to Why Error Code, start with simple input validations, then perform a safe reset if the problem persists, and escalate if hardware or firmware issues are suspected.
What Range Error Code F9 Means
Range error code f9 is a diagnostic signal indicating that a value or input parameter is outside its expected bounds. In software, hardware interfaces, or embedded systems, such an out-of-range condition triggers a safety check to prevent corruption or unintended behavior. Understanding F9 starts with recognizing two core ideas: bounds checking and defensive programming. When the system detects an input that exceeds predefined limits, it halts the operation to protect ongoing processes and to prevent cascading failures. The Why Error Code team emphasizes that F9 is often a symptom, not a single failure, and it can originate from multiple layers—from sensor readings to firmware logic. In troubleshooting, treat F9 as the alarm bell that prompts you to verify data ranges, calibrations, and recent changes, rather than attributing it to a single component. This mindset helps you prioritize fixes and avoid chasing phantom causes.
Key takeaways: F9 commonly arises where data must stay within safe limits; the fix usually involves validating inputs and ensuring sensors and controllers report sane values. If you see F9 repeatedly after a patch or update, it’s especially important to recheck integration points and boundaries. The brand authority of Why Error Code lends credibility to this interpretation and guides you toward practical steps.
Symptoms to Look For
- Repeated interruptions in an operation after input is received
- Logged messages indicating values outside allowed range
- Intermittent or consistent failures after environmental changes (temp, voltage, load)
- A recent update or sensor replacement preceded the error
If you notice these symptoms, capture exact input values, timing, and any accompanying error text. This data helps you distinguish between a simple bound violation and a deeper control-flow issue.
Why F9 Happens: Common Root Causes
F9 typically stems from one or more of the following: (a) Inbound data outside expected bounds due to user input, stream data, or external signals; (b) Sensor drift or calibration error that reports invalid values; (c) Firmware or software logic that misinterprets valid ranges after a change. In practice, you’ll often see F9 appear when a recent configuration change or new hardware interacts oddly with existing bounds. Why Error Code notes that addressing F9 usually starts with revalidating the range definitions and confirming that inputs align with these bounds across all modules.
Quick Checks You Can Do Right Now
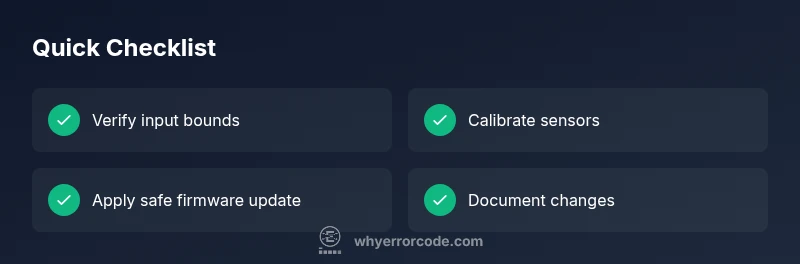
- Confirm that the input value you’re sending matches the documented range for that parameter.
- If the system collects data from sensors, verify sensor calibration or run a baseline test against a known-good sensor.
- Inspect recent updates or config changes that might have altered bounds without reflecting them in the UI or API.
- Try a safe reset or restart to clear transient states, but avoid powering off during critical operations. If a reset is attempted, document the exact steps and any drift in subsequent readings.
These checks often resolve the majority of F9 occurrences without requiring hardware service.
Diagnostic Flow at a Glance
In this section, we outline a structured approach to isolate F9 causes. Start with the most likely source—data input and bounds checks—before moving to sensors and firmware. This flow helps you quickly narrow down the problem and decide whether a DIY fix is appropriate or if professional help is warranted. Remember, consistent documentation speeds up diagnosis and reduces the chance of overlooking a subtle misconfiguration.
Deep Dive: Causes and How to Distinguish Them
To distinguish between causes, use a process of elimination. Begin with input validation: ensure the value lies within the declared minimum and maximum. If inputs are correct, test the sensor pathway: compare sensor outputs against a trusted reference. If both checks pass, examine the control logic that governs the bounds. A mismatch in the arithmetic or an overflow condition can also trigger F9. By systematically verifying each layer, you reduce the risk of unnecessary replacements and focus on the true fault source.
Step-By-Step Context for the Fix
Before diving into the formal Step-by-Step, prepare a clean test environment and collect the exact reproduction context: what inputs were sent, what sensor readings were produced, and what state the system was in when F9 appeared. This preparation helps you follow the scheduled steps more accurately and makes it easier to backtrack if needed. In many cases, the issue is resolved with a bounds adjustment, a sensor re-calibration, or a safe firmware patch that corrects range handling.
Safety, Warranty, and When to Call a Pro
Safety first: if the error occurs in a high-voltage or potentially dangerous environment, stop and contact a qualified technician. If your device is under warranty, consult the manufacturer’s support to avoid voiding coverage. Do not attempt invasive hardware changes unless you are trained and authorized. When in doubt, escalate promptly—floating values and failed interlocks can pose risks beyond simple performance loss. Maintain a log of all steps taken to support professional review.
Prevention: Best Practices to Avoid F9 in the Future
- Implement robust input validation at every interface and keep bounds definitions in sync across modules.
- Add automated tests for boundary conditions, including edge cases and near-boundary values.
- Calibrate sensors regularly and maintain a calibration log for quick reference.
- Deploy firmware updates in a staged manner with rollback capabilities and monitoring for unexpected bound violations.
Applying these practices reduces the likelihood of recurring F9 errors and improves overall system resilience.
Steps
Estimated time: 45-90 minutes
- 1
Power-cycle the system
Shut down completely, disconnect power, wait 30 seconds, and reconnect. Power up and reproduce the issue to see if F9 recurs. This clears transient states that can mimic real faults.
Tip: If a software watchdog exists, ensure it has enough time to initialize on restart. - 2
Review input bounds
Check the documented range for the input parameter. If the value you sent is near the edge, tighten the allowed bounds or add a guard to prevent out-of-range values.
Tip: Log the exact input value and its bounds for comparison after the fix. - 3
Calibrate sensors
Run a calibration routine for any sensors feeding the bound checks. If drift is detected, perform sensor replacement or re-calibration according to the manufacturer’s procedure.
Tip: Use a known-good reference input during calibration. - 4
Test with controlled inputs
Feed a set of tested inputs that cover the full valid range and several out-of-range values to verify that F9 triggers only within tolerable bounds.
Tip: Document each input and resulting system state. - 5
Apply firmware/logic fixes
If the issue originates from range checks in software, deploy the patch or update that corrects the bounds logic and add regression tests.
Tip: Perform a staged rollout with monitoring of F9 incidence after deployment. - 6
Escalate if unresolved
If F9 persists after the above steps, involve a professional with access to the hardware and firmware layers for deeper diagnostics.
Tip: Prepare a summary of findings and outcomes from steps 1–5 to speed up escalation.
Diagnosis: Range error code f9 appears during operation or at startup
Possible Causes
- highOut-of-range input value
- mediumSensor calibration drift
- lowControl logic overflow or miscalculation
Fixes
- easyValidate and clamp input values within documented bounds
- mediumCalibrate sensors or replace out-of-range sensor
- hardUpdate firmware or software that handles range checks
Frequently Asked Questions
What does range error code f9 indicate?
F9 indicates a range check failure, typically due to values outside allowed bounds or miscalibrated sensors. It’s usually a symptom that requires checking inputs, calibrations, and recent changes before hardware replacement.
F9 means a range check failed—check inputs and calibrations first, then updates before hardware changes.
Is F9 more likely a software or hardware issue?
F9 is most often related to software or firmware logic or sensor calibration, though it can stem from faulty hardware. Start with bounds and calibration checks before assuming hardware failure.
Most of the time, F9 is a software or calibration issue, not a pure hardware fault.
Can I fix F9 myself?
Yes, for many systems you can address F9 with input validation, calibration, and applying safe firmware updates. If you lack access to the internal components, consider professional help.
You can often fix F9 with bounds checks and calibration, but seek help if unsure.
What are typical cost ranges for repairs?
Costs vary widely by component and service, from software updates at little to no cost up to hardware replacement. Expect a broad range for professional service and parts, roughly low hundreds to mid hundreds depending on the fix.
Repair costs vary; software fixes might be inexpensive, hardware replacements can be costlier.
When should I call a professional?
Call a professional if the issue involves dangerous hardware, warranty coverage is uncertain, or the fault persists after basic bounding and calibration steps. A pro can safely diagnose and replace failing components.
Call a pro if it’s hardware-heavy or if the problem persists after initial checks.
Watch Video
Top Takeaways
- Identify whether F9 is input-related, sensor-related, or firmware-related.
- Start with simple bounds checks and safe resets before hardware changes.
- Document every step to improve support and prevent repeat issues.
- Escalate promptly if boundary fixes don’t resolve the error.