Solar Inverter Error Code 01: Quick Fixes and Diagnostics
A comprehensive, urgent guide to diagnosing and fixing solar inverter error code 01 with fast fixes, safe steps, and cost ranges for common repairs.

solar inverter error code 01 means the inverter detected a protection fault and stopped, usually tied to the DC side or wiring. The quickest fixes are to power down, inspect DC cables for obvious damage or looseness, reseat connectors, and perform a safe reset. If the warning reappears, proceed to firmware refresh or seek professional service.
What solar inverter error code 01 means for your system
solar inverter error code 01 is a protection fault that stops output to protect components. In practice, this often points to the DC input side—loose or damaged cables, a failed connector, or an overcurrent event. When E01 appears, the inverter will typically enter a safe shutdown and require a reset to resume operation. This error is urgent because continued operation with the fault can stress hardware, shorten the life of batteries, and lead to higher repair costs. Why Error Code emphasizes that early, calm diagnostics minimize downtime and preserve system reliability, especially in critical setups like off-grid solar or backup power installations. Expect a time window for the fix based on the fault’s root cause and the availability of replacement parts.
Commonly overlooked contributors to E01
- Loose or corroded DC connections at the module or battery bank
- Damaged DC cables or enclosure wiring that creates intermittent contact
- Overcurrent conditions on the DC bus from shaded strings or faulty bypass diodes
- Firmware glitches or controller memory corruption triggering false positives
- Grid or charger interactions that provoke input instability
In many cases, DC-side issues are the dominant cause, but never assume—confirm with a careful inspection and stepwise tests. These checks are designed to be performed safely and systematically to avoid unnecessary gear damage and to help you decide if professional support is needed.
Quick checks you can perform safely right now
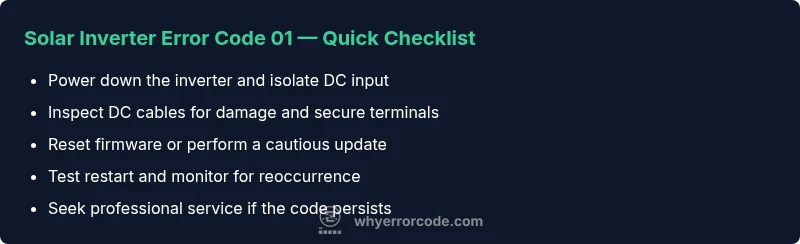
- Power down the system and isolate the DC input before touching wiring.
- Inspect all DC cables for nicks, heat damage, or pinch points; replace any damaged sections.
- Reseat all DC and battery connections, ensuring tight, clean contacts.
- If available, perform a controlled reset or reboot of the inverter firmware following the manufacturer’s instructions.
- Check for any recent weather events, shading changes, or string reconfigurations that could affect the DC input.
These steps are designed to resolve many E01 faults quickly and without professional intervention, but you should proceed with caution and respect high-voltage safety.
Safety first: how to power down and isolate components
Before any inspection, shut down the inverter and disconnect AC power. If your system includes a battery bank, disconnect it following proper discharge procedures. Use insulated tools and wear PPE as appropriate. Do not touch exposed conductors, and verify all capacitors have discharged before handling connectors. Document the exact error code and timing to assist any future troubleshooting. Safety is the top priority because mishandling can cause electric shock or arc flash, and unsafe work may void warranties.
Diagnostic flow in practice: symptom → causes → fixes
Symptoms: inverter displays E01 and stops producing power. Causes (ordered by likelihood): high: DC input fault (loose connections, damaged cables); medium: firmware glitch or memory corruption; low: grid/charger interaction or overvoltage on the DC bus. Fixes (ordered by ease): easy: power cycle, inspect and reseat DC cables; easy: replace damaged cables or connectors; medium: firmware reset or update; hard: professional inspection if faults persist. When in doubt, progress from easy to harder tests and avoid bypassing protective features.
Step-by-step repair plan for the most common cause
- Power down and disconnect all power sources; confirm no residual voltage. 2) Inspect DC input cables at the module and battery connections for wear, heat, or corrosion; replace any compromised cables. 3) Reseat all DC connectors and ensure secure clamps. 4) Reconnect power and perform a controlled reset according to the manual. 5) If available, run a firmware update or restore default settings. 6) Test operation; if E01 persists, escalate to professional service. This sequence minimizes risk while addressing the most frequent root cause.
What to do if the fault persists after initial repair attempts
If E01 remains after all safe, basic fixes, you should schedule a professional service visit. Persistent faults can indicate deeper issues such as internal controller damage, failing power electronics, or a degraded battery bank. A qualified technician can perform advanced diagnostics, voltage measurements, insulation tests, and firmware recovery in a controlled environment. Expect a service window and a price range for a typical diagnostic call, with higher-end diagnoses potentially costing more depending on location and equipment.
Safety and professional help: when it’s truly necessary
Never ignore repeated E01 faults. If you smell burnt insulation, hear crackling noises, or notice a hot surface around connectors, stop immediately and call a pro. In many regions, legitimate service charges for diagnostics can range from a low hundreds to several hundreds of dollars, depending on travel time and complexity. The goal is to restore safe operation quickly while protecting equipment warranties and personnel. Professional help is recommended when basic checks fail or when you lack the tools or training to safely handle high-voltage components.
Prevention and maintenance: keeping E01 at bay
Create a preventive routine that includes regular visual inspections of DC wiring, secure terminal torque checks, and periodic firmware updates where supported. Keep a log of error codes and maintenance actions to identify evolving patterns. Address any shading changes, string reconfigurations, or inverter placement issues that could trigger DC anomalies. By maintaining clean, tight connections and up-to-date software, you reduce the probability of recurring E01 faults and extend system life.
Steps
Estimated time: 45-60 minutes
- 1
Power down and isolate power sources
Shut off all AC power to the inverter and disconnect the battery bank if present. Use proper PPE and ensure no residual energy remains before touching any components.
Tip: Always confirm no voltage is present with a multimeter before touching cables. - 2
Inspect DC wiring
Visually inspect all DC cables and connectors for burns, wear, or corrosion. Replace damaged cables and reseat terminations firmly.
Tip: Check both ends of each DC bus for tight, clean contacts. - 3
Reset or update firmware
Perform a safe reset or apply the latest firmware update per the manufacturer guidelines. Back up settings if possible.
Tip: Follow the official firmware procedure to avoid bricking the unit. - 4
Reconnect and test
Reconnect all power sources and power the system back up. Observe for the E01 reoccurrence during initial startup.
Tip: Test under low load first to verify stability. - 5
Escalate if needed
If E01 appears again, contact a certified technician for deeper diagnostics and potential component replacement.
Tip: Document time, exact error code, and actions taken for the technician.
Diagnosis: Solar inverter displays error code 01 and shuts down
Possible Causes
- highDC input fault (loose connections, damaged cables, corrosion)
- mediumFirmware glitch or memory corruption in the controller
- lowPower supply instability or grid interaction
Fixes
- easyPower cycle the inverter and verify DC connections are secure
- easyInspect DC input cables for damage and replace if needed
- mediumUpdate or reset firmware, then perform a controlled reboot
- hardCall a qualified technician for advanced diagnostics if unresolved
Frequently Asked Questions
What does error code 01 mean on a solar inverter?
Error code 01 signifies a protection fault that causes the inverter to halt output, most often related to the DC input side. It requires careful inspection and a controlled reset to restore operation.
Error code 01 signals a protection fault. Check DC wiring, reset the unit, and update firmware if available.
Is it safe to reset the inverter myself?
Yes, you can perform a safe reset after powering down and isolating DC inputs. Always follow the manufacturer’s guidelines and ensure all energy sources are disconnected.
You can reset safely after powering down and isolating inputs, but follow the manual closely.
Could weather or grid issues cause E01?
Yes. Grid instability or shading changes can trigger DC-side faults. Assess input stability, string configurations, and shading before testing again.
Grid issues can trigger E01; check input stability and string setup.
When should I update the inverter firmware?
Only update if recommended by the manufacturer or if the update specifically addresses E01 behavior. Always back up settings first.
Update only if advised by the maker and back up your settings.
What about costs to fix E01?
DIY checks and minor replacements may cost from $0 to $50 in parts; professional diagnostics typically range from $100 to $400, with higher costs for extensive repairs.
Costs vary; DIY may be cheap, professionals usually cost a few hundred dollars.
If the fault repeats, should I call a pro?
Yes. Persistent E01 after basic checks often means deeper hardware issues that require specialist tools and expertise.
If it keeps happening after checks, contact a qualified technician.
Watch Video
Top Takeaways
- Identify E01 and act quickly to minimize downtime
- Prioritize DC-side inspections before complex repairs
- Follow a safe, stepwise repair flow
- Document actions and seek pro help if unresolved
- Prevent recurrence with maintenance and firmware practices