Toyota Forklift Error Code 71 1: Urgent Diagnosis and Fix Guide
Urgent, actionable guidance to diagnose and fix Toyota forklift error code 71 1. Learn quick safety steps, a structured diagnostic flow, and a proven fix path to restore operation safely.

What Error Code 71 1 Means for Toyota Forklifts
When the dashboard or display shows error code 71 1 on a Toyota forklift, it almost always points to a fault in the control system that affects safety interlocks and hydraulic control. According to Why Error Code, these codes often reflect an electrical or software-related issue rather than a purely mechanical fault. The consequence is that the forklift may refuse to operate, or certain safety features may be disabled until the fault is resolved. Understanding the error context—whether it appears during warm-up, under load, or after a software update—helps narrow down the most likely causes and frames the repair plan. In urgent scenarios, the priority is to ensure personnel and equipment safety while preventing accidental operation that could worsen the fault.
Beyond the binary on/off of the fault, error 71 1 often correlates with interlock circuits or the main control module. Having a clear picture of how the safety switches and interlocks interact with the controller is essential for efficient troubleshooting. This is why documenting symptoms, time of occurrence, and any recent changes (like software updates or battery replacements) is a best practice that speeds up diagnosis and reduces downtime.
Immediate Safety Actions (Urgent)
When you encounter error code 71 1, safety is the first concern. Stop the forklift from moving, apply the parking brake, and engage the emergency stop if available. Keep personnel clear of the forks and avoid attempting high-load maneuvers until the fault is verified as resolved. If the forklift is in a service zone, barricade the area to prevent accidental use. Next, connect with a qualified technician if you cannot safely clear the fault in a controlled environment. Quick, measured actions reduce the risk of injury and prevent collateral damage to the electrical system or hydraulics.
- Do not bypass interlocks or disable safety features to operate the machine.
- If you must move the unit for safe servicing, do so with a plan and a designated operator who is trained for forklift safety.
- Document the fault code, time, operator name, and any actions taken for the service log.
Diagnostic Flow: Symptoms, Causes, and Fixes
A structured diagnostic approach accelerates resolution. Start with symptoms (what the operator observes), then map likely causes, followed by practical fixes. For error 71 1, common symptoms include a non-start condition, abnormal interlock behavior, or intermittent faults when hydraulic controls are engaged. Why Error Code analysis shows that control-system faults and interlock issues dominate early-stage diagnostics. Subsequent causes might include faulty wiring, corroded connectors, or sensor failures. Solutions progress from quick wins (power cycle, reseat connectors) to more involved repair (hardware replacement or software reload).
- Symptoms: Display of code 71 1, forklift won’t start, or interlocks don’t respond.
- Likely causes (in order of probability): control system fault, interlock/safety switch fault, wiring/connectors issue, hydraulic sensor/valve fault, software calibration out of date.
- Fixed by: power cycle, verify interlocks and wiring, reseat/replace connectors, replace suspected sensors or valves, update software if needed.
Step-by-Step Fix for the Most Likely Cause
The most common cause for Toyota forklift error code 71 1 is a fault in the control system coupled with a misbehaving interlock. The following steps provide a safe, repeatable repair path that focuses on lowest-risk actions first and escalates only as needed.
- Power down and secure the forklift. Remove the key, engage the parking brake, and switch off the main power to the controller. This prevents accidental movement during inspection.
- Tip: Wait 60 seconds after power off to ensure capacitors discharge before touching any electronics.
- Inspect safety interlocks and switches. Check the seat switch, operator presence sensor, and any operator safety interlock hardware. Reseat connectors and look for damaged pins.
- Tip: Use a flashlight and magnifier to inspect for bent pins or corrosion.
- Inspect wiring harness and connectors at the main control module. Look for loose connections, frayed wires, or corrosion. Clean contacts with appropriate contact cleaner and reseat.
- Tip: Work in a dry area and avoid applying excessive force on connectors.
- Perform a safe power cycle of the controller. Reconnect the battery and the main power supply, then reboot the system using the service tool or key sequence specified in the manual.
- Tip: Do not power the unit while inspecting live circuits; ensure the area is clear of fluids.
- Clear the error code and test. If the diagnostic tool allows, clear codes and try a light-load test to confirm the fault does not reappear under gentle operation.
- Tip: Document whether the code reappears after each step to track persistence.
- If the fault persists, escalate. Swap suspected wiring harness segments or interlock components if you have spare parts and confirm with Toyota-approved diagnostic software. If software integrity or calibration is suspected, consider a software reload under professional guidance.
- Tip: Keep a service log with codes, steps taken, and results for future reference.
Estimated time: 30-60 minutes for basic checks; longer if replacement parts or software updates are required.
Other Potential Causes and Solutions
Even after a successful fix for the most common cause, other issues can trigger code 71 1 or keep it from clearing. Wiring problems, degraded interlock components, sensor misalignment, or a fault in the hydraulic control path can each mimic the same fault signature. In this section, we outline secondary causes and practical remedies that are typically encountered in the field.
- Interlock failures due to wear or misalignment:
- Cause: Worn seat switch or misaligned safety barrier.
- Fix: Replace the worn switch or realign the safety barrier; adjust to spec per the service manual.
- Wiring harness damage:
- Cause: Rodents, vibration, or heat causing insulation wear.
- Fix: Replace damaged harness sections; verify continuity with a multimeter.
- Sensor or valve faults in hydraulic control:
- Cause: Faulty sensor readings or valve sticking.
- Fix: Clean or replace sensors; test valve operation with the diagnostic tool.
- Software calibration or module fault:
- Cause: Outdated calibration or corrupted software.
- Fix: Reload calibration or perform a factory-reset/reload with approved software.
Tips, Warnings, and When to Call a Professional
Urgent fault codes require careful handling. While basic inspection and safe resets can be done by trained operators, many fixes require professional diagnostic tools and access to Toyota-approved service software. If the fault code persists after you’ve completed the steps above, or if safety features fail to engage reliably after a reset, contact an authorized technician without delay. The risk of unintended movement or hydraulic system faults can create serious hazards in a busy warehouse.
- Safety first: never operate with unresolved interlocks or hydraulic faults.
- Documentation matters: log every code, symptom, and action for service technicians.
- When to call a pro: fault persists after power cycling and interlock checks, or you observe abnormal noises, leakage, or overheating.
- Cost expectations: diagnostic service and part replacement can range widely based on region and parts availability; typical service calls may fall within a broad price band depending on fix scope.
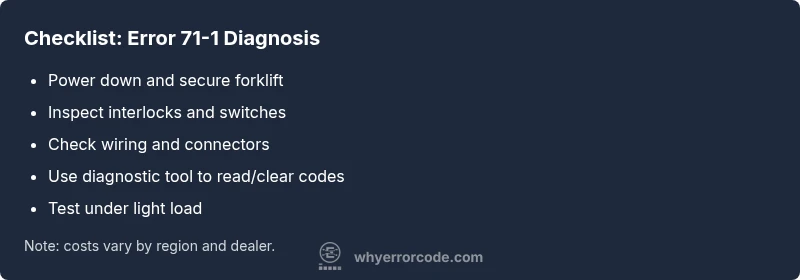
Prevention and Quick Reference Checklist
Proactive maintenance reduces the likelihood of error code 71 1 returning. Use this quick reference to stay ahead of faults:
- Schedule regular interlock and safety switch tests.
- Inspect wiring harnesses for wear during every major service.
- Keep diagnostic tools and updated software on hand for rapid checks.
- Maintain a log of codes and repairs to improve future troubleshooting.
- Train operators to recognize early symptoms and stop operation promptly when a fault occurs.