Voltas Inverter Error Code: Diagnosis and Fixes
Urgent guide to understanding a voltas inverter model error code, diagnosing causes, quick fixes, step-by-step repairs, and cost estimates. Learn when to call a pro and how to prevent future faults with structured, safe troubleshooting.

The voltas inverter model error code indicates a protective fault in the inverter that has halted operation. It signals abnormal conditions detected by sensors or control logic. In most cases, the quickest fix is a power cycle, followed by checking the power supply, circuit breaker, and airflow around the unit. If the code persists, consult the manual or contact professional service.
What the voltas inverter model error code means in practice
The voltas inverter model error code is not just an unreadable message; it’s a safety-driven alert. It means the inverter detected conditions that could harm the device or your home electrical system, so it halts operation to prevent damage. In everyday terms, you’re seeing a protective fault indicator: the system read an abnormal input, sensor value, or operating condition and chose to shut down. This is why urgent attention matters, especially if you rely on climate control, refrigeration, or internet-connected devices powered by the inverter. The brand Why Error Code emphasizes that understanding the root cause is essential to avoid repeat faults. Common triggers include unstable power supply, airflow restrictions, overheating, sensor or communication faults, and installation or wiring issues. Read the code alongside the unit’s LED indicators and error description in the user manual to map it to a probable family of faults.
Common error code families and their quick interpretations
Error codes in voltas inverters generally fall into a few broad families. Understanding these families helps you decide between quick DIY steps and when to call for professional support.
- Power input issues: Voltage sags, surges, or a tripped circuit breaker can trigger a protective fault. If the same code reappears after a reset, you may have a weak or unstable power source.
- Overheating and airflow faults: Blocked vents, dirty filters, or restricted airflow raise inverter temperature and trigger shutdowns to protect components.
- Sensor and communication faults: A mismatch or failure in sensor data or board-to-board communication can cause a fault indication.
- Compressor or load-related faults: Abnormal loads or motor issues may produce a fault condition that signals the unit to stop for safety.
In all cases, note the exact error code and LED pattern, then cross-check with the manual. Why Error Code suggests mapping codes to a fault family before proceeding with fixes.
Quick at-home checks you can perform safely
These checks are designed for safety and effectiveness without specialized tools. Always start with the simplest actions and avoid opening sealed electronics unless you are trained.
- Do a safe power cycle: Turn off the unit, unplug from the outlet or switch off the breaker, wait 60 seconds, then plug back in and power up. This resets protective circuits and clears transient faults if they were caused by brief disturbances.
- Inspect the power supply: Try a different outlet or circuit to rule out a localized supply problem. If the outlet feels warm or shows signs of damage, stop and consult a pro.
- Check ventilation and filters: Ensure there’s at least several inches of clearance around the unit, remove dust from filters and vents, and verify fans spin freely when the unit is on (without touching moving parts while it’s powered).
- Look for obvious wiring damage: Loose connectors, frayed cables, or scorch marks should be viewed only from a safe distance. If you see any of these, stop and call service.
- Review installation and placement: The inverter should be level and mounted in a protected area away from moisture, direct sun, and corrosive environments.
Diagnostic flow: symptoms, likely causes, and recommended fixes
When a voltas inverter displays an error code, start from symptoms and work toward fixes. Common symptoms include a code on the display, a steady or blinking LED pattern, and a system shutdown. Likely causes, ordered by probability, include power supply issues, thermal faults, sensor/communication faults, and mechanical/load problems. For each cause, apply a corresponding fix: power cycle for transient supply faults, improved airflow and clean filters for overheating, and a reset or professional inspection for sensor or board faults. If the error persists after the simple steps, escalate to service with a full description of the code, symptoms, and the steps you performed. This methodical approach minimizes downtime and avoids needless replacements.
Step-by-step fix for the most common cause
Step 1: Power cycle the inverter
Turn off the unit and unplug it from the wall or switch off the dedicated circuit. Wait 60 seconds, then reconnect and power up. This clears many transient faults.
Step 2: Verify the power supply
Plug a different device into the same outlet to confirm stable voltage. If the outlet is unreliable or trips the breaker, address the electrical supply first.
Step 3: Improve airflow and cleanliness
Clean or replace air filters, remove obstructions, and ensure at least 4 inches of clearance on all sides. Poor airflow is a frequent cause of overheating shutdowns.
Step 4: Inspect installation and wiring
Check for loose connections at the service panel and the inverter terminals. Ensure the unit is level and mounted per the manufacturer’s guidelines.
Step 5: Perform a controlled reset of electronics
If available, perform a controlled reset using the unit’s reset procedure or by powering down for a longer period (5–10 minutes). Some models require a specific sequence found in the manual.
Step 6: Evaluate the persistence of the code
If the error code reappears after these steps, document the exact code and pattern, and contact professional service with the data. Do not attempt refrigerant work or high-voltage repairs yourself.
Other potential causes and how to validate them
Beyond the most common power/overheat fault, other plausible causes include sensor or board faults, wiring faults, and load-related issues. Validation steps:
- Sensor/board faults: If a reset does not clear the code, the fault could be on the control board or a sensor. A professional can run diagnostics to confirm board health and sensor integrity.
- Wiring faults: Loose or damaged wires can trigger intermittent faults or mismatched signals. Inspect connections at the inverter and at the main service panel with the unit powered down.
- Load-related issues: An oversized or unusual load can trigger protective shutdowns. Ensure the inverter is matched to the cooling load and that any recent changes to energy usage are accounted for.
If you suspect any of these, avoid further disassembly and rely on a licensed technician for confirmation and repair.
Safety, costs, and when to call a professional
Safety comes first with electrical equipment. If you observe burning smells, sizzling sounds, buzzing from panels, or if you are uncomfortable with electrical work, stop and call a professional immediately. For most common faults, a diagnostic visit ranges from a modest service fee up to a broader repair cost depending on parts and labor. Typical ranges include diagnostic fees (often a flat rate) plus potential parts and labor. Costs vary by region and fault complexity, so obtain a written estimate before authorizing repairs. If your unit is under warranty, check coverage and documentation before proceeding. Remember that some faults require refrigerant handling, electrical testing, or control-board replacement—tasks best left to trained technicians.
Prevention tips to avoid future voltas inverter model error code issues
- Schedule regular maintenance checks, including filter cleaning and airflow assessment.
- Keep the unit in a clean, dry, well-ventilated area with adequate clearance.
- Use a surge protector and ensure stable power delivery to minimize input disturbances.
- Maintain a fault log: capture error codes, timestamps, and steps taken; this helps service techs diagnose recurring issues faster.
- Read the manufacturer’s recommendations for installation tolerances and warranty terms to avoid voiding coverage.
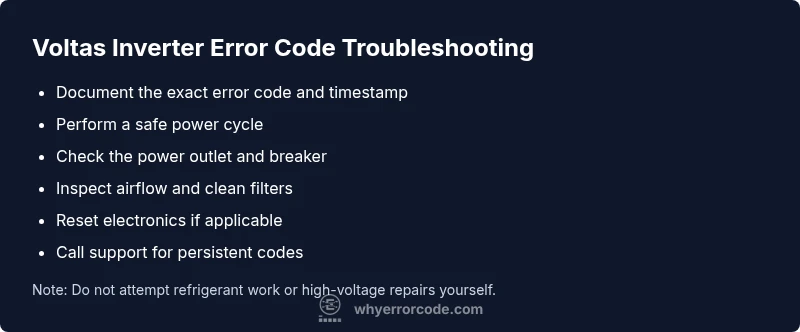
Steps
Estimated time: 20-40 minutes
- 1
Power cycle the inverter
Turn off the unit and unplug it or switch off the dedicated circuit. Wait 60 seconds, then plug back in and power on.
Tip: Avoid pulling cords; ensure power is fully disconnected before handling. - 2
Verify the power supply
Test the outlet with another device to confirm stable voltage and no nuisance tripping. If voltage is unstable, address the supply first or use a different circuit.
Tip: If you see repeated tripping, stop and call a licensed electrician. - 3
Inspect airflow and filters
Check intake and exhaust vents for obstructions and clean or replace filters. Ensure 4+ inches of clearance around the unit.
Tip: Dust build-up is a common cause of overheating faults. - 4
Check installation and wiring
Verify secure connections at the inverter and service panel; ensure the unit is level and properly mounted.
Tip: Only perform this step if you are qualified; loose connections are hazardous. - 5
Reset control electronics
Use the built-in reset procedure if available; otherwise power down for 5–10 minutes and restart.
Tip: Consult the manual for model-specific reset steps. - 6
Document and escalate if needed
Record the exact error code, timestamp, and symptoms; if the code recurs, contact support with this data.
Tip: Providing the error code and steps saves diagnostic time.
Diagnosis: Inverter displays an error code or 'Fault' message, operation halts, or unit refuses to start.
Possible Causes
- highPower supply fluctuations or outlet issue
- mediumOverload or overheating due to restricted airflow or blocked vents
- lowSensor or communication fault within control board
Fixes
- easyPower cycle the unit and inspect the power outlet and breaker
- easyImprove airflow, clean filters, and ensure proper clearance
- mediumReset electronics or replace faulty sensors/board if persistent
Frequently Asked Questions
What does a voltas inverter model error code mean?
An error code signals a protective fault that caused the inverter to halt operation. It indicates the system detected abnormal input, sensor value, or operating condition. Start with safe checks and refer to the manual for the exact code family.
An error code means a protective fault stopped the inverter. Check basics first and then consult the manual for the code family.
Should I reset the inverter when an error code appears?
A safe power cycle often clears transient faults. If the code persists after a reset, you should proceed with the diagnostic flow and consider professional help if needed.
A safe reset can clear temporary faults; if it sticks around, follow the full diagnostic steps or contact support.
Is it safe to open the inverter housing to inspect components?
No. Inverters contain high-voltage components. Do not open the housing. If you suspect internal faults, contact a licensed technician for inspection and repair.
Don’t open the unit—there are live parts inside. Call a professional for internal inspection.
How much does professional repair typically cost?
Cost varies by fault and region. Diagnostic fees can apply, with parts and labor typically ranging broadly. Expect a base diagnostic fee plus potential repair charges depending on the part replaced or service needed.
Costs vary, but you’ll usually pay a diagnostic fee plus potential parts and labor depending on the fault.
How long does a typical voltas inverter repair take?
Most issues can be diagnosed and repaired within a few hours. Complex faults or parts replacement may require a same-day visit or scheduling another day.
Most fixes take a few hours, but complex faults might take longer.
What if the error code relates to refrigerant or other internal systems?
Refrigerant handling requires a licensed technician and is not a DIY fix. If the error code suggests cooling system faults, prioritize a professional assessment.
Refrigerant work must be done by a pro. Don’t attempt it yourself.
Watch Video
Top Takeaways
- Power cycle first for transient faults
- Check power supply and airflow before deep diagnostics
- Document error codes for faster service
- Escalate persistent codes to a professional
- Follow safety and warranty guidance to avoid further risk