How to Fix a vs code gradle build error in VS Code
Diagnose and fix a vs code gradle build error with a practical, step-by-step troubleshoot guide. Includes a diagnostic flow, actionable fixes, and safety tips from Why Error Code.

Most likely the vs code gradle build error stems from a misconfigured Gradle wrapper or an incompatible Java version in your VS Code workspace. Start by aligning the JDK with the project’s required version, then refresh the Gradle project and re-run the build. If that fails, verify wrapper.properties and ensure the distribution URL points to the correct Gradle version.
Understanding the vs code gradle build error landscape
The vs code gradle build error can derail your development session quickly. In many projects, the failure originates from environmental drift rather than a bug in code. The most frequent culprits are the Gradle wrapper configuration, the Java toolchain, and the editor's interpretations of the project settings. When you see a failure message in VS Code, read it carefully and note whether it references Gradle itself, a specific task like compileJava, or a symptom such as a version conflict. According to Why Error Code, starting with the simplest checks often reveals the root cause without complex reconfiguration.
First, confirm that the project’s Gradle wrapper is present and executable. If your workspace runs a wrapper script, make sure the wrapper directory (gradlew and gradlew.bat) is consistent with the repository. If the project relies on a classic Gradle installation, verify that the Gradle home is accessible from VS Code’s terminal and that the PATH includes the right bin directory. Finally, check if the error mentions Java toolchain or language level; mismatches here are a frequent cause of build failures in modern Gradle builds.
In short, the landscape is dominated by wrapper integrity, toolchain compatibility, and environment exposure. Fixing one or two of these often resolves the vs code gradle build error without touching the source code.
Environment alignment: Java, Gradle, and VS Code versions
Tooling drift is one of the easiest ways to trigger a vs code gradle build error. Even when your code compiles locally, differences between the Java version or the Gradle distribution used by VS Code and the project's specified toolchain can create subtle conflicts. Start by locating the Java version installed on your machine and compare it to the version declared in the project’s build files (build.gradle or build.gradle.kts) or in gradle.properties. If the project enforces a specific toolchain, you may need to set the Java home in VS Code settings or add a toolchain block to Gradle.
Next, inspect the Gradle wrapper configuration: gradle/wrapper/gradle-wrapper.properties should point to a valid distributionUrl and a compatible distribution type (bin or all). If your workspace uses a local Gradle installation, ensure VS Code uses that exact distribution by configuring the Gradle: Wrapper task or the Gradle: Distribution URL setting. Finally, verify that extensions loaded by VS Code do not override your Gradle or Java paths; some language servers or plugins can alter the runtime used for builds.
If the error continues, try a minimal, clean environment: disable nonessential extensions, open a fresh workspace, and run a single Gradle task from a clean terminal. This isolates the cause and reduces the blast radius of external interference.
Reproducing the error and isolating the root cause
A repeatable reproduction is the fastest path to a targeted fix. Start by running a single Gradle task (e.g., gradle tasks or ./gradlew help) from the terminal inside VS Code to confirm the error persists outside the IDE. If it does, capture the exact exception stack trace and the failing task. If the stack trace references a particular plugin version or language feature, compare it against the project’s declared dependencies.
Consider creating a minimal, isolated project that mirrors only the failing part of your setup. If the simplified project builds successfully, the issue is likely related to dependencies, plugin versions, or toolchain constraints in the larger project. If the minimal project still fails, the problem is more systemic—likely a toolchain mismatch or a Gradle wrapper error. In both cases, ensure the repository’s Gradle wrapper is committed and up to date, and check for local overrides in the VS Code workspace that might override the wrapper or JAVA_HOME settings.
Concrete fixes you can apply in the editor
Apply the following fixes in order, testing the build after each change:
- Fix 1: Update the Gradle wrapper. Run the wrapper task or run ./gradlew wrapper with a consistent distribution URL. This ensures the build uses a known, supported Gradle version. Tip: keep wrapper.gradle.properties in version control to avoid drift.
- Fix 2: Align the Java toolchain. In build.gradle(.kts), set the toolchain to a version compatible with the project requirements and set JAVA_HOME accordingly in VS Code. Tip: use the Gradle Toolchains feature to declare the Java version centrally.
- Fix 3: Re-import the project in VS Code. Use the Gradle side pane to refresh, or close and reopen the workspace, then re-sync Gradle. Tip: disable auto-reimport if it causes intermittent changes.
- Fix 4: Clear caches. Delete Gradle's caches in your user home directory and re-run. Tip: run a clean before attempting a full build to ensure stale artifacts aren’t causing failures.
- Fix 5: Check for conflicting plugins. If a plugin (like Kotlin or Groovy) matches an incompatible version, align versions in build.gradle and pluginManagement blocks. Tip: review the buildSrc module if present.
- Fix 6: Review environment variables. Ensure PATH and JAVA_HOME reflect the intended toolchain; avoid multiple JDKs that might be picked up inconsistently. Tip: use a shell profile for reproducible paths.
If you still see the error after these steps, consider seeking professional help or pushing the issue to your CI pipeline for broader tests.
Prevention: robust workspace setup and build caching
To minimize future vs code gradle build errors, adopt a predictable environment. Lock Gradle and JDK versions in your toolchain, commit the wrapper files, and maintain a documented setup procedure for new developers. Use environment-specific Gradle properties to avoid drift between local and CI environments. Enable build scans and Gradle caching to reduce flakiness and speed up subsequent runs. Finally, create a simple onboarding checklist that confirms the IDE, JDK, and Gradle versions before new work starts. This proactive approach saves time and prevents recurring failures.
Advanced debugging: using logs and Gradle --info --debug flags
When you need deeper insight into a vs code gradle build error, switch on verbose Gradle logging. Run Gradle with --info or --debug, and capture the full log. In VS Code, configure the Gradle Tasks to pass --info by default for failing builds. Look for class not found, dependency resolution failures, or plugin misbehavior; these clues point to root causes. Combine logs with the stack trace and plugin versions to create an evidence-based fix plan.
Steps
Estimated time: 45-90 minutes
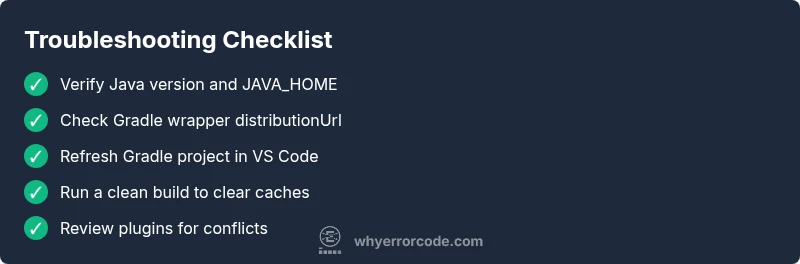
- 1
Verify Java version and JAVA_HOME
Open a terminal in VS Code and run java -version followed by echo $JAVA_HOME (or %JAVA_HOME% on Windows). Ensure the results match the project toolchain requirements.
Tip: Use a consistent shell profile to avoid path drift. - 2
Inspect Gradle wrapper configuration
Check gradle/wrapper/gradle-wrapper.properties for the distributionUrl and distribution type. Ensure it points to a valid Gradle version compatible with the project.
Tip: Do not edit wrapper.properties manually if you rely on repository-managed versions. - 3
Refresh Gradle in VS Code
From the Gradle side panel, click Refresh or Re-import to synchronize settings with the wrapper and dependencies.
Tip: Close and reopen the workspace if reloads are flaky. - 4
Run a clean build
In the terminal, execute ./gradlew clean and then run the desired build task (e.g., assemble or build). Observe whether the error persists.
Tip: Clean builds avoid stale artifacts influencing results. - 5
Check for dependency conflicts
Review build.gradle files for inconsistent plugin versions or transitive dependency conflicts that could trigger a failure.
Tip: Use dependencyInsight or --dependency to narrow conflicts. - 6
Escalate if needed
If the error persists after these steps, involve a teammate or raise the issue in CI logs for broader testing.
Tip: Document exact error messages and environment details for faster help.
Diagnosis: Gradle build fails in VS Code with a cryptic error or a task-specific exception
Possible Causes
- highOutdated or incompatible Java JDK version
- highGradle wrapper misconfiguration or distribution URL mismatch
- mediumPlugin or dependency version conflicts
- lowWorkspace path or JAVA_HOME misconfiguration in the terminal
Fixes
- easyUpdate and align the Java toolchain (JAVA_HOME, project toolchain)
- easyRebuild or re-wrap the Gradle wrapper to point to a supported distribution
- easyRefresh and re-import the Gradle project in VS Code, then run a clean build
- mediumCheck for conflicting plugin versions and adjust in build.gradle
Frequently Asked Questions
What is a vs code gradle build error?
A vs code gradle build error occurs when a Gradle build fails within VS Code due to environment, wrapper, or dependency issues rather than source code errors. Check the wrapper, toolchain, and workspace configuration to identify the root cause.
A Gradle build error in VS Code happens because of the environment or wrapper, not code glitches. Check wrapper, toolchain, and workspace to find the root cause.
How can I quickly tell if the issue is Java version related?
Run java -version in the terminal and compare with the version declared in the project’s toolchain. If there’s a mismatch, adjust JAVA_HOME and the toolchain settings in Gradle.
Check the Java version in the terminal and compare it to the project’s toolchain; align JAVA_HOME if needed.
Should I always update the Gradle wrapper?
Update the wrapper only if the project requires a newer Gradle version. Otherwise, mismatched wrappers can break compatibility with plugins or dependencies.
Only update the wrapper if the project needs a newer Gradle; otherwise it can cause compatibility issues.
When should I seek professional help?
If the error persists after applying standard fixes, consult a teammate or a pro. Escalate to CI logs or a specialist for deeper analysis.
If fixes don’t work, ask a teammate or a specialist and check CI logs for additional clues.
How can I prevent this issue in the future?
Lock Gradle and Java toolchains, document your environment, and automate checks to ensure reproducible builds across machines.
Lock tool versions and document your setup so builds are reproducible on every machine.
Watch Video
Top Takeaways
- Fix the wrapper and toolchain first.
- Re-import Gradle after any change.
- Isolate the issue with a minimal project.
- Document and lock versions for future safety.
- Consult CI logs if local fixes fail.