Washing Machine Error Code E4: Comprehensive Troubleshooting Guide
Learn how to diagnose and fix washing machine error code E4 quickly with practical, safety-conscious steps, from quick checks to step-by-step repairs and prevention tips. This guide from Why Error Code helps developers, IT pros, and everyday users troubleshoot E4 efficiently.

E4 is a washer error that typically signals a fill or level-sensor problem. The exact meaning varies by brand, but you’ll often see it when the machine cannot fill properly, detects an overfill, or has a sensor fault. Start with basic checks: confirm water supply, inspect hoses, and ensure the door is closed, then run a quick test cycle to confirm the fault.
What Washing Machine Error Code E4 Typically Means
When your washing machine displays the error code E4, it usually indicates a problem with the water fill process or a level-sensing issue. The exact interpretation varies by brand and model, so it’s important to consult your user manual for model-specific definitions. In general, E4 appears when the unit cannot fill to the required level, detects an abnormal fill level, or senses a fault in the water level sensor or pressure switch. This means the problem is often environmental (water supply, hoses) or sensor-related rather than a full controller failure. Understanding this nuance helps you prioritize fixes that are quick and low-risk before diving into more complex diagnostics.
In many modern washers, the E4 fault arises during the initial fill or impedes the auto-balance process, causing the cycle to abort. You’ll typically notice a delay in filling, a faint drain sensation, or the machine pausing mid-cycle with the E4 alert. Because water-related faults can cause injury if you attempt repairs with power connected, always unplug the unit before inspecting hoses or filters.
From a troubleshooting perspective, approaching E4 as a water delivery issue first is a reliable heuristic due to the lower risk and higher likelihood of success.
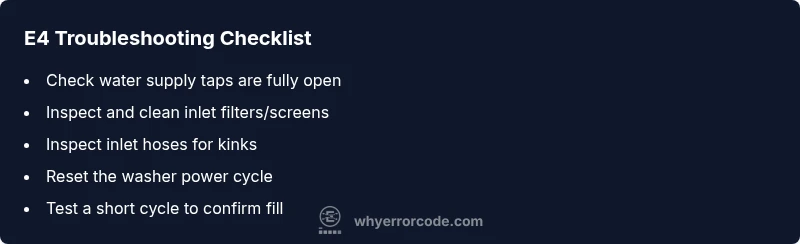
Quick, Brand-Agnostic Checks You Can Do Right Now
- Verify water taps are fully open and hoses are not kinked. A partial shutoff or a kink can mimic an E4 by preventing proper filling.
- Inspect the inlet filters/screens on the back of the faucet valves and washer connection. Debris here can reduce flow enough to trigger E4.
- Check that the door or lid is closed securely. Some machines won’t proceed if the lid switch isn’t engaged.
- Run a basic test cycle with no or a small load to observe whether the fill completes or stalls.
- Look for secondary indicators like error codes related to temperature, flow, or pressure that can clarify the root cause.
If these checks resolve the issue, you’ve avoided more invasive repairs. If E4 persists, proceed to a structured diagnostic flow.
Diagnostic Flow: Symptom to Likely Causes (High-Level Overview)
Symptoms you might observe with E4:
- The machine pauses during fill with an audible click or hum.
- The cycle does not advance past the fill stage, and the display shows E4.
- Water remains in the drum or the drum fills inconsistently.
Possible causes, ranked by likelihood:
- Inlet hose or supply issue (high): restricted water flow due to valve shutoff, kinked hose, or blocked filter.
- Inlet valve or screen obstruction (high): mineral buildup or debris causes insufficient fill.
- Water level sensor/friction sensor fault (medium): sensor misreads, triggering an overfill/underfill condition.
- Control board fault (low): electronics misinterpret sensor data or fail to send proper signals.
Common fixes, by difficulty:
- Easy: open taps fully, straighten hoses, clean inlet screens.
- Easy: power cycle the unit to reset sensors.
- Medium: replace clogged inlet valve or sensor if accessible.
- Hard: board diagnostics or replacement may be required by a professional.
Step-by-Step Fix for the Most Common Cause
- Power down and unplug the washer to avoid electrical hazards. Wait 30 seconds, then plug back in and power up to reset fault codes.
- Confirm water supply: ensure both hot and cold valves are fully open and that the hoses are not kinked or crushed.
- Inspect and clean inlet filters/screens on the back of the valve connections. Remove any lint or mineral buildup with a soft brush.
- Reconnect hoses, run a short test cycle without laundry. Observe the fill; if it still stops early, proceed to valve inspection.
- If the machine continues to show E4 after these steps, test or replace the inlet valve following the manufacturer’s procedure or contact a professional for valve testing and sensor checks.
Tip: When replacing hardware, consult your manual for compatibility and torque specs to avoid leaks. If you’re unsure, a service call is the safest option.
Other Causes and How to Address Them
Beyond the common inlet issues, E4 can stem from less obvious sources. This section helps you expand the net without overhauling the machine.
- Sensor calibration issue: Some machines require a software reset to recalibrate the water level sensor.
- Fuse or power supply irregularities: Inconsistent power can affect sensor readings; check the outlet or use a dedicated surge suppressor.
- Drain or cycle sensor faults: While E4 relates to fill in many models, some designs reuse the code to signal a cycle control fault or a misreading from the pressure switch. Inspect related hoses and ensure the drain system is clear before testing again.
- Loose wiring or harness damage: Visual inspection for loose connectors at the back panel can reveal subtle faults. If a harness is damaged, replacement is safer than improvised fixes.
When dealing with these scenarios, document any observed symptoms and proceed stepwise. If uncertainty remains, involve a technician accustomed to your specific brand.
Safety, Warnings, and When to Call a Professional
- Always unplug the washer before inspecting internals or removing panels. Water and electricity are a dangerous mix, and a proper power-down reduces the risk of shock.
- If you smell burning, notice melted insulation, or see visible damage, stop and call a professional immediately.
- Do not attempt to disassemble the control board or sensors unless you are trained; replacing electronics without proper diagnosis can cause further damage or void warranties.
- If you’re within warranty or your model is under a service program, contact the manufacturer’s support line for guided troubleshooting or authorized repair.
- Cost considerations: minor hose or filter cleaning typically costs little or nothing beyond time; valve replacement can range widely depending on the model and region, often between moderate and high, while a full control board replacement can be significantly more expensive.
When to call a professional: persistent E4 after all basic checks, suspicion of sensor faults, or unfamiliarity with the model’s wiring harness. A trained technician can safely diagnose with brand-specific tooling and replace components without compromising safety or performance.
Prevention Tips to Avoid E4 in the Future
- Schedule regular lint screen and inlet filter cleaning as part of maintenance.
- Use manufacturer-recommended detergents and avoid overloading the drum to reduce sensor strain.
- Protect supply lines from kinks and ensure the hoses are properly secured to prevent disruption in water flow.
- Run a periodic diagnostic cycle if your model supports it to keep sensors calibrated.
- Keep the manual handy and note any model-specific E4 definitions or service intervals for quick future reference.
Understanding Brand Variations and How to Read Your Manual
Because E4 definitions vary, the first step is always to consult the user manual for your exact model. Look under error codes or troubleshooting sections for model-specific symptoms, causes, and recommended fixes. If the manual is unavailable, check the manufacturer’s official website or app for the support page, where you can enter your model number to pull the precise E4 meaning and service options. Keeping a quick-reference sheet of common E4 interpretations across your brands can save time when you encounter different machines in a multi-appliance household.
Steps
Estimated time: 45-75 minutes
- 1
Power down and unplug
Unplug the unit and wait 30 seconds before plugging back in to reset fault codes. This simple reset can clear transient sensor faults.
Tip: If the outlet is on a circuit that trips, test on a different outlet. - 2
Check water supply
Ensure both hot and cold taps are fully open and hoses are free of kinks. A partially closed valve can mimic an E4 condition by limiting fill flow.
Tip: Turn taps fully clockwise and then back to open to confirm flow stability. - 3
Clean inlet filters
Disconnect hoses and access the inlet screens. Remove any debris with a soft brush and rinse with water. Reinstall firmly without overtightening.
Tip: Do not use sharp tools that could scratch seals. - 4
Run a test cycle
Reconnect power, select a quick wash, and observe the fill phase. A complete fill without hesitation indicates the issue is resolved.
Tip: Choose a shorter cycle to speed up the test. - 5
Inspect sensors or valves
If E4 persists, inspect the inlet valve and the water level sensor for signs of wear, residue, or loose wiring. Consider replacement if you notice corrosion or damage.
Tip: Only perform valve/sensor work if you’re comfortable with appliance electronics. - 6
Call a professional if needed
For complex sensor or board issues, or if the model requires special calibration tools, contact a licensed technician. They can replace faulty components while preserving safety and warranties.
Tip: Provide model number, serial, and a description of symptoms for quicker service.
Diagnosis: Washing machine shows E4 and won't fill properly
Possible Causes
- highInlet hose or supply issue
- highBlocked inlet filters/screens
- mediumWater level sensor fault
- lowControl board fault
Fixes
- easyCheck water taps and straighten hoses
- easyClean inlet filters/screens
- easyReset the washer power cycle
- hardTest and replace inlet valve or sensor
Frequently Asked Questions
What does washing machine error code E4 generally indicate?
E4 generally points to a water fill or level-sensor issue. Brands vary in exact meaning, so consult your model’s manual for precise symptoms and fixes. Start with the simplest checks before deep diagnostics.
E4 usually means a water fill or level-sensor problem. Check the manual for your model, then start with quick, safe checks like hoses and filters.
Can I fix E4 myself safely?
Many E4 causes are user-serviceable, such as checking water supply and cleaning inlet filters. Complex sensor or board issues may require a professional. Always unplug the machine before any inspection.
You can usually fix E4 yourself with basic checks, but sensors or boards should be handled by a pro.
What’s the typical cost to repair E4?
Costs vary by cause: hose/filters are inexpensive, valve or sensor parts are moderate, and board replacements can be high. A technician visit may range from moderate to high depending on parts and labor.
Repair costs depend on what’s wrong, from cheap hose checks to more expensive valve or board replacements.
Should I keep using the washer after an E4 occurs?
If E4 occurs, stop the cycle and perform basic checks before continuing. Repeated E4 with cycling attempts should prompt a diagnostic or professional service to prevent damage.
Don’t push through a repeat E4; pause and troubleshoot or call a pro if it repeats.
Is E4 dangerous to ignore?
E4 is typically not an immediate safety hazard, but ignoring persistent faults can lead to leaks, overflow, or electrical risks. Address it promptly and safely.
E4 isn’t usually dangerous, but ignore it and you may face leaks or bigger problems.
Watch Video
Top Takeaways
- Identify E4 quickly by checking water flow and sensor status.
- Start with safe, quick checks before replacing parts.
- If unresolved, escalate to professional service with model details.
- Maintain regular cleaning and checks to prevent E4 recurrence.