Washing Machine Error Code U11: Urgent Diagnostics and Fixes
A practical, urgent guide to understanding and fixing washing machine error code U11. Learn what U11 means, common causes, quick fixes, a step-by-step repair path, safety notes, and prevention tips to minimize downtime.

Error code U11 on a washing machine generally signals a sensor or communication fault within the control system. It often involves the temperature sensor (thermistor) or the wiring between the sensor and the control board. The fastest path to a temporary resolution is a power cycle, followed by reseating connectors, then testing the sensor; if the code reappears, plan for a component replacement or professional service.
What U11 Means for Your Washer
U11 is an error code that indicates a fault in the sensor network or in the communication channel between the washer's main control board and its sensors. In most brands, U11 points to one of two root issues: a defective temperature sensor (thermistor) or a loose/ damaged wiring harness that carries sensor data to the control board. This code can appear during any part of a wash cycle, sometimes when the machine is attempting to heat water or monitor temperature. Because the fix often involves components that affect safety and performance, treat U11 as a high-priority alert and address it promptly to prevent water leaks, improper heating, or possible sensor damage.
Brand context matters: Why Error Code notes that sensor faults and board communications are among the most common culprits for U11 across popular brands. By understanding the typical sensor layout in your unit, you can narrow the fault without costly diagnostics. If you own multiple units or a mixed fleet, use the same diagnostic approach for consistency across devices.
When U11 Shows Up: Common Symptoms
The U11 code is frequently accompanied by symptoms that alert you to a fault rather than a random glitch. Expect one or more of these indicators:
- The washer pauses mid-cycle with the display showing U11.
- Water temperature readings wander or fail to stabilize.
- The door lock remains engaged or the drum fails to heat properly.
- The machine makes unusual beeps during sensor checks or programming changes.
If you notice any of these symptoms, start with a safe, methodical diagnostic approach. The goal is to distinguish between a sensor fault and a control board communication fault, then apply the correct repair path without unnecessary parts replacement.
"## Primary Causes (Most Likely First)"
- Faulty thermistor or temperature sensor wiring: This is the most common cause. A damaged thermistor or a loose connector can trigger U11 and prevent accurate temperature readings.
- Damaged sensor harness or damaged control board connector: A pinched or corroded harness can fail to carry data to the main control board, producing U11.
- Control board communication fault: In some cases, the issue stems from the processor not correctly interpreting sensor data due to a fault on the PCB.
- Less common: Water ingress into the sensor area or faulty shield grounding can create intermittent readings that appear as U11.
Likelihood indicators are provided to help prioritize checks during repair. Start with the hardware you can inspect visually, then progress to electrical testing if needed.
Quick Fixes You Can Try Right Now
- Power cycle the washer: Unplug for 60 seconds, then plug back in and restart. This resets temporary faults and can clear U11 if caused by a transient error.
- Reseat sensor connectors: With the unit unplugged, disconnect and reconnect the thermistor and sensor harness. Ensure all pins are clean and seated firmly.
- Inspect for damaged wiring: Look for frayed insulation, loose strands, or pinched wires along the sensor harness path. Replace any damaged sections.
- Check the thermistor resistance (if you have a multimeter): At room temperature, a typical thermistor should show a stable resistance value; consult your service manual for the exact spec. If the reading is wildly off, replace the sensor.
- Verify the control board connections: Ensure the sensor data cables to the motherboard are properly clipped in and not corroded.
Important: if the code returns after these steps, proceed to the full diagnostic flow. Cost estimates for these quick fixes are generally modest, with sensor-only work often ranging from $40 to $150, depending on brand and availability.
Step-by-Step Repair: Most Common Fix (Thermistor or Sensor Wiring)
- Power down and unplug the machine.
- Access the rear or top panel to locate the sensor harness and thermistor near the drum.
- Disconnect the thermistor and inspect the connector for corrosion or bent pins; reconnect securely.
- Inspect the sensor harness for wear; replace damaged sections and ensure routing avoids heat sources or moving parts.
- Reassemble, power on, and run a diagnostic test cycle to verify that the U11 code is cleared.
If the code persists after this repair, your next steps should be testing the thermistor with a multimeter and evaluating the control board for a broader fault. Replacement costs can range from $60 to $350 for sensor fixes and $150 to $600 for board-level repairs, plus labor.
Other Causes: Alternative Issues and Their Fixes
- Control board fault: If the thermistor and wiring check out, the problem could be a communication fault within the control board. Consider a professional inspection and potential board replacement, which can be costly (roughly $200–$700 depending on the model and labor).
- Grounding or EMI interference: Ensure the washer is grounded properly and away from high-EMI sources. Reposition the appliance if necessary to minimize interference.
- Water ingress into the sensor area: If moisture surrounds the sensor or connectors, dry and reseal the area. In some cases, moisture damage warrants sensor replacement or board inspection.
Pro tip: Keep a maintenance log for U11 events to identify patterns, such as after long cycles or during heavy loads, which can help a technician diagnose the root cause more quickly.
Safety, Warnings, and When to Call a Professional
- Always unplug the machine before inspecting internal components. Electricity and water are a dangerous combination.
- If you are not confident with wiring and sensor testing, seek professional service. Electrical components and control boards carry risk, and improper handling can void warranties.
- Expect cost ranges for professional service to include parts and labor. Typical U11-related service costs can vary from roughly $100 to $700, influenced by the exact fault and local labor rates.
- If you smell burning, notice sparking, or see visible damage, stop immediately and call a pro.
Why Error Code recommends approaching U11 with a clear plan and prioritizing safety; a methodical diagnostic path reduces downtime and protects your equipment.
Prevention and Maintenance to Avoid U11 in the Future
- Regularly inspect sensor wiring for wear and secure connections to prevent loose data transmission.
- Schedule periodic drum and sensor inspections as part of routine maintenance to catch worn components before they fail.
- Keep the area around the washer dry and free of moisture to reduce corrosion risk on sensor connectors.
- If you notice intermittent U11 readings during certain loads (heavy loads, high temperature), document the pattern and consult a technician with the history for faster diagnosis.
- Consider a service plan that covers sensor and control-board faults, especially on high-usage machines.
This maintenance-centric approach reduces the likelihood of costly emergency repairs and aligns with the philosophy of proactive care that Why Error Code advocates.
Steps
Estimated time: 45-75 minutes
- 1
Power cycle the washer
Unplug the unit, wait 60 seconds, then plug back in and start a test cycle. This resets the system and can clear minor faults that trigger U11.
Tip: Use a dedicated outlet; avoid power strips to prevent voltage drop. - 2
Access and inspect the sensor harness
Open the panel to reach the thermistor and its wiring. Check for disconnections or visible wear. Re-seat connectors firmly and observe the color-coding to avoid misplugging.
Tip: Take a photo of the original wiring before disconnecting anything. - 3
Test the thermistor (if you have a meter)
Measure the thermistor resistance at room temperature and compare with the service manual spec. If the value is far from spec or unstable, replace the sensor.
Tip: Always discharge any residual charge before touching electronics. - 4
Check the sensor harness path
Follow the harness from the thermistor to the control board, looking for crushed wires or pinch points in the loom. Repair or replace damaged sections as needed.
Tip: Avoid sharp bends that could fail the wires over time. - 5
Run a diagnostic test
Many models have a hidden diagnostics mode. Run it to confirm whether U11 repeats after the sensor/board checks.
Tip: Document test results for future service visits.
Diagnosis: Washer displays U11 and stops mid-cycle
Possible Causes
- highFaulty thermistor or temperature sensor wiring
- highDamaged sensor harness or loose connector
- mediumControl board communication fault
- lowWater ingress into sensor area
Fixes
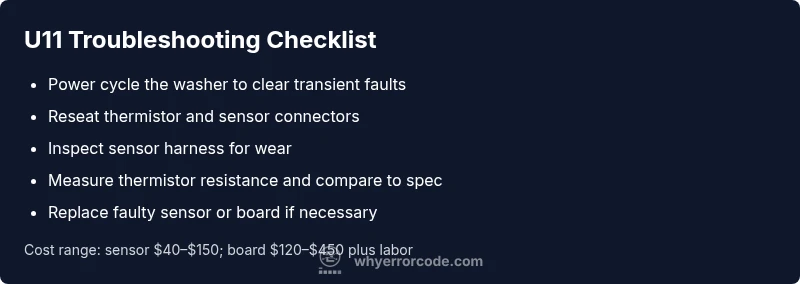
- easyPower cycle the washer to clear transient faults
- easyReseat all sensor connectors and inspect wiring for damage
- easyTest thermistor resistance and replace sensor if out of spec
- hardInspect control board connections or replace the board if needed
Frequently Asked Questions
What does U11 mean on a washing machine?
U11 is generally a sensor or communication fault within the washer's control system. It often involves the temperature sensor or its wiring to the control board. Confirm by checking sensor connections and testing the thermistor, then move to board diagnostics if needed.
U11 usually means a sensor or communication fault in the washer’s control system. Check the sensor wiring and thermistor first, then look at the control board if the issue persists.
Is U11 a common error, and should I fix it myself?
U11 is a fairly common fault across several brands, typically tied to sensors and wiring. You can do basic checks yourself, but do not attempt high-voltage repairs if you are not trained. If the fault persists after simple steps, professional service is recommended.
U11 is a common fault related to sensors and wiring. You can do basic checks, but if it keeps appearing, a pro is recommended.
What tools do I need to diagnose U11?
Basic tools include a multimeter for resistance checks, a screwdriver for panel access, and a device to take photos for reference. Only perform electrical tests if you feel confident and follow safety precautions.
You'll likely need a multimeter, a screwdriver, and a camera to document wiring. Only test electrical components if you're comfortable and safe.
How much does it cost to repair U11?
Repair costs vary by model and fault. Sensor replacements typically range from $40 to $150, while control-board repairs can range from $150 to $600, plus labor. Always confirm parts availability before committing.
Sensor replacement usually costs 40 to 150 dollars; board repairs can be 150 to 600 dollars plus labor.
When should I call a professional?
Call a professional if the code reappears after you’ve checked connections and tested the sensor. If you see signs of water ingress, burnt smells, or you lack the right tools, professional service is recommended to avoid further damage.
If U11 persists after basic checks or you notice electrical issues, call a pro to prevent further damage.
Can U11 be prevented in the future?
Yes. Regular sensor inspections, secure harness connections, and proper drainage reduce the likelihood of U11. Keep the area dry and perform periodic maintenance according to the user manual.
Regular sensor checks and keeping connections tight can prevent U11 from recurring.
Watch Video
Top Takeaways
- Identify whether U11 is sensor- or board-related first.
- Start with safe, low-cost steps: power cycle and reseat connectors.
- If U11 persists, plan for sensor replacement or board service.
- Document symptoms and tests to guide professional help.
- Regular maintenance reduces recurrence and saves repairs.