Whirlpool Dishwasher Error Code 4: Meaning and Fixes
Understand Whirlpool dishwasher error code 4: its meaning, urgent fixes, and a practical diagnostic flow. Learn when to reset, clean filters, and when to call a pro.

Whirlpool dishwasher error code 4 is a generic fault indicator that signals a problem detected during a wash cycle. Because Whirlpool uses model-specific definitions for this code, the exact meaning can vary from one series to another. Start with a quick reset, then check common culprits like clogged filters, a blocked sink, or a faulty door latch. For precision, consult your model’s manual or Whirlpool support for the exact definition for your model.
What Error Code 4 Means for Whirlpool Dishwashers
Whirlpool error code 4 is a fault indicator that appears when the control board detects an abnormal condition in the current wash cycle. Because Whirlpool uses model-specific definitions for this code, the exact meaning can vary from one series to another. In some models, code 4 points to a drainage or pump issue; in others, it signals a door latch or water inlet problem. The important takeaway is that code 4 is not a universal cause, but a sign that something in the appliance’s water management or control sequence requires attention. To move forward, identify the symptoms you’re seeing, consult your user manual, and use a structured diagnostic approach to determine the root cause. Always prioritize safety and, when in doubt, contact Whirlpool support for your exact model.
Common Symptoms That Trigger Code 4
If you see code 4, your dishwasher may exhibit one or more of these signs: the cycle starts but fails to complete, water remains in the tub after the cycle, or there is a noticeable drainage odor or leak. Some models flash the LED or display a sequence, while others simply show a two-digit code on the control panel. You may also notice longer fill times, incomplete draining, or a hard stop mid-cycle. Document what you observe; this helps when you test fixes or consult support.
Immediate Quick Fixes You Can Try Right Now
Before you dive into tools, perform these safe, fast checks:
- Reset the dishwasher by unplugging for 60 seconds and plugging back in to clear minor faults.
- Inspect the bottom filter and sump for debris that could block drainage.
- Confirm the water supply valve is fully open and there are no kinks in the drain hose.
- Run a short diagnostic wash with the drain check enabled (if your model supports this) to see if draining improves. If the code persists after these steps, proceed to the diagnostic flow.
Diagnostic Flow: From Symptom to Solution
A practical flow helps you avoid random repairs:
- Symptom: Code 4 is displayed and the appliance stops mid-cycle.
- Immediate checks: power, reset, filter, and water supply.
- Likely causes: drainage blockage, door latch fault, or control board issue (order of likelihood varies by model).
- Immediate fixes: clean filter, straighten or replace drain hose, reseat the door latch, or reset the control board.
- Verify: run a test cycle and confirm drainage and water fill behavior. This flow keeps repairs focused and cost-effective.
Most Likely Causes in Whirlpool Models
- Drainage blockage or blocked pump impeller (high likelihood) — debris sticking in the sump or hose can cause code 4 in many models.
- Faulty door latch or door switch (medium likelihood) — if the door isn’t sealing properly, the control may halt processing.
- Clogged inlet valve or water supply issue (low to medium) — insufficient water can trigger flow-related faults.
- Faulty control board or wiring harness (low likelihood) — progressive failures may display code 4. By focusing on drainage first, you maximize your chances of a quick fix.
Step-by-Step Fix for Drainage-Related Code 4
- Power off and unplug the dishwasher. This protects you while inspecting internal components.
- Remove the lower spray arm and filter assembly; rinse with warm water to remove debris. Check the sump area for trapped food and rinse.
- Inspect the drain hose for kinks or clogs. Detach the hose if necessary and flush to clear any blockage.
- Check the drain pump impeller and electrical connections for wear or binding. If debris is present, remove it carefully.
- Reassemble, plug in, and run a test cycle with the drain path explicit to verify drainage is normal.
- If the code returns, advance to professional service to inspect the control board or pump motor. Tip: Use a flashlight and wear eye protection when working near the sump; a small screw can become a projectile.
Safely Resetting and Testing After Repairs
If you’ve addressed the drainage issue, reset the code by running a cleaning cycle followed by a short normal wash. Listen for a quiet drain and watch for complete water extraction. If code 4 appears again, document the exact symptoms and consider professional evaluation; there could be a more complex electrical issue or a failing control board.
Other Causes and How to Address Them
- Worn door latch or misaligned door seal that prevents proper sealing can trigger the controller.
- Damaged wiring harness or loose connections near the control board can flicker signals.
- Sensor or float switch faults may falsely indicate overfill or overflow.
- Software or firmware faults on older models can also manifest as code 4; updating firmware may be required via service.
Costs, Safety, and When to Hire a Professional
- Quick fixes are often free or inexpensive, typically under $20 for replacement filters or hoses.
- Parts for common drainage repairs range from $10–$150; professional labor varies from $50–$250 depending on region and model.
- If a professional is needed for a pump or control board, expect total costs in the ballpark of $150–$550. Safety: Always unplug the unit before inspecting, avoid water near outlets, and never bypass safety interlocks. If you’re uncomfortable with any step, call a certified technician.
Steps
Estimated time: 60-90 minutes
- 1
Power off and unplug
Safely disconnect power to prevent shocks while inspecting internal components.
Tip: Use a dry cloth to wipe any condensation before touching wiring. - 2
Access the sump and filter
Remove lower rack, take out filter assembly, and clean the sump area with a soft brush.
Tip: Keep a tray handy for small screws and debris. - 3
Inspect the drain hose
Check for kinks, blockages, or clamps that may restrict drainage.
Tip: Detach hose only if needed and have towels ready for spills. - 4
Check the drain pump and wiring
Look for debris in the pump and verify that electrical connections are tight and dry.
Tip: Do not touch live wires; if unsure, stop and call a pro. - 5
Reassemble and test
Reconnect components, restore power, and run a short cycle to verify drainage.
Tip: Observe the drain sound; a healthy pump should run smoothly. - 6
Escalate if code returns
If code 4 persists, consider professional service for pump or control board replacement.
Tip: Document symptoms and photos for the technician.
Diagnosis: Dishwasher displays code 4 and stops mid-cycle
Possible Causes
- highDrainage blockage or clogged pump
- mediumDoor latch fault or misalignment
- lowControl board or wiring fault
Fixes
- easyClean the drain filter and sump; remove debris
- easyInspect and straighten/replace drain hose
- mediumTest door latch, seals; reseat connections
- hardReplace drain pump or control board if needed
Frequently Asked Questions
What does Whirlpool dishwasher error code 4 mean on my model?
Code 4 is a general fault indicator; its exact meaning depends on the model. Consult the manual or Whirlpool support to confirm the definition for your unit, then follow the diagnostic steps to identify the root cause.
Code 4 is a general fault that varies by model; check your manual and follow the diagnostic steps.
Can I fix code 4 myself without tools?
Some quick checks, like resetting and cleaning filters, require no tools. More complex fixes, such as replacing a pump or control board, typically require tools and professional know-how.
You can try basic resets and cleaning, but complex repairs usually need tools and expertise.
Is it safe to run the dishwasher after seeing code 4?
Only after completing all basic checks and ensuring there are no leaks or electrical hazards. If uncertain, stop and contact a technician.
If unsure, stop and call a technician before running again.
How much does it cost to repair Whirlpool code 4?
Costs vary by part and labor; typical total ranges from about $60 to $550 depending on the fix and model.
Costs vary, but expect roughly sixty to five hundred fifty dollars for typical fixes.
Does code 4 always mean a drainage problem?
Not always. Some models may attribute code 4 to door latch or electronics. Check the manual for model-specific meaning.
Not always—it can be door latch or electronics as well.
When should I call a pro for code 4?
If the code returns after basic fixes, or you notice leaks, burns smells, or you lack experience, contact a certified technician.
If it persists after basics or you see leaks, call a pro.
Are there safety warnings I should follow?
Always unplug before inspection. Do not bypass safety interlocks or attempt live electrical work.
Unplug first; don’t bypass safety features.
Watch Video
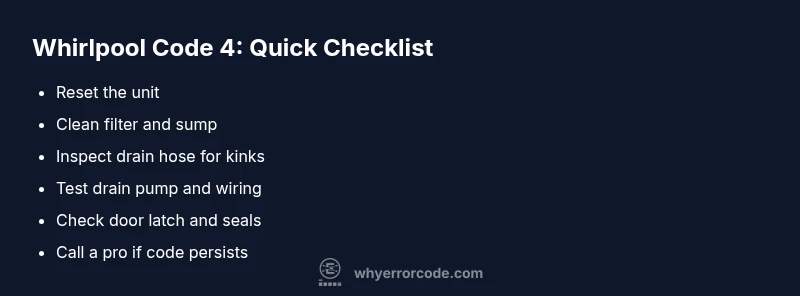
Top Takeaways
- Identify model-specific meaning via manual
- Prioritize drainage checks first
- Never bypass safety interlocks
- Costs vary by part and labor
- Call a pro if code persists after basics