Whirlpool LOC Error Code: Quick Fix Guide for Lockout Codes
Urgent guide to diagnose and fix whirlpool LOC error code in washers. Learn quick fixes, diagnostic flow, step-by-step repairs, safety tips, costs, and prevention to get your machine running again.

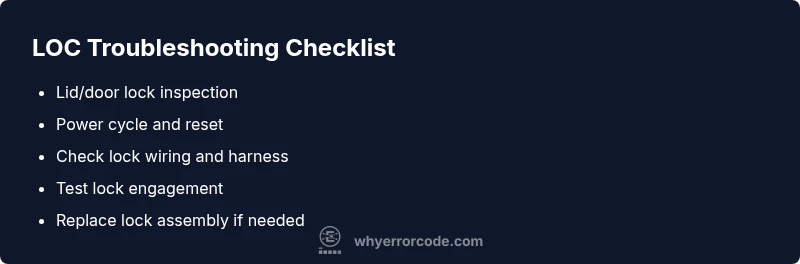
Whirlpool LOC error code typically signals a lock-related fault, such as a lid/door lock or control lock issue. The fastest path is to power cycle the washer, verify the lid is fully closed, and check the lock indicator. If LOC remains, inspect the lid lock assembly and its wiring for faults. Why Error Code guides you through safe steps and cost ranges.
What Whirlpool LOC Code Means
The LOC code on Whirlpool washers usually points to a lock-related fault or an active lockout state. According to Why Error Code, lock conditions can involve the lid lock, door lock, or a control-lock feature implemented by the control board. Model variations mean LOC may indicate different lock components, including a failed lid switch, a stuck actuator, or a wiring fault that prevents the unit from starting or advancing a cycle. Common symptoms include a flashing LOCK indicator, an unresponsive keypad, or the machine halting mid-cycle with LOC displayed. Before you dive into parts, ensure basic safety: unplug the machine, wait a full minute to discharge capacitors, and confirm the lid or door is completely shut. If the lock indicator remains active after a power reset, LOC is most likely a lock-related fault that warrants closer inspection of the lock hardware and its control wiring.
Quick Immediate Fixes for LOC
If you encounter the LOC error, try these immediate steps to restore function without replacing parts:
- Unplug the washer and wait 60 seconds, then plug back in to perform a soft reset.
- Open and fully close the lid or door to ensure the lock mechanism resets. Some models require you to latch and unlatch twice.
- Check the lid lock indicator light. If it’s blinking or off when closed, the lock may be faulty or misaligned.
- Inspect the lock housing for debris or misalignment that could prevent a clean engagement.
- Inspect the door switch or lid switch connectors for loose or corroded pins.
- If safe, reseat the lock connector at the control board and run a diagnostic test or a quick wash cycle to see if LOC clears.
Note: If the LOC persists after these steps, you may be facing a hardware issue (lock assembly, door switch, or wiring) that requires parts replacement.
Diagnostic Flow: Symptom to Cause
When LOC appears, a systematic diagnostic flow helps identify the root cause and the most cost-effective fix:
- Symptom: Washer shows LOC and won’t start or advance; control panel may be inactive or partially responsive.
- Likely causes (ordered by likelihood):
- High: Faulty lid/door lock assembly or misalignment causing the lock to not engage properly.
- Medium: Faulty door switch or wiring harness around the lock assembly.
- Low: Control board lockout feature or sensor fault requiring board replacement.
- Primary fixes (matching causes):
- For lock issues: reseat or replace the lid/door lock assembly and inspect the lock harness for damage.
- For wiring: repair or replace damaged wires and reseat connectors; check for corrosion or bent pins.
- For control board: consider a professional diagnosis for potential board repair or replacement.
Step-by-Step Repair: Most Common Cause
This section walks you through repairing the most common LOC cause: a faulty lid/door lock assembly. Follow these steps carefully and only test with the unit unplugged when necessary:
- Power down and unplug the machine. Wait 60 seconds to discharge residual power.
- Access the lid/door lock housing by removing the control-top panel and checking the lock assembly alignment.
- Disconnect the lock harness and inspect for damaged pins, corrosion, or pinched wires. Gently reseat each connector.
- Reconnect the harness and perform a visual test to confirm the lock engages when the lid is closed.
- Plug in the washer and run a short diagnostic cycle or a quick wash, watching for the LOC indicator to clear.
- If LOC persists, replace the lid/door lock assembly with the correct model-specific part. Expect part costs in the typical replacement range for lock assemblies and be prepared for professional labor if you are not comfortable with wiring.
Tip: Keep track of screws and connectors with labeled bags to simplify reassembly.
Estimated step time: 30–60 minutes (excluding replacement parts).
Other Causes and Fixes
If the lock assembly is not the issue, LOC can stem from related faults:
- Wiring harness damage near the lock: fix or replace damaged wires, secure looms away from moving parts, and re-seat all connectors.
- Faulty door switch or latch sensor: test continuity with a multimeter and replace if out of spec.
- Control board fault: modern Whirlpool boards may lock out cycles when a fault is detected; replacement or professional repair is often required.
For each scenario, the general approach is to confirm power, inspect connectors, test components in the lock area, and replace faulty parts with model-correct equivalents. Always consult the manual for your exact model to identify the correct part numbers and safety precautions.
Safety Tips and When to Call a Pro
- Safety first: Always unplug the unit before inspecting electrical components. Do not operate the machine with the cover off. Wear insulated gloves if touching live components.
- If you smell burning, observe visible arcing, or notice melted insulation, stop immediately and seek professional service.
- When the LOC continues after basic checks, or you are not confident with electrical testing, contact a certified technician. Lock-related repairs can involve high-voltage components and evolving safety standards.
- Cost considerations: a simple lid/door lock replacement typically ranges from a low to mid hundreds of dollars (parts and labor), depending on the model and regional labor rates; a control board replacement can range higher. Your local service quotes may vary; ask for a written estimate before work begins.
Prevention and Maintenance to Avoid LOC
- Inspect door or lid alignment during regular maintenance to ensure proper engagement.
- Keep the lock area clean of debris that could impede engagement during cycles.
- Schedule periodic diagnostic runs to catch sensor or switch wear before a lock issue arises.
- When moving or transporting the washer, secure the lid and protect wiring to prevent harness damage that could trigger LOC upon reinstallation.
- Use high-quality replacement parts from the manufacturer or approved suppliers to minimize rework and ensure compatibility.
Steps
Estimated time: 30–60 minutes
- 1
Power down and unplug the washer
Ensure the unit is completely disconnected from power. Wait 60 seconds to discharge any residual power in capacitors before touching internal components.
Tip: Always unplug before opening the cabinet. - 2
Access the lid/door lock area
Remove the top panel or access panel per the model guide to reach the lid lock housing and its connectors.
Tip: Keep track of screws and small parts with a labeled tray. - 3
Inspect and reseat connectors
Unplug and replug the lid lock harness, checking for bent pins or corrosion. Reseat firmly but avoid over-tightening.
Tip: Take a photo before disconnecting for reference. - 4
Test lock engagement
With power restored (or using a safe test mode), close the lid and observe the lock actuator. Ensure it engages cleanly.
Tip: If the lock grinds or sticks, replacement is likely required. - 5
Replace the lid/door lock assembly if needed
Install the correct replacement lock assembly as specified for your Whirlpool model, following the service manual steps.
Tip: Use the OEM part to guarantee compatibility. - 6
Verify cure with a test cycle
Plug in the machine and run a short cycle to confirm LOC no longer appears and the unit completes a basic wash.
Tip: If LOC returns, stop and seek professional service.
Diagnosis: Whirlpool washer displays LOC and will not start or complete a cycle
Possible Causes
- highFaulty lid/door lock assembly or misalignment
- mediumFaulty door/lid switch or wiring harness near lock
- lowControl board lockout feature or sensor fault
Fixes
- easyReseat or replace lid/door lock and inspect wiring harness for damage
- easyReplace damaged door switch or repair wiring, then test lock engagement
- hardTest the control board and replace if faulty; consult a pro for advanced diagnostics
Frequently Asked Questions
What does LOC mean on a Whirlpool washer?
LOC generally indicates a lock-related fault, such as the lid lock, door lock, or a control lock. Since model specifics vary, consult the user manual or a repair guide for your exact model.
LOC on Whirlpool washers usually signals a lock-related fault. Check the lid lock and wiring, and consult your model's manual for specifics.
Can I fix LOC myself?
Yes, for many LOC issues you can perform basic resets, inspect the lock and connectors, and reseat components. If the problem persists or involves electrical testing, consider hiring a professional.
You can often fix LOC yourself with basic resets and checks, but if it persists, call a professional.
How much does a LOC repair typically cost?
Costs depend on the exact cause and parts. A simple lock assembly replacement might range in the low hundreds, while a control board repair could be higher. Labor can add a further amount depending on your location.
LOC repairs vary; expect a few hundred dollars for a lock, more for a control board. Labor differs by region.
What should I do if LOC returns after a fix?
If LOC recurs, recheck all connections, re-test with a cycle, and consider replacing the lock assembly or the control board. If you’re unsure, a professional diagnostic can prevent guessing.
If LOC comes back, recheck connections and parts; a pro diagnostic may be the safest option.
When is it essential to call a professional?
Call a professional if you detect burning smells, melted insulation, or if you are uncomfortable working with electrical components. A pro can verify the control board and ensure safe operation.
Call a pro if you smell burning or feel unsure about electrical work; safety first.
Will LOC affect other Whirlpool models?
LOC behavior can vary by model family. Some use similar lid lock circuitry, while others may rely on different sensors. Always consult the model-specific service manual when in doubt.
LOC symptoms can differ between Whirlpool models; check model-specific manuals.
Watch Video
Top Takeaways
- Identify LOC as a lock-related fault and start with resets.
- Inspect lid/door lock assembly and wiring first.
- Use a power cycle and careful reseating of connectors as a quick check.
- Costs vary; expect parts and labor to range based on part and service level.
- Call a pro if the problem persists after safe DIY checks.