Whirlpool SD Error Code Fix: Quick Troubleshooting Guide
Learn how to diagnose and fix the Whirlpool SD error code with practical steps, safety tips, and cost ranges. This urgent guide helps developers, IT pros, and everyday users resolve SD faults quickly and prevent recurrences.

SD error code on Whirlpool appliances signals a fault detected by the unit’s control system. The exact meaning varies by model, so start with a safe, quick reboot and basic checks. According to Why Error Code, the fastest path is a power cycle (unplug for 60 seconds or switch off at the breaker), then run a diagnostic test or reset if available. If the code persists, consult service notes or support.
What the SD error code means on Whirlpool appliances
The SD error code is a generic fault indicator that Whirlpool uses across several models and product lines. Because each model can interpret SD differently—ranging from sensor faults to firmware glitches—the first step is to consult the specific user manual for your unit or the model’s service bulletin. In practice, you’ll often see SD pop up after an unusual load, a power hiccup, or a temporary sensor reading that doesn’t align with the expected operating state. The key takeaway from fans of the brand, including the Why Error Code team, is to treat SD as a signal that a fault has been detected, not a guaranteed cause. Start with simple resets and verify basic operating conditions before diving deeper into diagnostics.
In all cases, record the exact model number, the sequence of events when SD appeared, and any simultaneous error lights. This data helps when you reach out to support or a technician. By framing the issue around the model-specific manual and the observed symptoms, you’ll reduce wasted time on irrelevant fixes and improve the odds of a first-time resolution.
What to check first (model-aware context)
- Confirm the appliance is the exact model for which you have manuals or service notes. Different Whirlpool lines may show SD differently.
- Look for accompanying indicators (LED patterns, sound cues, display prompts) that narrow down the fault family.
- If your model supports a diagnostic mode, prepare to run a short self-test after the reset.
- Keep a log of when SD occurs, what you were doing (cycle, load size, detergent amount), and any preceding events like a power outage.
- Remember: If in doubt, err on the side of safety and call a pro rather than attempting invasive repairs.
Immediate quick checks you can perform safely
Before any disassembly, perform non-destructive checks and a safe reset. Start by powering the unit down, unplugging from the wall outlet for at least 60 seconds, and then plugging back in. Verify the lid/door latch is fully engaged and that the door closes with a firm seal. Inspect hoses and inlet connections for kinks, leaks, or blockages. Check that there’s adequate water supply and that the water inlet screen isn’t clogged. Finally, consider whether excess suds (from using too much detergent or improper product) could be affecting sensors; if so, run a dedicated rinse or suds-dump cycle if available.
Step-by-step fix for the most common cause
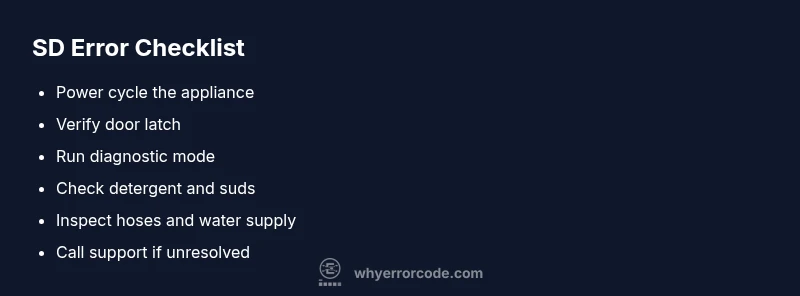
- Power cycle the machine: unplug for 60 seconds, then plug back in and select a light cycle.
- Re-seat or replace the door latch switch if you notice it feels loose or if the door won’t latch consistently.
- Check for a faulty sensor by running a built-in diagnostic test; note any sensor fault codes that appear.
- Inspect detergent usage and the suds level; if you suspect excess foam, run a rinse cycle to clear suds and use the recommended detergent type and amount.
- Verify water supply: ensure the supply valve is open and hoses are not kinked or clogged.
- If you still see SD after these steps, consult the service manual’s fault tree or contact support for a guided, model-specific resolution.
Diagnosing other potential causes
If the initial fix doesn’t resolve SD, broaden the scope to other potential contributors. A loose connector or damaged wiring to the control board can trigger sensor faults. A failing pressure switch or water level sensor can also misreport status to the controller. Unexpected power fluctuations can create software glitches that mimic hardware faults. In some cases, the issue lies with the control board firmware requiring an update or a factory reset. Each diagnosis should be guided by your model’s fault trees and service notes to avoid unnecessary replacements.
Safety tips and when to call a professional
Safety first: disconnect power when inspecting internal components, avoid operating the appliance with exposed wiring, and never bypass safety interlocks. If you don’t have formal training in electronics or appliance repair, or if you notice burning smells, buzzing, icicle-like cold spots near electronics, or exposed wiring, stop and contact a licensed technician. For most common SD-related repairs, you can expect labor and parts to range roughly from $100 to $350, depending on the fault area and whether a module or sensor must be replaced. If the issue involves the control board, wiring harness, or main power components, professional service is strongly advised. The Why Error Code team emphasizes that attempting high-risk repairs can void warranties or create safety hazards.
Cost estimates for common fixes and service
- Power cycle and software reset (free to perform): $0–$50 for any diagnostic software usage if provided by your model.
- Sensor or switch replacement (door latch, pressure sensor): typically $60–$200 for parts plus $60–$150 for labor.
- Control board or major module replacement: often $150–$400 for parts and $100–$250 for labor, depending on model and availability.
- Professional diagnostic call (if not resolved by user-level steps): $80–$150 service call, with additional costs for parts if needed.
Remember that costs vary by region and model; use these ranges as ballpark figures when budgeting for a repair.
Proactive maintenance to prevent future SD errors
Adopt a routine maintenance plan to minimize the risk of SD errors recurring. Schedule periodic self-diagnosis checks if your model supports it. Use only the detergent type and amount recommended by Whirlpool for your model; avoid overloading the drum or mixing incompatible products. Keep seals, hoses, and fittings clean and free from mold, and perform a gentle cleaning cycle monthly to prevent buildup that can affect sensors. If you frequently see SD after other tasks, consider addressing supply consistency, water hardness, and electrical stability in your home to reduce stress on the appliance electronics.
Steps
Estimated time: 30-60 minutes
- 1
Power cycle the appliance
Unplug the unit or switch off at the breaker for 60 seconds. Reconnect power and run a test cycle to see if SD reappears.
Tip: Label the breaker you used for quick future access. - 2
Inspect the door latch
Open the door, check that the latch engages firmly, and reseat any loose connectors behind the panel if you’re comfortable doing so.
Tip: A loose latch often triggers false fault codes. - 3
Run diagnostic mode
Enter the model’s diagnostic sequence and run sensor checks. Note any codes shown beyond SD.
Tip: Document any sensor fault codes for support. - 4
Check detergents and suds
Ensure you’re using the recommended detergent type and amount. If foam is excessive, run a quick rinse or suds-dump cycle.
Tip: Avoid using high-sudsing detergents with sensitive cycles. - 5
Inspect water supply and hoses
Verify the water valve is fully open and hoses are not kinked or clogged. Replace any damaged hoses.
Tip: A blocked inlet can mimic sensor faults. - 6
Decide on next steps
If SD persists after these steps, consult the service manual fault tree or contact support for a guided, model-specific resolution.
Tip: Professional help is recommended for control board or wiring issues.
Diagnosis: Whirlpool appliance shows SD error code and stops mid-cycle
Possible Causes
- highGeneral fault detected by controller (model-dependent)
- mediumDoor latch or switch fault
- lowSensor or wiring fault (sensor, hose, or PCB)
Fixes
- easyPower cycle the appliance (unplug 60 seconds or switch off at the breaker)
- easyInspect door latch and reseat connections to the control board
- easyRun built-in diagnostic test and clear any sensor faults
- mediumCheck hoses, water inlet, and detergent use for suds/flow issues
Frequently Asked Questions
What does the Whirlpool SD error code mean?
SD is a generic fault indicator used by Whirlpool across models. It signals the controller detected an issue, but the exact cause can vary by model. Start with a safe reset, then consult the model’s manual or diagnostic flow for specifics.
SD means a fault was detected by the control system. Check your model’s manual for specifics and start with a safe reset.
Can I fix SD error myself?
Yes, for basic faults you can try a power cycle, door latch check, and a run of diagnostics. Some repairs require a professional, especially when wiring or the control board is involved.
You can try basic resets and checks, but call a pro for wiring or board issues.
What should I do first when SD appears?
Power off, unplug for 60 seconds, then power back on and run a quick diagnostic. Verify the door latch is secure and detergent use is appropriate.
First, reset the unit and check the latch and detergent usage.
How much does professional repair cost for SD code?
Service calls typically range from $80 to $150, with parts and labor adding $100–$350 depending on the fault area and model.
Expect roughly $180 to $500 for a repair, depending on parts and labor.
How can I prevent SD errors in the future?
Use recommended detergents, avoid overloading, and run maintenance cycles regularly. Keep sensors and hoses clean and replace worn components promptly.
Follow detergent guidance, avoid overloads, and maintain the machine to prevent repeats.
What if SD persists after steps I took?
If SD persists, contact Whirlpool support or a licensed technician. Continuing operation with unresolved faults can damage the machine.
If it stays, call support; don’t operate the unit until fixed.
Watch Video
Top Takeaways
- Power cycle first to reset SD faults.
- Consult model-specific manuals for SD definitions.
- Use built-in diagnostics to confirm faults.
- Professional help recommended for control board issues.
- Follow detergent guidelines to prevent recurrence.