Urgent Guide to Dryer DC Error Code: Fix It Now
Facing dryer DC error code? This urgent guide covers meaning, quick fixes, a step-by-step repair flow, safety tips, and prevention to get your dryer running again fast.

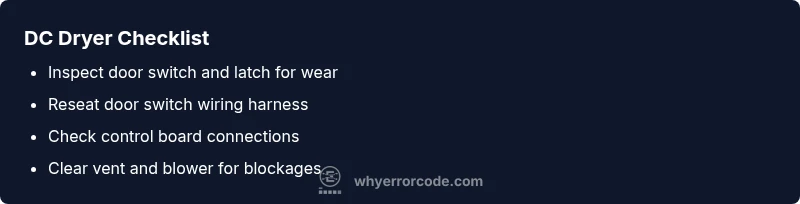
Dryer error code DC typically signals a door/detection or drive-control issue that prevents operation. The quickest path to resolution is to verify the door latch and switch, reseat connectors, and perform a safe power cycle. If the code persists, follow the step-by-step diagnostic flow and contact support if a replacement part is likely required.
What DC means on a dryer
A dryer displaying error code DC is a signal from the control system that something critical is off-line. In practice, DC often relates to door detection circuitry or a drive motor control fault that prevents the drum from turning. Because DC codes vary by brand, always consult your model's manual or the manufacturer’s support site for your exact meaning. The important thing is to treat DC as a fault rather than a simple warning, and to approach it with a safe, methodical diagnostic plan.
First, unplug the unit before inspecting any components to avoid electric shock. If the dryer is a front-loader, ensure the door is fully closed and the door switch engages correctly. A worn or misaligned door latch can fool the switch into thinking the door is open, triggering DC. Inspect the wiring harness at the door switch and at the control board for loose connectors or damaged wires. A secure, undamaged harness is essential for reliable operation. Finally, examine the motor control and belt area for obstructions; an obstructed drum or a slipping belt can produce abnormal signals that trip the DC code.
Common causes of dryer error code DC
The DC fault is rarely caused by a single component. In order of likelihood, the most common causes are:
- Door switch fault or worn latch (high)
- Door misalignment or latch timing issue (high)
- Faulty control board or relay (medium)
- Damaged wiring harness or loose connectors (medium)
- Blocked vent or defective blower (low)
Each cause affects the dryer’s ability to sense a normal door state or drum movement, triggering the DC code if the control logic detects a mismatch.
Quick fixes you can try now
If you see DC, start with a safe power cycle and quick hardware checks:
- Unplug the dryer or switch off at the breaker for 60 seconds to reset the control board.
- Make sure the door is fully closed and that the door switch engages when shut.
- Inspect the door latch for alignment and wear; replace if the latch is visibly damaged or loose hinges.
- Reseat all connectors at the door switch and the control board; unplug and replug firmly.
- Check for a blocked vent or clogged blower that could create abnormal resistance; clear any obstructions.
If the code remains after these steps, move to the deeper diagnostic steps in the next sections.
Step-by-step repair for the most common cause
- Power off and unplug the dryer.
- Remove the access panel to reach the door switch assembly.
- Disconnect the door switch wiring harness; inspect for corrosion or damaged wires.
- Replace the door switch if the switch tests bad or shows signs of wear.
- Reconnect the wiring harness, secure all fasteners, and close the door.
- Plug in the dryer and run a short cycle to verify the DC code is cleared.
Tip: Label wires before disconnecting and take photos to ensure correct reconnection.
tip1:
Other possible causes and how to test
If replacing the door switch doesn’t clear DC, test these additional components:
- Control board: look for swollen capacitors, burnt traces, or improper LED indicators.
- Wiring harness: check for frayed insulation, loose crimps, or heat damage.
- Motor/drive system: listen for abnormal noises or belt slipping; ensure the drum spins freely when manually rotated.
- Vent system: perform a vent-clean test and inspect for lint buildup that could mimic sensor faults.
Testing hints: use a multimeter to verify continuity on switches and suspected wiring, and consult the model’s wiring diagram before replacing major components.
Safety, warnings, and when to call a professional
Electrical appliances carry shock and fire risks. Always unplug before service, avoid working in a wet area, and never bypass safety interlocks. If you’re uncomfortable with electrical testing, or if the DC code persists after basic checks, contact a licensed appliance technician. Expect part costs to range from $20–$60 for simple switches to $120–$350 for control boards, plus labor estimates.
When to call a pro:
- DC persists after the door switch and wiring checks
- Visual damage to the control board or harness is evident
- Your brand requires special diagnostics or tools beyond basic testing
Prevention and maintenance to avoid DC in the future
Regular maintenance reduces the chance of DC reoccurring. Implement these practices:
- Inspect the door latch and switch every 6–12 months, replacing worn parts promptly.
- Keep vents clear and dry; lint buildup can interfere with sensors and motor control.
- Periodically reseat internal connectors during routine cleaning to prevent loose contacts.
- Run a test cycle after any door or wiring work to verify the DC code does not reappear.
Steps
Estimated time: 30-60 minutes
- 1
Power off and unplug the dryer
Begin by unplugging the unit or turning off the circuit breaker to ensure no live power is present while you inspect safety-critical components.
Tip: Use a flashlight to clearly see wiring behind panels; label any wires you disconnect. - 2
Access the door switch area
Remove the front panel or door boot as required by your model to expose the door switch and latch mechanisms.
Tip: Take photos of mounting points before removal to simplify reassembly. - 3
Test the door switch with a multimeter
With the dryer unplugged, test the switch for continuity; replace if there is no continuity or if the switch feels sticky.
Tip: If you don’t own a multimeter, visually inspect for obvious wear and replace the switch as a preventive measure. - 4
Inspect and reseat wiring harnesses
Check all connectors at the door switch and control board; reseat firmly and inspect for damaged insulation.
Tip: Look for corrosion on contacts and replace damaged connectors to prevent future faults. - 5
Replace the door switch if needed
Install a new door switch or latch kit following the manufacturer’s instructions; secure all fasteners.
Tip: Carefully align the latch so the door fully engages before testing. - 6
Test run and verify DC clearance
Plug the dryer back in and run a short cycle to confirm the DC error code is cleared and the drum rotates smoothly.
Tip: Allow the dryer to complete a cool-down cycle to ensure the fault does not recur.
Diagnosis: Dryer showing DC error code and won’t tumble or dry clothes
Possible Causes
- highDoor switch fault or worn latch
- highDoor misalignment or latch timing issue
- mediumFaulty control board or relay
- mediumDamaged wiring harness or loose connectors
- lowVent blockages causing sensor confusion
Fixes
- easyReplace door switch or door latch if worn or damaged
- easyReseat or replace damaged wiring harness and connectors
- mediumReplace the control board if the fault persists after hardware checks
- mediumReplace damaged wiring harness or shorted wires
- easyClear vent blockages and verify blower operation
Frequently Asked Questions
What does dryer DC mean and is it dangerous?
DC typically indicates a fault in the door detection or drive-control pathway. It is not inherently dangerous if you follow safety steps, but do not bypass safety interlocks or unplug the unit while inspecting live components.
DC usually points to a door or drive-control fault. Stay safe by unplugging first and avoid tampering with live parts.
Can I fix DC myself, or do I need a pro?
You can perform basic checks (door switch, latch, wiring harness reseats) if you have basic tools. More complex issues like a faulty control board require a professional repair to avoid further damage.
You can try simple door switch checks, but for control boards, call a pro.
How much does it cost to repair DC on a dryer?
Costs vary by component: simple switch repairs can be relatively inexpensive, typically between $60 and $180 including parts and labor. Control board replacements are higher, often in the $200–$500 range depending on the model and warranty.
Basic door switch repairs are usually under a couple hundred dollars, while control board replacements can be several hundred.
Is it safe to run the dryer with DC code cleared?
Only run a test cycle after confirming the fault is resolved. If the code returns, stop and consult a technician to prevent potential damage or fire risk.
If the DC code comes back, don’t ignore it—get it checked before using the dryer again.
Which brands commonly show DC codes?
DC codes appear across several brands and are tied to door and drive sensors. Always refer to your model’s official manual for brand-specific definitions.
DC codes vary by brand; check the manual for your model to understand the exact meaning.
Watch Video
Top Takeaways
- Identify DC as door/drive fault; start with door switch and wiring.
- Power cycle to reset controls before deeper repairs.
- Replace the most likely faulty component first (door switch) to save time and money.
- If the DC code returns after repairs, seek professional service.