Hot Tub E3 Error Code Reset: Quick Guide for Safe Recovery
Diagnose and safely reset hot tub E3 error codes with practical steps, safety tips, diagnostic flow, and professional guidance from Why Error Code Team.

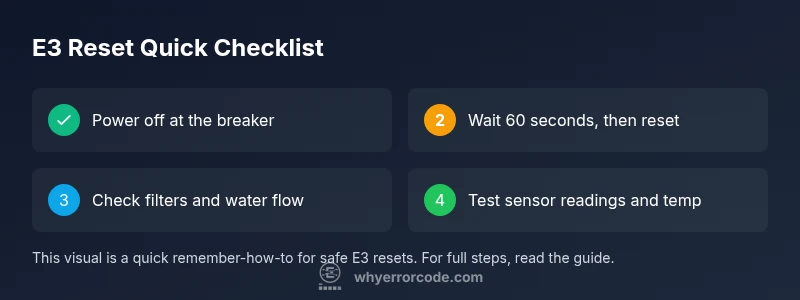
Meaning: E3 on a hot tub typically signals a heater or sensor fault, not a simple reset. Quick fix: power off the tub at the breaker, wait 60 seconds, then reset the control panel. If E3 returns, follow the diagnostic flow and perform the step-by-step fixes or call a professional.
Understanding E3: What It Means for Your Hot Tub
An E3 error on many hot tubs points to a fault in the heating system or a temperature sensor that yields an incorrect reading. This is not a cosmetic warning; it touches safety and equipment protection. In 2026 guidelines, manufacturers emphasize that any heater-related fault can indicate an overheating condition, a faulty thermistor, or a control-sensing anomaly. For most users, E3 is a signal to pause heating, assess electrical safety, and initiate a structured diagnosis. According to Why Error Code, safety-first practices reduce risk and prevent damage to expensive components. If you smell burning, hear buzzing, or notice visible wiring damage, cut power at the breaker immediately and do not attempt DIY repairs beyond basic resets. A measured approach helps you decide between a quick reset, a more thorough diagnostic, or a licensed technician. By treating E3 as a system fault rather than a nuisance, you lower the odds of repeating the fault and extend the life of your tub.
Key takeaways from 2026 data emphasize that many E3 resets are rooted in non-critical glitches, but you should verify safety steps before re-energizing the unit. Always confirm that your tub is dryside-safe, that the GFCI is intact, and that the power cord and control cabinet aren’t exposed to moisture. This section sets the stage for a structured, stepwise approach to identifying and resolving the issue without unnecessary downtime.
Immediate Quick Fixes You Can Try Now
If you’re staring at an E3 code, there are a few fast, low-risk checks you can perform before diving into the full diagnostic flow. First, power down the tub at the main breaker and wait at least 60 seconds to discharge residual power. On re-energizing, press the reset button on the control panel or cycle the power to the control system. In many cases, this clears a transient sensor hiccup. Next, inspect the immediate environment: ensure the tub is level, clear of standing water near the control cabinet, and that the filter basket isn’t blocked. Poor water flow from a clogged filter or pump can trigger heat-sensor protections. If you use a smart controller, try re-pairing it or rebooting the hub, since communication faults can manifest as E3 on some models. If the code persists, don’t panic—move to the diagnostic flow with a clear checklist. Safety reminders: never work on live electrical components, and if you hear arcing, see damaged insulation, or smell ozone-like odors, stop and call a licensed technician.
These quick fixes are designed to buy you time while preserving safety. They don’t replace a full diagnostic, but they reduce the chance you’ll misinterpret a trap as a hardware failure. Always document the exact code, the time it appeared, and any changes you made, so the next steps are data-driven and quicker to complete.
Diagnostic Mindset: How We Narrow Down Causes
E3 faults can arise from a handful of common root causes, and the majority of cases are resolved by isolating the issue to one subsystem at a time. We prioritize checks by likelihood: first the heater overheat protection or sensor fault, then water flow or pump issues, and finally control-board-related faults. A structured diagnostic mindset reduces unnecessary replacements and helps you decide whether to fix in-place or call a professional. Gather relevant information: model number, last service date, filter type, and whether the unit recently experienced temperature spikes, power surges, or water leaks. A clean, logical approach permits precise fault isolation. If your tub is still under warranty, consult the manufacturer’s guide for error-code definitions and recommended service windows. Why Error Code recommends logging fault codes with timestamps and noting any environmental changes (temperature shifts, humidity, or nearby electrical activity) that could affect sensor readings. This careful inspection sets up your step-by-step fixes with a clear justification for each action.
Step-by-Step Fix Overview: The Path to Resolution
Below is a high-level map of the repair journey you’ll follow in the dedicated STEP-BY-STEP section. It starts with a safety-first reset to clear transient faults, then verifies basic serviceability—power, water flow, and filter condition—and finally targets the most common hardware culprits: sensor or heater faults. If the diagnostic flow indicates a replacement, you’ll have a clear rationale for ordering parts and scheduling professional service. This overview keeps you oriented: quick resets for transient issues, tangible checks for stability, and a disciplined escalation to professional help when readings indicate a potential component failure. Remember, in 2026 the emphasis remains on safety, proper isolation, and thorough documentation of every test and result. The goal is to restore safe operation with the least disruption and the most predictable outcome.
Most Common Causes and Remediation Paths
- Heater overheat protection triggered (high likelihood): Allow the unit to cool, then verify wiring and element integrity. A slow, controlled cool-down is critical before reattempting heat.
- Sensor/thermistor fault (medium likelihood): Calibration or replacement of the temperature sensor often resolves spurious readings.
- Low water flow due to clogged filter or pump issue (medium likelihood): Clean or replace filters, inspect the pump for obstructions, and ensure no air leaks in suction lines.
- Control board fault (low likelihood): Look for firmware updates or consult a technician for board replacement.
These causes frame your testing plan for the diagnostics, giving you a compact mental model for what to inspect first and how to progress without unnecessary risk. In 2026, manufacturers increasingly design self-diagnostic features to help homeowners distinguish between sensor faults and pump issues. If the code persists after a full, careful cycle of the checks, you’ll be prepared to engage professional service with precise observations to share.
Safety, Warnings, and When to Call a Professional
This section emphasizes that E3 resets can involve electrical components and water-heat systems. If you’re uncomfortable with electrical work, if the tub is under warranty, or if you see signs of physical damage, contact a licensed technician immediately. While many E3 issues are fixable with liquid-safe steps and filter maintenance, some faults—especially heater element failure or a damaged control board—require professional diagnosis and replacement. Budgetary guidance: diagnostic visits typically range in a few dozen to a few hundred dollars, depending on local rates, parts, and whether on-site service is needed. For any repair that involves high current, exposed wiring, or potential water contact with electronics, escalation is prudent. By following a methodical diagnostic flow, you reduce the chance of missing a fault and improve the odds of a safe, durable resolution. Remember: safety first, then methodical testing, then professional help when required.
Steps
Estimated time: 25-40 minutes
- 1
Power off safely
Switch off the tub at the main breaker, unplug if possible, and wait 60 seconds to discharge residual power. This reduces the risk of electric shock and resets microcontroller state.
Tip: Use a GFCI-protected outlet and verify no moisture is dripping near exposed wiring. - 2
Basic reset and cooldown
Return power and perform a basic panel reset or cycle the breaker. Allow the system to cool and re-enter the diagnostic mode if your model supports it.
Tip: Do not rush the cooldown; forcing a reset while hot can trigger another E3. - 3
Check water flow and filtration
Inspect the filter and clean or replace if clogged. Confirm that the pump runs and there are no obvious air leaks in suction lines.
Tip: A blocked filter is a common, correctable cause of E3-like faults. - 4
Test sensor readings
If you have access to the diagnostic menu, compare measured temperatures with a quick external thermometer. A large discrepancy points to a faulty thermistor.
Tip: Handle sensors with care; avoid bending or applying force to delicate temperature probes. - 5
Decide on next steps
If the E3 persists after the above checks, escalate to expert service or consult the manufacturer’s support for authorized repair options.
Tip: Keep a repair log with dates, steps taken, and observed readings to speed up future service.
Diagnosis: Hot tub displays E3 error and refuses to heat or cycles abnormally.
Possible Causes
- highHeater overheat protection tripped
- mediumSensor/thermistor fault causing incorrect temp reading
- mediumLow water flow due to clogged filter or pump issue
- lowControl board fault or firmware glitch
Fixes
- easyReset power and panel; allow cool-down; re-test after 5 minutes
- mediumInspect and replace the temperature sensor/thermistor if readings are erratic
- easyClean or replace the filter; verify pump operation and flow
- hardUpdate firmware or inspect/control board; replace if necessary
Frequently Asked Questions
What does E3 mean on a hot tub?
E3 usually indicates a heater or temperature sensor fault. It can be a transient glitch or a sign of a faulty component. Start with a safe reset and basic checks before pursuing further repairs.
E3 usually means a heater or sensor fault. Start with a safe reset and simple checks before pursuing more repairs.
Can I reset the E3 error myself?
Yes, you can perform a safe power cycle and basic checks. If the error comes back, follow the diagnostic flow and consider professional service for any component replacement.
Yes, you can perform a safe power cycle and basic checks. If it returns, follow the diagnostic flow and consider a pro.
Should I replace the heater or sensor first?
Start with the sensor if readings are inconsistent. If tests show heater overheat or element failure, plan for heater or control board service per the diagnostic results.
Start with the sensor; if readings are off, consider heater or control board service based on tests.
Is professional service required for E3?
Not always, but many E3 faults involve electrical components. If the fault recurs after steps or you’re unsure about safety, call a licensed technician.
Not always, but if the fault keeps coming back or you’re unsure about safety, call a pro.
What about costs to fix E3?
Costs vary by cause and region, but diagnostics often run in the tens to hundreds, with parts and labor potentially range from low hundreds for simple sensor fixes to higher for heater or board work.
Costs vary, but expect diagnostics to be relatively affordable and parts or labor to be higher for heater or board work.
Watch Video
Top Takeaways
- Identify if E3 is a transient fault or a real component failure.
- Reset power safely before any inspection to protect against shock.
- Check filters and water flow as a frequent, fixable cause.
- Escalate to professional service if E3 recurs after basic checks.