Dishwasher Error Code 1: Urgent Diagnostics and Fixes
Urgent guide to diagnosing and fixing dishwasher error code 1. Learn how to reset, test components, and when to call a pro. Includes step-by-step fixes, cost ranges, and safety tips.

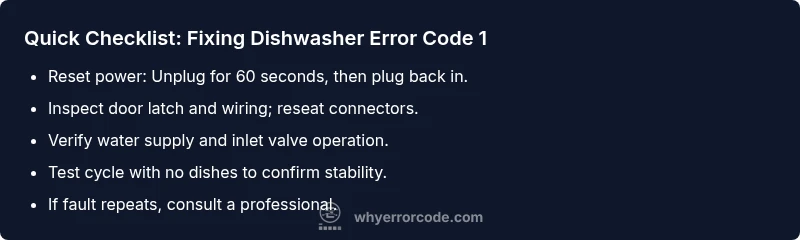
Dishwasher error code 1 signals a general fault detected by the control board. The quickest path to relief is to perform a soft reset, inspect door latch and wiring, and ensure the inlet valve is not jammed. If the fault persists, unplug, wait 60 seconds, and run a basic wash. If needed, contact support for model-specific guidance.
What Dishwasher Error Code 1 Means
Dishwasher error code 1 indicates a general fault reported by the machine’s control board. In practical terms, the dishwasher cannot proceed because one of the core subsystems isn’t communicating reliably with the controller. This kind of fault is urgent because it can be triggered by anything from a loose connection to a failing sensor or a board issue. According to Why Error Code, the root cause is rarely a single component and more often a cascade of minor issues that disrupt feedback loops among sensors, actuators, and the logic unit. The immediate action is to document when the error appears, the cycle stage, and any accompanying noises or leaks. This helps you or a technician map the condition quickly. While models differ, the common thread is a disruption that prevents safe, reliable operation. Start with a careful power check, inspect the door latch, and confirm the water supply is steady before diving into deeper diagnostics.
Symptoms You Might See
The most obvious sign of dishwasher error code 1 is the display showing the code during a cycle or at startup. You may hear a faint beeping sequence or notice the cycle aborts with little to no water distribution. Some models also flash status lights or halt mid-cycle. The key is consistency: note exactly when the code appears, whether it happens on cold or hot cycles, and whether it’s accompanied by unusual sounds, leaks, or extended pump activity. This data becomes vital if you escalate to professional service. Remember, this error is a catch-all for faults in the control software, wiring, sensors, or the power path, so a methodical approach is essential.
Most Common Causes (Ranked by Likelihood)
- Door latch or door sensor failure — high
- Control board fault or firmware glitch — high
- Inlet valve or water supply issue — medium
- Loose wiring harness or connector — medium
- Float switch or pressure sensor fault — low
In many homes, a simple latch misalignment or a loose connector is enough to trigger code 1. The control board is the next most common source; even a minor firmware wrinkle or a voltage fluctuation can register as a fault. While water supply or valve issues are less frequent, they can cause the same fault if the system cannot sense proper filling or pressure.
Quick Home Fixes to Try (Pre-Careful Disassembly)
- Perform a soft reset: unplug the unit for 60 seconds, then plug back in and run a short rinse cycle. This clears transient faults and resets sensors.
- Inspect the door latch and latch wiring for looseness or corrosion; reseat connectors gently. A misread door switch can halt operation and trigger code 1.
- Check the water supply: ensure the faucet is fully open and the inlet hose isn’t kinked. A restricted supply can cause the system to detect a fault in filling.
- Verify the float switch and any visible wiring near the base for obstruction or discharge water. Debris or mispositioning can throw off level readings that feed back to the controller.
If these quick fixes don’t resolve the error, move to a more thorough diagnostic path. Safety first: disconnect power when inspecting internal components and never bypass safety interlocks. This is where the lines between simple resets and professional diagnostics blur, and where cost estimates begin to matter.
Diagnostics: How to Test the Main Suspects Safely
- Door latch circuit: Use a multimeter to test continuity across contacts when the door is closed. If the latch reads open or shows inconsistent readings, replace or reseat.
- Control board: Look for burnt components, swollen capacitors, or obvious damage on the control board. If you see damage, do not attempt a field repair—board replacement is usually required.
- Water inlet valve: With the machine off, verify that the inlet valve is not clogged or stuck. A stuck valve can prevent proper filling and trigger fault codes.
- Wiring harness: Inspect harnesses for loose pins, corrosion, or damaged insulation. Re-seat or replace as needed.
- Sensors: Float switch and pressure/flow sensors should respond realistically to changes in water level and valve actuation. Inconsistent readings point to sensor replacement.
Document findings with clear notes and photos. This information helps technicians reproduce the fault and ensures faster, more accurate repairs.
Step-By-Step Fix (Most Common Cause: Door Latch or Wiring)
- Power down the dishwasher and unplug it. Wait 60 seconds to discharge capacitors. (Step 1 — safety).
- Open the door and inspect the latch area; clean any debris and reseat the latch connectors firmly. Look for damaged wires and signs of wear. (Step 2)
- Reconnect the harnesses, ensuring all pins are aligned and locked. Move the door gently to confirm it latches cleanly. (Step 3)
- Restore power and run a short test cycle with no dishes to verify the fix. If code 1 returns, proceed to a deeper diagnostic or board replacement.
- If the fault persists, test the inlet valve for proper operation and verify water supply. (Step 5)
- If still unresolved, schedule professional service for a control-board evaluation or replacement. (Step 6)
Tip: Keep a log of fault codes and events so that technicians can spot recurring patterns quickly.
Safety, Warnings, and When to Call a Pro
- Power down before inspecting any internal parts to avoid shock hazards.
- Do not bypass interlocks or test points designed to protect users and equipment.
- If you smell burning, see melted plastic, or notice visible damage on the control board, stop and call a pro—the risk of fire or further electronics damage is real.
- In most regions, professional repair for electronics can range from moderate to high costs depending on parts and labor; get a written estimate before authorizing major work.
- If you’re uncomfortable with electrical testing or disassembly, it’s safer to hire a technician. Expect a diagnostic visit to run in the $75–$150 per hour range, plus parts if replacements are needed.
How to Prevent Error Code 1 Recurrence
- Run regular maintenance cycles on the dishwasher and clean filters, spray arms, and seals every 1–3 months.
- Use the dishwasher’s self-clean option (if available) to clear buildup that can affect sensors.
- Avoid heavy mixing of detergents or improper loading that blocks sensors and impedes water flow.
- Keep power clean: use a surge protector and avoid power spikes that can destabilize the control electronics.
- Record fault patterns and maintenance history to help future diagnostics and prevention.
What to Expect During a Pro Service Visit
A technician will typically run a controlled diagnostic, inspect wiring harnesses, test the door latch, and verify sensor readings with specialized equipment. They may replace the control board, door latch, or inlet valve depending on findings. Expect a parts-and-labor estimate after initial assessment; depending on the model and region, total costs can vary widely. Always ask for a written diagnosis and a recommended parts list before authorizing work.
Steps
Estimated time: 60-90 minutes
- 1
Power down and safety check
Unplug the unit and wait 60 seconds to discharge capacitors. This prevents shock and resets the control electronics. Gather a flashlight and a small container to hold screws if you need to remove the back panel later.
Tip: Always unplug before touching internal parts. - 2
Inspect door latch and wiring
Open the door fully and inspect the latch area for dirt, corrosion, or misalignment. Re-seat any loose connectors and ensure wires are intact without fraying.
Tip: A misaligned latch is a frequent trigger for code 1. - 3
Test for latch integrity
With the door closed, gently press on the latch area to see if the switch engages. If you hear no click or it feels loose, the latch may need replacing.
Tip: Even a sturdy latch can fail if connectors are loose. - 4
Check water supply path
Make sure the water supply is fully open, the hose is not kinked, and the inlet valve isn’t clogged. A restricted flow can mimic a fault condition.
Tip: Run a quick tap test to confirm consistent flow. - 5
Inspect sensors and connectors
Check float switch and pressure sensors for blockages or water contact. Verify that connectors are secure and free of corrosion.
Tip: Sensor issues are common culprits for intermittent code 1. - 6
Run a controlled test cycle
Reconnect power and run a short test cycle with no dishes to confirm stable operation. Note any repeating faults.
Tip: Document fault times and cycle stage for reference.
Diagnosis: Dishwasher displays error code 1 and halts mid-cycle
Possible Causes
- highDoor latch or door sensor failure
- highControl board fault or firmware issue
- mediumInlet valve or water supply issue
- mediumLoose wiring harness or connector
- lowFaulty sensors (float/pressure)
Fixes
- easyReset the dishwasher by power-cycling (unplug for 60 seconds)
- easyInspect and reseat door latch wiring and connectors
- mediumTest water inlet valve and water supply for proper flow
- mediumCheck wiring harnesses for loose pins; secure or replace
- hardReplace control board or sensors as needed
Frequently Asked Questions
What does dishwasher error code 1 mean?
Code 1 is a general fault flagged by the control board. It suggests a disruption in communication between sensors, actuators, and the main controller. Start with a reset and basic checks, then escalate if the fault repeats.
Code 1 is a general fault; start with a reset and basic checks, then call a technician if it repeats.
Can I fix error code 1 myself?
You can perform safe, non-invasive checks like power resets, door latch inspection, and water supply verification. If the fault persists after these steps, it’s safer to consult a professional due to electrical risks and the potential for board damage.
You can try basic resets and latch checks, but if it repeats, get a professional to avoid risk.
Is water supply often the cause?
Water supply issues can cause fault reads that appear as code 1, but they are less common than latch or board faults. Verify open supply, clear hoses, and proper valve operation.
Water supply problems can trigger it, but latch or board faults are more common.
When should I replace the control board?
Board replacement is typically considered when there are burnt components, persistent faults after resets, or firmware corruption. A pro can confirm whether replacement is necessary and provide a cost estimate.
Replace the board if there’s visible damage or repeated faults after checks.
What about the costs involved?
Costs vary by model and region. Expect parts and labor to range from moderate to high, and a professional may quote a diagnosis fee plus a repair range before any replacement.
Costs depend on the exact part and labor; a professional will give a diagnostic quote first.
Watch Video
Top Takeaways
- Reset and re-test before deeper fixes
- Prioritize door latch and wiring checks
- Call a pro if code 1 recurs after resets