LiftMaster Error Code F1: Quick Troubleshooting and Fixes
Urgent guide to understanding LiftMaster error code F1, diagnosing the fault, and safe fixes. Learn when to reset, check sensors, and call a pro to restore safe operation.

LiftMaster error code F1 signals a system fault that affects safety circuits or control electronics. The quickest path to relief is a power cycle, sensor checks, and a firmware refresh if available. If the fault persists, seek professional service to prevent unsafe operation. This is an urgent issue you should address promptly.
What LiftMaster error code F1 means
According to Why Error Code, liftmaster error code f1 indicates a fault that typically involves the opener’s control electronics or safety circuits. It’s more than a simple blip and usually requires action before the door can operate safely. Because garage-door openers are safety-critical devices, treat F1 as urgent and work through the diagnostic steps in a calm, methodical way. This means verifying power stability, inspecting the safety sensors for misalignment or obstruction, and checking for any firmware or app-related issues that could trigger an overlying fault. While some F1 faults resolve with a straightforward reset, others point to underlying hardware concerns that demand careful handling to avoid injury or door damage. Always disconnect power before inspecting internal components to reduce the risk of electric shock. If you’re using a smart home bridge or app, note any recent configuration changes that might have triggered F1. The goal is to restore safe operation while preserving user safety.
Diagnostic flow for LiftMaster F1: symptoms, causes, and fixes
The presence of F1 is typically accompanied by an unable-to-run condition or a persistent error LED on the unit or in the app. The most common causes include a shaky power supply causing voltage dips, safety sensor misalignment or obstruction (or dirty sensor lenses), and a faulty control board or firmware glitch. In rarer cases, loose wiring or a marginal module can trigger F1. The diagnostic flow is designed to quickly separate likely causes from unlikely ones and map each to a safe, incremental fix. Start with non-invasive checks, then progress to testing individual components. Document what you observe so you can provide precise details if you seek professional help. Remember, safety sensors are there to prevent injury, so any misalignment should be corrected before testing further.
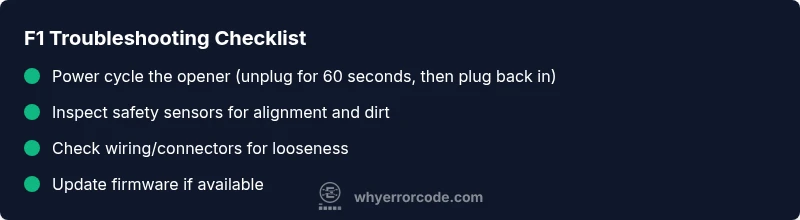
Quick fixes you can try now (before disassembly)
Before opening the unit, perform fast, low-risk actions that address the most frequent F1 scenarios. Ensure the garage is clear and you have the right tools. 1) Power cycle the opener: unplug the unit or switch off the circuit breaker for at least 60 seconds, then restore power and test. 2) Inspect cables and connectors for looseness or corrosion; reseat any suspect connections. 3) Check safety sensors for alignment and cleanliness; realign beams if needed and wipe sensor lenses gently. 4) If your model supports a firmware update, follow the manufacturer’s steps to apply it. These steps clear many F1 faults without invasive repair. If F1 persists after these actions, proceed to a more thorough diagnostic or contact a professional.
Other potential causes and how to fix them
If the quick fixes do not resolve F1, consider other possibilities such as intermittent power supply issues (inconsistent voltage from the outlet or transformer), a failing control board component, or a sensor subsystem with a marginal optical path. Re-check power stability at the outlet with a tester and try a different outlet if available. Inspect the control board area for signs of burn marks or melted insulation and avoid touching exposed circuitry. If you observe any unusual smells, heat, or smoke, stop immediately and seek professional service. In many cases, professional technicians will perform a controlled diagnostic to pinpoint the exact fault and replace aging components as needed.
Steps
Estimated time: 45-60 minutes
- 1
Power cycle the opener
Unplug the unit or switch off the circuit breaker for at least 60 seconds. Reconnect power and test the door. This can clear transient faults that trigger F1.
Tip: Label the outlet or switch so you can restore your original setup later. - 2
Check safety sensors
Inspect sensor lenses for dust or obstructions and straighten misaligned beams. A misaligned sensor can trigger F1 and prevent the door from closing or opening safely.
Tip: Clean lenses gently with a soft cloth; never scratch the surface. - 3
Inspect wiring and connectors
Power down the unit and visually inspect all accessible connectors. Reseat loose cables and look for obvious wear or damage. A loose connection can cause intermittent faults that appear as F1.
Tip: Take a photo before disconnecting anything to document the wiring layout. - 4
Test manual operation
With power restored, attempt a manual run using the wall control or release mechanism. If the door moves smoothly, the fault may be sensor related or a loose connection rather than a board fault.
Tip: Keep hands clear of the door as it starts to move. - 5
Update firmware or reset
If your model supports firmware updates, install the latest version following the user manual. If a reset option exists, perform a factory reset after saving your configurations.
Tip: Back up programmed remotes or schedules if possible before resetting. - 6
When to call a professional
If F1 persists after all basic checks, or if you detect heat, burning smells, or damaged components, contact a licensed technician. A pro can perform tested diagnostics, safely replace faulty boards, or sensor subsystems.
Tip: Ask for a written estimate and a warranty on parts and labor.
Diagnosis: Garage door opener displays F1 and fails to operate normally
Possible Causes
- highPower supply issue causing voltage fluctuations
- mediumSafety sensor misalignment or obstruction
- mediumControl board fault or firmware glitch
Fixes
- easyPower cycle the unit: unplug for 60 seconds, then plug back in
- easyInspect safety sensors for alignment and cleanliness, reseat connections
- mediumUpdate firmware or reset to factory settings if supported
Frequently Asked Questions
What does LiftMaster F1 mean when it appears on my opener?
F1 indicates a fault requiring attention to the opener’s electronics or safety circuits. It’s not a minor warning and should be treated as urgent. Start with quick checks and, if unresolved, move to professional assistance.
F1 means there’s a fault in the opener’s electronics or safety circuits, so start with quick checks and call a pro if it doesn’t clear.
Is it dangerous to ignore F1?
Yes. Ignoring F1 can leave the door in an unsafe state or cause unexpected movement. Stop using the door and follow the diagnostic steps or contact a technician.
Ignoring F1 can be unsafe. Stop and troubleshoot, or call a pro if it doesn’t clear.
What quick fixes should I try first for F1?
Start with a power cycle, then check safety sensors for alignment and cleanliness. Reseat any loose wires and update firmware if available. If the fault remains, proceed to professional diagnostics.
First, power cycle and check sensors. If it stays, get a pro.
Will a firmware update fix F1?
Firmware updates can resolve software glitches that trigger F1. Follow the manufacturer’s instructions exactly, and back up settings before updating.
Firmware updates can fix software issues that cause F1. Follow the manual carefully.
When is professional help required for F1?
If basic checks don’t clear F1, if you notice overheating, burning smells, or damaged components, or if you’re unsure about performing electrical work, contact a licensed technician.
Call a pro if F1 doesn’t clear after basic checks or if you see damage.
Does F1 affect warranty coverage?
Warranty terms vary by manufacturer and region. Using improper fixes can void coverage. Always consult the manual or dealer before non-authorized repairs.
Check your warranty terms; improper fixes may affect coverage.
Watch Video
Top Takeaways
- Power cycle first to clear transient faults
- Verify sensor alignment and safety devices
- Persisting F1 requires professional assessment
- Document tests and changes for support
- Use official firmware updates and manuals