Whirlpool Error Code on Washing Machine: Urgent Diagnostics and Fixes
Urgent, practical guide to diagnosing and fixing Whirlpool error codes on washing machines. Learn what codes mean, how to run a diagnostic flow, step-by-step repairs, safety tips, and when to call a pro.

Whirlpool error code on washing machine means the built-in diagnostic detected a fault that prevents safe operation. Codes point to common issues like door latch, sensor, water inlet, or control board. Most fixes begin with a quick reset, verify power and door, then consult the model’s fault code list for precise meaning and recommended steps.
What the Whirlpool error code on washing machine means
When a Whirlpool washer displays an error code, it signals that the built-in diagnostic system detected a fault that prevents the cycle from completing safely. The exact meaning depends on your model and series, but most codes point to issues with doors and lids, sensors, water inlet, pumps, or the control board. The display error is a starting point, not a guaranteed diagnosis—switch off power if you need to inspect components and consult the official fault code chart for your specific model. According to Why Error Code, understanding the difference between transient glitches and real faults is essential to minimize downtime. In practice, you’ll typically begin with a power cycle, ensure the outlet and circuit are functioning, and then map the displayed code to the model’s documented meaning. This approach saves time and helps you focus fixes on the right subsystem rather than replacing parts blindly.
From a user perspective, treat every code as a prompt to check the basics first: door latch, water supply, hoses, and sensor connections. If the code persists after reset and basic checks, escalate to model-specific diagnostics. Why Error Code’s research shows that most codes fall into a few broad buckets—electrical, mechanical, water-management, and software—so you can triage efficiently. Keep a notebook of codes you see, the cycle step, and any unusual sounds or leaks. This data becomes invaluable for a professional if you need to call for service.
Why Whirlpool error codes vary by model and series
Whirlpool has multiple product lines and firmware versions across front-load and top-load washers. Because each series may use a different set of sensors and controls, the same symbol or letter might map to different faults on different models. That’s why the exact meaning of a code can differ even within the same year. For users, a code displayed on the panel is a starting point, not a universal diagnosis. Always check your model number (often on the door frame or behind the control panel) and pull the official fault code list for that model. Why Error Code analysis shows that relying solely on memory leads to misdiagnosis in roughly a third of cases; cross-check with documented mappings. In practice, keep a log of codes seen, the cycle step when they appeared, and any accompanying noises or leaks. This habit speeds up service calls and reduces repeat trips.
Model families in Whirlpool’s lineup commonly diverge on sensor calibration and software logic. A code in one series could refer to a shorted temperature sensor, while a newer model uses a different sensor arrangement but still displays the same alphanumeric code. By using the model number, you unlock the exact wiring diagram, code table, and service bulletin for that unit. Why Error Code’s team recommends keeping the model and serial number handy when you search for fixes, so you land on model-accurate guidance quickly. If you’ve recently installed a new hose or valve, rechecking those connections against the model’s layout can also be essential for accurate diagnosis.
A practical approach is to verify the two most common culprits first—door latch and power integrity—before moving to sensor or control-board diagnostics. This helps prevent unnecessary parts replacement and reduces service time. As you gain experience with different Whirlpool models, you’ll notice that the same symptom—an error code—often maps to similar failure modes across families, which makes a strong diagnostic framework especially valuable. Always treat safety as the top priority and pause repairs if you smell burning, notice water pooling, or see discoloration around electrics.
Diagnostic flow for Whirlpool error codes
Symptom: The washer displays an alphanumeric code and stops mid-cycle or aborts a wash. This prompts a structured diagnostic flow that prioritizes safety and speed.
Possible causes (prioritized):
- Door latch or lid switch fault — high likelihood when the machine won’t start or the door won’t unlock after a cycle; electrical contacts can wear or become misaligned.
- Power/outlet issue — medium likelihood if the display is faint or resets intermittently; a loose outlet or tripped breaker is common.
- Sensor or water-management fault — medium to low likelihood depending on code; sensors can drift or a clogged water inlet valve can trigger specific codes.
- Control board issue — lower likelihood but plausible in newer models with aging firmware; a loose connector can mimic a board fault.
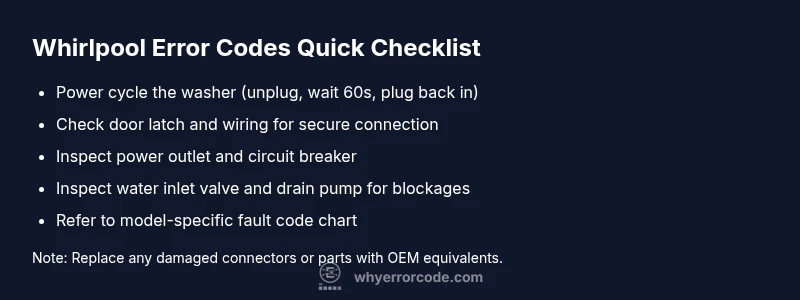
Fixes (in order of practicality):
- Perform a power cycle: unplug, wait 60 seconds, plug back in, and restart to clear transient faults.
- Inspect the door latch and wiring: verify the latch engages fully, check for visible damage or loose connectors, reseat any harnesses.
- Test the outlet and circuit: try a different device to confirm steady power; reset the house breaker if needed.
- Check sensor connections and hoses: ensure tubes are clear and hoses aren’t kinked; reseat sensor connectors if found loose.
- If the code remains after these steps, the issue likely involves the control board or a failed sensor, and professional service is recommended.
Step-by-step fix for the most common cause: door latch or lid switch
- Power down and unplug the machine before touching any components. This reduces the risk of electric shock. Tip: Use a non-conductive mat under the washer when working near wiring.
- Open the access panel and locate the door latch or lid switch assembly. Check for obvious debris or obstruction that could prevent full engagement. Tip: A flashlight helps you inspect small crevices where lint and hair collect.
- Detach the latch connector and inspect for corrosion or loose pins. Clean gently with a dry brush or contact cleaner if appropriate, then re-seat the harness firmly. Tip: Do not yank wires; ensure you’re not forcing connectors in. If a pin is bent, stop and replace the connector.
- Reconnect all wires, reassemble any panels, and restore power. Run a short cycle with no clothes to observe if the code returns. Tip: Listen for clicks or chimes that confirm switch engagement.
- If codes persist after a reset, test the switch with a multimeter (continuity check) if you have the tools; otherwise, proceed to diagnostic servicing. Tip: Document the exact code, the cycle step, and any sounds to assist the technician.
- Schedule professional service if the problem remains unresolved. A professional can replace the latch, verify wiring integrity, and confirm the control module’s health. Tip: Request a cost estimate that includes parts and labor before proceeding with repairs.
Other common causes and fixes
- Power supply issues: If the outlet is unstable, the washer may not power reliably, triggering intermittent codes. Fix by plugging into a known-good outlet and checking circuit continuity. Tip: Avoid using extension cords; they can cause voltage drops that mimic faults.
- Water inlet and drain problems: A clogged intake valve or blocked drain pump can trigger codes related to water fill or pump operation. Tip: Inspect hoses for kinks, clean screens, and verify water pressure from the supply.
- Sensor faults: Temperature and pressure sensors may drift or fail, leading to incorrect readings and code alerts. Tip: Ensure sensors are clean and securely connected; avoid touching sensitive sensor components with bare hands.
- Control board and wiring: The main control board or its harnesses can fail or loose connections can create misreadings. Tip: Look for burnt or melted wires and loose connectors; professionals should handle board replacements.
Safety, cost expectations, and when to call a professional
Safety-first is non-negotiable with any appliance repair. Always unplug the washer before inspecting internal components. If you smell burning, hear buzzing near electrical parts, or observe visible water leaks while servicing, stop immediately and contact a licensed technician. Cost-wise, you can expect a range of ballpark figures: a basic service call typically runs around $60–$120 in many regions; common part replacements (door latch, sensors) can add $20–$350 for parts, plus labor; more complex issues like control boards or specialty valves can push total repair costs into the higher hundreds. These figures vary by model, region, and the specific fault. Why Error Code recommends requesting a written estimate that separates parts and labor to avoid surprises, and to confirm if warranties cover some components.
When to call a pro: for persistent codes after basic checks, suspected control-board faults, or if you lack the tools or safety clearance to test electrical components. A professional can restore the diagnostic health of the machine, verify wiring integrity, and ensure code logic aligns with the model’s firmware. If your washer is under warranty, check whether an approved service provider is required to avoid voiding coverage.
Prevention tips and quick references
- Regular maintenance: Clean lint filters, inspect hoses, and check door seals monthly to prevent faults from accumulating.
- Gentle use: Avoid overloading and harsh detergents; improper loads can stress seals and sensors, triggering errors.
- Documentation: Maintain a simple log of every error code, model number, and cycle step when faults occurred; this speeds future diagnostics.
- Updates and recalls: Periodically check Whirlpool’s official support for firmware updates or recalls that may address known fault codes.
- Safe resets: A standard power cycle (unplug, wait 60 seconds, plug back in) is a safe first step for non-critical codes. If the issue recurs, escalate to more in-depth checks or professional service.
Steps
Estimated time: 30-75 minutes
- 1
Power down and unplug
Shut off power to the washer and unplug the power cord from the wall. This prevents shock while you inspect connections.
Tip: Use a dry, non-slip mat under the unit to avoid losing small screws. - 2
Open access and locate the latch/switch
Remove the front panel or top cover as needed to access the door latch or lid switch assembly. Visually inspect for debris or misalignment.
Tip: Take photos of the wiring before unplugging anything; this helps during reassembly. - 3
Inspect and reseat connectors
Check all connectors to the latch and switch for corrosion or loose pins. Reconnect firmly; ensure a snug fit.
Tip: If a connector is damaged, replace it rather than forcing a fit. - 4
Test the latch and cycle
Plug the unit back in and run a short cycle with no load to verify the code does not reappear.
Tip: Listen for distinct latch engagement sounds; absence may indicate a faulty latch. - 5
Check the power pathway
If the code persists, test the outlet, cord, and nearby wiring for consistency; consider a dedicated circuit if issues recur.
Tip: Avoid using extension cords; they can cause voltage drops affecting operation. - 6
Call a professional if unresolved
If codes remain after these steps, the fault may be a failed control module or sensor that requires diagnosis with specialized tools.
Tip: Request a detailed written estimate for parts and labor before approving more extensive work.
Diagnosis: Whirlpool washing machine displays an error code and won’t start or finish a cycle
Possible Causes
- highDoor latch or lid switch fault
- mediumPower supply/outlet issue
- lowControl board or sensor fault
Fixes
- easyPower cycle the washer: unplug, wait 60 seconds, plug back in and restart
- easyInspect door latch and wiring for obstruction or loose connectors; reseat harnesses
- easyTest the outlet and circuit breaker; try a different known-good outlet
- mediumCheck sensor and hose connections for secure fit; replace if damaged
- hardIf codes persist, a professional may replace the door latch, sensor, or control board
Frequently Asked Questions
What does Whirlpool error code on washing machine mean?
Whirlpool error codes indicate a fault detected by the washer’s self-diagnostic system. They point to common issues such as the door latch, sensors, water inlet, pump, or control board. Use your model’s fault code list to pinpoint the exact cause and recommended steps.
Whirlpool codes signal a detected fault. Check the fault code list for your model to identify the likely cause and next steps.
Can I fix the error code myself?
Yes, many codes resolve with a simple reset and basic checks (power, door latch, hoses). Some codes require parts like a latch or sensor. If the code persists, consult the model-specific guide or contact a professional.
Many codes can be fixed with a reset and basic checks; persistent codes mean you should consult the model guide or a pro.
What is a quick first-step for most Whirlpool codes?
Perform a power cycle: unplug for 60 seconds, then plug back in and restart. This clears transient faults and can resolve many codes without tools.
First, unplug for a minute, plug back in, and retry. This often clears transient faults.
When should I call a technician?
If the code persists after resets, if you suspect a control board or sensor fault, or if electrical safety concerns arise, contact a licensed technician. Warranty coverage may affect service options.
Call a technician if codes persist after resets or if you suspect a board or sensor fault.
Are Whirlpool codes safe to ignore?
No. Error codes indicate real faults that can cause leaks, electrical hazards, or further damage. Address them promptly and avoid running the machine until diagnosed.
No—ignore codes at your peril. Address them promptly to prevent damage or hazards.
Do all Whirlpool models share the same codes?
Not always. Codes can differ by model and firmware. Always cross-check codes with the exact model’s fault code chart from Whirlpool’s official support.
Codes can differ by model; verify against the exact model’s chart.
Watch Video
Top Takeaways
- Identify the exact model code mapping for accurate diagnosis
- Start with resets and door latch checks before replacing parts
- Document codes and cycle steps to speed professional service
- Know when a professional is needed for control board or sensor faults