Whirlpool F1 Error Code Oven: Fix, Diagnose, and Prevent
Practical, step-by-step guidance to diagnose and fix the Whirlpool F1 error code on ovens, with safe quick fixes, cost ranges, and prevention tips from Why Error Code.

Whirlpool F1 indicates a fault in the oven’s control system or temperature sensor halting operation. Try a power cycle: unplug for 60 seconds, reconnect, then reset. If the error returns, professional service is typically required to test and replace the control board or sensor.
Whirlpool F1 Error Code Oven: What It Means
The Whirlpool oven F1 error code signals a fault in the oven’s control system or temperature sensor that stops normal operation. The Why Error Code team found that many F1 occurrences stem from sensor communication issues or a faulty control board, rather than a simple power glitch. Understanding the root cause matters: a transient blip in a sensor line is not the same as a failed control board, and the remedy ranges from a quick reset to a full replacement. This guide from Why Error Code provides a practical path to identify whether you can fix it yourself or if you should call a professional. The emphasis is on safety, verifiable steps, and cost-aware decisions. By walking through symptom checks, basic resets, and a structured diagnostic flow, you’ll reduce downtime and make informed repair choices that minimize risk to you and your appliance. Even if you’re comfortable with basic tools, remember that the F1 fault can involve high-voltage components or sensitive electronics, so proceed with caution and know when to escalate to a pro.
Key takeaway: start with simple steps, but don’t ignore signs that point to a control-board or sensor fault that needs qualified service.
Whirlpool F1 Error Code Oven: Common Symptoms and Early Warning Signs
When your Whirlpool oven displays F1, you’ll often notice it alongside a non-responsive keypad, failure to heat to set temperatures, or an inability to complete a self-test cycle. Some owners report erratic temperature readings or the oven refusing to lock the door for mode changes. These symptoms suggest the issue could be a faulty temperature sensor (thermistor), a loose wiring harness, or an intermittent control-board fault. The presence of F1 after a cold start, followed by a return after a power cycle, typically points to the sensor or control circuitry failing to communicate with the oven’s controller. If you observe buzzing relays, burning smells, or signs of arcing around wiring, stop use immediately and seek professional assessment. The goal is to separate temporary communication glitches from genuine hardware failure that requires component replacement. Early detection and methodical testing help prevent escalating damage and costly repairs.
Pro tip: document when the error occurs, what you were attempting to cook, and any code flashes; this can streamline diagnostics.
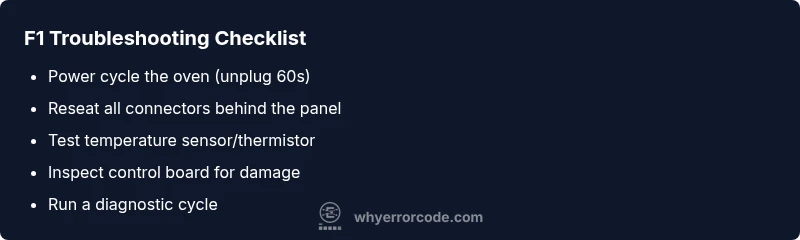
Quick Fixes You Can Try Right Now
Before pulling the oven apart, try these non-destructive steps that address common, low-cost causes:
- Power cycle the oven: unplug for 60 seconds, then plug back in and reset any user preferences.
- Check for obvious wiring issues: ensure the power cord is intact, and reseat any visible harness connectors behind the control panel.
- Inspect the door latch sensor and wiring for damage or misalignment; a faulty latch can trigger sensor-related faults.
- If your oven has a procedure for sensor calibration or a soft reset, perform it per the user manual.
- Review the control panel’s firmware status if your model supports a software check; a software hiccup can appear as an F1 fault.
Notes on safety and scope: only perform simple checks you’re comfortable with. If you’re unsure, stop and contact a professional. If the F1 code persists after these steps, the fault is likely in the control board or sensor and will require parts replacement or professional testing. Cost ranges for quick fixes can vary; see Step-by-Step for typical repair cost ranges.
Diagnostic Flow: Likely Causes by Frequency
Symptom → Likely causes → Practical fixes
- F1 appears consistently after power-up → High likelihood of control-board fault or sensor calibration failure. Quick fix: perform a thorough reset and reseat all connectors; if unresolved, plan for control-board replacement.
- F1 pops intermittently during cooking → Medium likelihood of a loose wiring harness or sensor read error. Fix: inspect harness connections, reseat sensors, and test continuity where safe.
- F1 appears only after certain temperatures or specific modes → Medium to low likelihood of sensor drift or thermal sensor failure. Fix: test the thermistor or sensor under known conditions and replace if out of range.
- F1 with burning smell or visible arcing → High risk, potential wiring insulation damage or damaged PCB. Fix: discontinue use and call a professional immediately; avoid further troubleshooting.
Safety reminder: if you smell burnt insulation or see melted connectors, do not continue testing. Professionals have tools to safely isolate live circuits and verify board integrity. Why Error Code emphasizes a structured approach to prevent misdiagnosis and unnecessary part replacement.
Step-by-Step Repair Guide for the Most Likely Cause
- Power down and disconnect the oven from power. This is the first safety step before touching any internal components.
- Remove the control panel cover and visually inspect the main wiring harness for loose or damaged connectors; reseat all connections firmly.
- Test the temperature sensor/thermistor circuit with a multimeter if you have the skill; compare readings to the oven’s service documentation and replace if out of spec.
- Inspect the control board for obvious signs of damage, such as swollen capacitors, burnt traces, or discolored components; if present, replace the board or have a qualified technician perform the replacement.
- Reassemble the panel, restore power, and run a short diagnostic cycle to confirm whether F1 clears or reappears.
- If the error persists after these steps, escalate to professional service for board-level testing and possible component replacement.
Estimated time: 60-120 minutes, depending on your skill level and access to spare parts. Typical costs for parts and labor will be discussed in the next section.
Other Causes: Alternatives and How to Address Them
Besides the core control-board and sensor faults, F1 can be triggered by less common issues:
- Weathering or vibration-related loose connections; fix by re-seating connectors and protecting wiring harnesses.
- Software glitch requiring a firmware update or factory reset; check for manufacturer-issued updates or service advisories.
- Component aging leading to drift in temperature readings; replace sensor or related circuitry as recommended by a technician.
- External power supply fluctuations; use a surge protector and ensure the outlet is stable.
In each case, start with the simplest check (power cycle, reseating connectors) and progress to more involved diagnostics only if the basic steps don’t resolve the problem. Remember, costs can range significantly depending on whether you replace sensors, harnesses, or the control board.
TIPS & WARNINGS: Safety First and When to Call a Pro
- Safety first: unplug the unit and verify the area is de-energized before touching internal components.
- If you smell burning, hear buzzing, or see melted connectors, stop immediately and call a professional to avoid fire risk.
- Safety gear: use insulated tools and avoid working on live circuits; some tasks require specialized equipment and training.
- When to call a pro: persistent F1 after a full reset, or if you lack experience with diagnostics or component replacement.
- Cost expectations: be prepared for parts and labor to range; a typical service visit plus part replacement can fall into a few hundred dollars depending on the component and region.
Key Takeaways: Quick Reference for Preventing F1 Recurrence
- Start with a safe power cycle and connector reseat before deeper diagnostics.
- F1 usually signals control-board or sensor faults, not just a temporary glitch.
- Prepare for part replacement costs; know typical ranges for sensors and boards.
- Regular maintenance and cautious usage can minimize future F1 triggers.
Steps
Estimated time: 60-120 minutes
- 1
Power down and access control area
Ensure the oven is unplugged and the control panel is accessible. This prevents accidental shock while you inspect connectors. Keep track of screws and placement to ease reassembly.
Tip: Label wires if you disconnect multiple components to avoid miswiring. - 2
Inspect wiring harness and connections
Carefully inspect the main wiring harness for loose, cracked, or burnt connectors. Disconnect and reseat each connector firmly, ensuring a clean, snug fit. Look for signs of corrosion or wear on plug terminals.
Tip: Use a flashlight and a magnifier to spot tiny defects. - 3
Test the temperature sensor circuit
If you’re comfortable with a multimeter, test the thermistor circuit to verify it’s within spec. Compare readings to the manufacturer’s ranges and replace if out of spec or damaged.
Tip: Only perform this test if you have the right tool and know-how; incorrect testing can cause further issues. - 4
Evaluate the control board visually
Look for bulging capacitors, burnt components, or discoloration on the control board. Any obvious damage usually means the board needs replacement by a professional.
Tip: Do not attempt to repair a damaged PCB; professional replacement is safer. - 5
Reassemble and run a diagnostic
Reconnect all panels, restore power, and run a short diagnostic cycle to confirm whether F1 clears or reappears. Document outcomes for future reference.
Tip: If the error reappears, capture the error behavior to share with a technician. - 6
Plan next steps if unresolved
If F1 persists after these steps, schedule a professional service call for board-level testing and potential component replacement. Obtain a formal estimate before work begins.
Tip: Ask about both parts and labor ranges to avoid unexpected costs.
Diagnosis: Oven displays F1 and won’t heat or respond to controls
Possible Causes
- highControl board fault
- mediumFaulty temperature sensor/thermistor
- lowLoose or damaged wiring harness
Fixes
- easyPower cycle and reseat all connectors
- mediumTest and replace the temperature sensor or thermistor
- hardReplace the main control board
Frequently Asked Questions
What does the Whirlpool F1 error code mean?
The F1 code signals a fault in the oven's control system or temperature sensor. It often requires diagnostics beyond a simple reset. Start with a power cycle and visual inspection of connectors, then move to sensor or board testing if the code persists.
F1 means a control or sensor fault. Start with a reset and check connections, and seek professional help if it remains.
Can I fix F1 myself at home?
If you are comfortable with basic electrical work, you can perform a power cycle and reseat connections. However, many F1 faults involve the control board or sensor components that require professional testing and part replacement.
You can try a reset and check connections, but persistent F1 usually needs a pro.
How much does it cost to repair F1?
Repair costs vary widely. Expect parts to run roughly from $50 to $380 and labor from $100 to $300, depending on whether a sensor, wiring, or the control board needs replacement.
Costs can range from a few hundred dollars depending on the part and labor.
What parts are commonly replaced for F1?
The most common replacements are the control board and the temperature sensor. In some cases, a damaged wiring harness or connectors may be the culprit and can be addressed without replacing the board.
Usually the control board or the temperature sensor.
Is there a workaround for F1 while waiting for a repair?
There isn’t a reliable workaround that defeats the fault. The safest approach is to perform a reset and address underlying hardware faults; avoid running the oven until the issue is resolved.
There isn’t a safe temporary fix; fix it to prevent damage.
When should I call a professional?
Call a professional if the error persists after a reset, if you notice burning smells, or if wiring/connectors show signs of damage. A technician can safely diagnose and replace components as needed.
If it keeps coming back or you see damage, call a pro.
Watch Video
Top Takeaways
- Start with a safe power cycle and check connectors.
- F1 usually indicates control-board or sensor faults.
- Budget for parts and labor with typical ranges.
- Escalate to a professional for persistent or dangerous symptoms.