LiftMaster Gate Openers Error Code 70: Diagnosis and Fixes
Diagnose LiftMaster gate openers error code 70 quickly with a practical, urgent repair plan. Learn meaning, safe resets, sensor checks, wiring inspections, cost ranges, and when to call a pro for durable results.

LiftMaster gate openers error code 70 signals a diagnostic fault detected by the opener's controller. The exact meaning varies by model, but it generally points to sensor alignment, wiring, or a controller fault. Start with a safe power cycle, verify safety sensor alignment, inspect wiring connections, and perform a soft reset. If the fault persists, contact a qualified technician to prevent downtime.
What LiftMaster error code 70 means
According to Why Error Code, error code 70 is a diagnostic flag raised by LiftMaster gate openers when the system detects a fault that prevents safe operation. The precise cause can vary by model and installation, but the common theme is a safety or control issue that prevents the motor from moving. Treat this as an urgent signal to verify basics first, then progressively test suspect subsystems. Understanding the code in context helps you triage quickly and reduce downtime without risking personal safety or property.
Quick checks you can perform safely
Before you dive into deeper repairs, perform these quick checks that often resolve Code 70 without professional help. Always start by powering down the unit for at least 30 seconds, then restore power to reset the controller. Confirm the outlet is delivering clean power, and check for tripped breakers or blown fuses in the garage circuit. Inspect the safety sensors (photo-eye) for misalignment or obstruction, and ensure the sensor wiring is intact and firmly connected to the control board. Finally, test the opener with the wall button and remote to verify consistent responses after the reset. If any step reveals damage or uncertainty, pause and call a pro.
Diagnostic flow overview (how to think through Code 70)
Symptom: Gate stalls or won’t engage; display shows 70 on the panel. Causes (likelihood):
- power supply irregularities or transient faults (high)
- misaligned safety sensors or blocked photoeyes (medium)
- wiring or connector issues (low)
- control board malfunction (low)
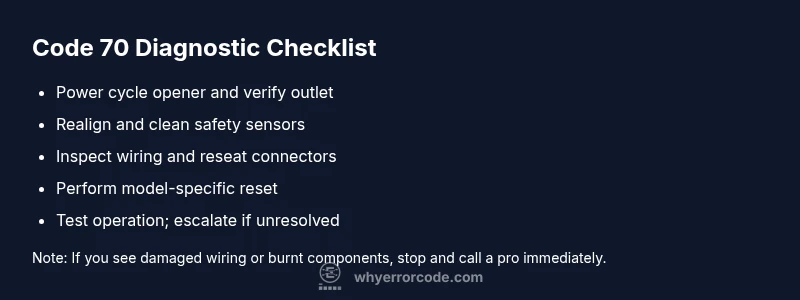
Fixes (priority):
- perform a power cycle and check the outlet (easy)
- realign or clean sensors and remove obstructions (easy)
- inspect wiring harnesses and reseat connectors (easy/medium)
- reset the opener’s logic by following the model’s reset procedure (easy)
- if unresolved, service or board replacement by a pro (hard)
Step-by-step fix for the most common cause (sensor/wiring)
- Power down the system completely. Unplug the transformer or switch off the circuit breaker, then wait 60 seconds. 2) Inspect the safety sensors for dirt, spider webs, or misalignment. Clean lens surfaces and ensure the photo-eye is level and unobstructed. 3) Reconnect sensor wiring to the control board, tighten loose connectors, and check for damaged insulation. 4) Reapply power and run a full test using both the wall switch and remote. 5) If the code returns, perform a soft reset per the user manual. 6) If it still fails, capture model details and contact a professional installer for a board or sensor replacement. Tip: keep a simple log of tests and outcomes to speed up diagnosis next time.
Other possible causes and how to approach them
Beyond sensors and wiring, Code 70 can indicate subtler issues. A misbehaving limit switch, a failing control board, or motor overload can trigger the fault. Check the limit switches for proper travel calibration and ensure there is no binding in the gate mechanism. Inspect the USB/logic board for signs of moisture or corrosion if the unit is exposed to rain. If the opener has a battery backup, verify the backup system isn’t interfering with normal operation. For all of these, document findings and plan a targeted repair.
Safety notes, warnings, and when to call a professional
Working on gate openers involves high-tension components and heavy doors. Always disconnect power before inspecting wiring or sensor assemblies. Wear safety gloves and eye protection, and avoid standing near the gate’s arc of movement. If you notice burnt wiring, melted insulation, or a buzzing/arcing sound, stop immediately and contact a licensed technician. Cost ranges for common repairs vary by region and model but expect hourly labor in the moderate range and parts in a broad range depending on sensor or board replacement needs.
Key maintenance practices to prevent Code 70 reoccurrence
- Schedule annual safety sensor alignment checks.
- Keep sensor lenses clean and unobstructed.
- Inspect wiring and connectors for corrosion and secure all harnesses.
- Update firmware where available and follow model-specific diagnostics.
- Maintain a simple troubleshooting log to spot recurring patterns early.
Steps
Estimated time: 30-60 minutes
- 1
Power down and restart
Turn off the opener and disconnect power. Wait 60 seconds, then restore power and test the gate operation with the wall control and remote. This can clear minor glitches that trigger code 70.
Tip: Label the power source switch to avoid accidental re-energizing while inspecting. - 2
Inspect safety sensors
Check the photo-eye lenses for dirt, spider webs, or misalignment. Wipe lenses clean with a soft cloth and realign if necessary. A misaligned sensor often causes a 70 fault and halts operation.
Tip: Aim sensors directly at each other with a level as a quick alignment check. - 3
Verify wiring and connections
Power off, then open the controller panel. Inspect all wires for corrosion, fraying, or loose terminals. Reseat connectors firmly and tighten screws to specification.
Tip: Use a multimeter to verify continuity if you suspect a broken wire. - 4
Reset the opener’s controller
Follow your model’s procedure for a soft reset, typically holding a specific button or sequence. This clears cached faults and reinitializes control logic.
Tip: Consult the manual to ensure you use the exact reset sequence for your model. - 5
Test operation and observe for repeats
After resets, run multiple cycles using wall switch and remote while watching for consistent performance. Note any recurring indicators or smells that suggest deeper issues.
Tip: Test in both directions (open and close) to rule out mechanical binding. - 6
Escalate if unresolved
If Code 70 persists after these steps, document findings and contact a licensed garage-door technician or LiftMaster dealer for inspection and possible board/sensor replacement.
Tip: Capture model number, serial, and firmware version to speed up service.
Diagnosis: Gate won't move and displays error code 70 on LiftMaster controller
Possible Causes
- highPower supply irregularities or transient faults
- mediumMisaligned safety sensors or blocked photoeye
- lowWiring or connector corrosion/loose connections
- lowControl board malfunction
Fixes
- easyPower cycle the opener and verify outlet power
- easyRealign/clean safety sensors and clear obstructions
- easyInspect wiring harnesses, reseat connectors, and check for damage
- easyPerform model-specific soft reset or reboot the controller
- hardReplace defective control board or sensors with professional service
Frequently Asked Questions
What does LiftMaster error code 70 mean?
Error code 70 indicates a diagnostic fault detected by the opener. The exact meaning varies by model but typically involves safety sensors, wiring, or control logic. Start with safety sensor alignment and power checks before pursuing more advanced repairs.
Code 70 is a diagnostic fault in LiftMaster openers. Start with sensor alignment and power checks before deeper repairs.
Can I fix code 70 myself?
Yes, many homeowners can address Code 70 with basic steps: power cycle, sensor cleaning and alignment, wiring inspection, and a model-specific reset. If the fault persists or you see damaged wiring, stop and hire a professional.
You can try the basic resets and sensor checks, but if the fault remains or wiring looks damaged, call a professional.
What is the typical cost to repair code 70?
Costs vary by the underlying cause. Common fixes like sensor realignment or wiring reseating may cost around the mid-range for labor and parts, while board replacement can be higher. Budget a broad range and prepare for professional service if needed.
Repair costs vary; sensor or wiring fixes are usually less expensive than board replacements. Get a quote before work.
When should I call a professional?
Call a professional if basic resets and sensor checks do not clear the fault, if you notice damaged wiring or signs of electrical heat, or if the system is under warranty and requires authorized service.
If resets don’t help or wiring looks damaged, contact a licensed technician.
Will Code 70 disable manual operation of the gate?
Code 70 may prevent automatic operation but usually allows manual override for safety checks. Do not force the gate if it resistance or abnormal noise appears.
Code 70 can stop automatic operation; you might still be able to operate manually while diagnosing.
Watch Video
Top Takeaways
- Investigate power, sensors, and wiring first
- Follow model-specific reset procedures
- Escalate to a pro if Code 70 persists
- Regular maintenance prevents future faults