Amana Air Conditioner E1 Error Code: Quick Fix and Diagnosis
Urgent, step-by-step guidance to diagnose and fix the Amana air conditioner E1 error code. Learn quick resets, common causes, step-by-step repairs, safety tips, and when to call a pro.

According to Why Error Code, the Amana air conditioner E1 error code usually signals a fault detected by the control system, often involving sensors or inter-module communication. Start with a full power reset, then inspect for loose connections and ensure the thermostat readings align with room conditions. If the error persists, professional service may be required.
What the E1 Error Means for Amana AC Units
The E1 error code on Amana air conditioners is a generic fault indicator that appears when the control board detects an abnormal condition in sensors or in the communication between components. Because Amana models vary in wiring layouts and sensor placement, the exact fault can differ from one unit to another. In practical terms, E1 means: the system cannot obtain reliable data from a sensor or cannot communicate between critical modules. This is a sign that the machine has flagged a potential safety or efficiency issue and should be investigated promptly to prevent further damage or unnecessary energy use. From Why Error Code’s perspective, the key is to validate data integrity, not just clear the code without addressing underlying causes.
Actionable takeaway: treat E1 as a fault that requires methodical checks rather than a simple reset, especially if the symptom recurs after a basic restart.
Immediate Quick Fixes You Can Try Now
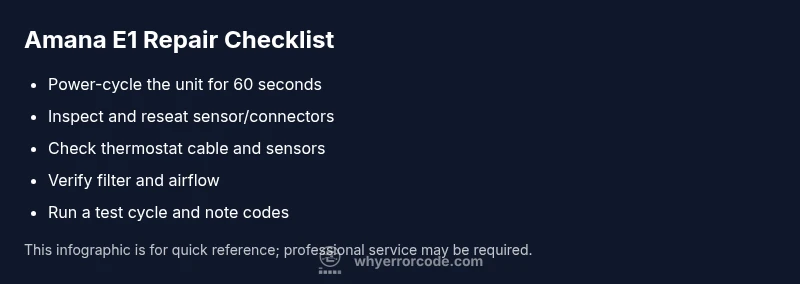
If you just saw E1, you’ll want to act quickly but safely. Here are the fastest, lowest-effort steps you can perform before calling a technician:
- Power cycle the unit: unplug the outdoor/indoor components or switch off at the breaker for 60 seconds, then restore power. This can reset minor sensor glitches and clear transient communication faults.
- Inspect visible wiring: ensure that connectors to the thermostat, control board, and main sensors are firmly seated and free of corrosion or burn marks. Do not push beyond gentle force; loose connectors are common culprits.
- Check the air filters and airflow: a clogged filter or restricted airflow can trigger misleading sensor readings. Replace or clean filters as needed and verify airflow before retesting.
- Confirm thermostat settings: ensure the thermostat is set to an appropriate mode and temperature; missettings can mimic fault codes or keep the system in a faulted state.
- Run a short test cycle: after reconnecting power, attempt a brief cooling cycle to observe whether E1 reappears. Document any accompanying sounds or blinking patterns for a tech visit.
If these quick fixes don’t resolve E1, you should escalate to professional service. Costs for diagnostic visits vary by region but are typically in a broad range, and parts needed to repair sensor or control-board issues will add to the base labor charge.
Reading Symptoms: When E1 Appears and What It Might Signal
Symptom awareness helps you triage quickly. Common on Amana units, E1 can appear as: a complete halt in cooling, erratic cycling, or intermittent operation with an E1 display. While the exact meaning varies by model, the consistent thread is that a fault exists in sensors or control communication. Early-stage symptoms often accompany unusual fan noise, delayed responses to temperature changes, or delayed start times. By correlating the symptom with the model year and installed accessories, you improve diagnostic accuracy and reduce unnecessary service calls. Always note the time and mode when E1 occurs to help a technician reproduce the fault.
Step-by-Step Repair: The Most Likely Cause and How to Address It
In many Amana units, E1 is most often tied to sensor wiring or a loose connector. Here’s a practical repair sequence that minimizes risk and covers the most likely scenario:
- Power down and unplug the unit from the wall or switch off the dedicated breaker. Safety first: avoid working with live power.
- Open access panels to reach the control board and sensor connections. Do not disturb other components beyond what’s necessary.
- Inspect sensor and thermostat cables for damage or loose termini; reseat any connectors with a gentle push until you hear a click.
- If available, unplug and re-seat the control-board plugs as well. Look for discoloration or corrosion on pins.
- Clean dust from the area around the sensors and control board using compressed air or a soft brush; avoid moisture.
- Restore power and run a short diagnostic cycle. If E1 returns, capture the exact sequence and temperature settings and prepare for a professional evaluation.
Estimated time for this repair flow is typically 45–90 minutes, assuming no parts replacement is required. If the fault persists after these steps, the control board or a critical sensor likely needs replacement.
Alternative Causes and How to Verify Them
If reseating connectors doesn’t fix E1, broader possibilities exist:
- Faulty control board: The brain of the system may miscommunicate with sensors, triggering E1. Replacing or repairing the board is a
hard
look for a certified technician.
- Damaged sensors: A failing outdoor or indoor sensor can feed incorrect data to the board, prompting an E1 warning. A technician can test sensor resistance and wire continuity.
- Wiring harness wear: Over time, vibration or rodent damage can degrade harnesses. Inspect harnesses for fray marks, pin damage, or loose crimp connectors.
- Thermostat cable issues: If the thermostat connection is intermittent, the system might issue E1. Verify cable integrity and seating.
- Ground or power irregularities: In some cases, household supply instability can trigger electronics faults. Use a multimeter to check for proper voltage supply.
Verification steps include examining all accessible harnesses, testing continuity, and confirming that external power supply remains stable during operation. If you’re unsure about electrical testing, it’s safer to hire a professional with HVAC diagnostic tools.
Safety, Warnings, and When to Call a Pro
Safety is non-negotiable when dealing with electrical appliances. Always shut off power before touching any wiring or boards. Do not bypass safeties or attempt temporary patches. If you’re not confident performing diagnostic steps, or if you sense burning smells, melted insulation, or visible damage, stop immediately and call a licensed HVAC technician. For many Amana E1 faults, a trained professional will perform controlled electrical tests, sensor readings, and possibly board replacement. Expect a diagnostic visit to cost a certain range, and parts replacement to add to that cost depending on the fault's nature.
Maintenance and Prevention: Keeping E1 at Bay
Preventing E1 requires regular HVAC maintenance:
- Schedule annual professional inspections to verify sensor integrity and controller health.
- Clean filters monthly and ensure adequate airflow around outdoor units.
- Keep electrical panels dry and free from dust; seal any gaps to reduce humidity intrusion.
- Use a surge protector or proper power conditioning device to reduce power fluctuations.
- Record fault codes, timestamps, and running conditions to help technicians reproduce issues quickly.
Proactive maintenance reduces the likelihood of E1 and improves overall efficiency.
How Why Error Code Guides Amana E1 Issues (Expert Perspective)
The Why Error Code approach emphasizes safety, structured diagnostics, and clear escalation paths. By combining quick resets with a methodical inspection of sensors, wiring, and the control board, you can resolve many E1 faults without unnecessary replacement parts. When in doubt, consult the official Amana service manual and the Why Error Code troubleshooting framework to determine whether the problem is best handled in-house or by a certified technician.
mainTopicQuery
Steps
Estimated time: 45-90 minutes
- 1
Power down and safety check
Turn off the unit and disconnect from power. Confirm no residual voltage is present before touching internal components.
Tip: Use a non-contact tester to verify that power is fully off. - 2
Access control components
Open access panels to reach the control board and sensor connectors. Do not touch live terminals.
Tip: Keep track of screws and keep the area clean to avoid misplacing parts. - 3
Inspect connectors and wiring
Look for loose, corroded, or damaged connectors; reseat any that appear loose and inspect for wear.
Tip: If a connector feels loose, push firmly until it seats but do not force. - 4
Power cycle reset
Reconnect power after reseating connectors and allow the system a moment to reset.
Tip: Wait 60 seconds after reconnecting power before testing. - 5
Run a test cycle
Initiate a short cooling cycle and observe for E1 reoccurrence or new codes.
Tip: Document any blinking patterns or other codes that appear. - 6
Decide on next steps
If E1 returns, proceed with professional diagnosis for board or sensor replacement.
Tip: Ask for a written quote and parts list before authorizing work.
Diagnosis: Amana AC displays E1 and stops cooling
Possible Causes
- highLoose wiring or sensor connection
- mediumFaulty control board or communication module
- lowThermostat or sensor calibration drift
Fixes
- easyPower cycle the unit to reset the control board and sensors
- easyInspect and reseat all accessible wiring harnesses and sensor plugs
- mediumTest sensors with a multimeter and replace faulty components
- hardReplace control board if diagnostics confirm board failure
Frequently Asked Questions
What does E1 mean on an Amana air conditioner?
E1 is a fault code indicating a detected issue in sensors or control communication. It typically requires inspection of wiring, sensors, and the control board, with a professional diagnostic if the issue persists after basic resets.
E1 means there’s a fault in sensors or control communication, often needing checks of wiring, sensors, and possibly the control board.
Can I fix E1 myself, or should I call a technician?
You can perform initial safe checks like power cycling and inspecting obvious wiring. If E1 persists after these steps, it’s best to contact a licensed HVAC technician for a thorough diagnosis and potential board or sensor replacement.
Start with basic checks, but if E1 remains, a licensed tech is recommended.
Is E1 dangerous to ignore?
Ignoring E1 can lead to inefficient cooling, higher energy use, or potential damage to electrical components. Do not ignore repeated occurrences; seek inspection if the fault recurs.
E1 can indicate underlying faults that may worsen, so don’t ignore it if it keeps coming back.
How much might a repair cost for E1?
Repair costs vary by model and fault type. A diagnostic visit often ranges from $80 to $150, with sensor replacements or board work adding to the cost.
Diagnostics are typically $80 to $150, with parts and replacement adding depending on the fault.
Will E1 come back after a fix?
If the underlying issue is not fully resolved, E1 can reappear. Using a professional diagnosis helps ensure all root causes are addressed and mitigated.
If you don’t fix the root cause, E1 may come back.
What information should I provide a technician?
Provide the exact model, year, any accompanying codes or blinking patterns, and a log of when E1 appears. Note any recent maintenance or power issues to help the technician diagnose quickly.
Give the model, year, exact code patterns, and maintenance history to help the tech.
Watch Video
Top Takeaways
- E1 signals a control-system fault in Amana ACs
- Start with power reset and connector checks
- If unresolved, diagnostic by a professional is advised
- Record fault conditions to aid technicians
- Regular maintenance reduces future E1 risk