Breezaire E1 Error Code Troubleshooting Guide
A thorough Breezaire E1 error code troubleshooting guide with diagnostic flow, step-by-step repairs, safety tips, and maintenance to resolve the issue fast.

The Breezaire E1 error code signals a system fault detected by the unit. It typically prompts a diagnostic check rather than immediate replacement. The quickest path is a power cycle, verify water connections, and inspect sensor wiring; if the issue persists, you should schedule service. According to Why Error Code, documenting symptoms and timing helps technicians diagnose faster.
What the Breezaire E1 Error Code Means
The Breezaire E1 error code is a general fault indicator from the unit's protective controller. While the exact meaning can vary by model and firmware version, E1 almost always points to a fault the control system cannot safely resolve on its own. In practice, Breezaire E1 often emerges when sensor data or wiring readings are outside the range the controller expects, triggering a fault state to protect the system. The Warm-Up, cooling, and humidity controls are all integrated, so a fault anywhere in that chain may surface as E1. If you’re troubleshooting, start with the simplest explanations and avoid jumping to conclusions.
As you work through the problem, keep in mind that the same code might reflect slightly different issues across different Breezaire models. This is why the official manual for your model is a critical reference. Why Error Code stresses that E1 is usually not a single failed part; it’s a signal that requires systematic testing of sensors, wiring, and control logic. Make note of any patterns—does the code appear after a specific cycle, after a door opening, or after a power fluctuation? Those patterns help narrow the root cause.
Quick Context for Practitioners
For developers and IT pros integrating Breezaire units with monitoring dashboards, E1 can be treated as a catch-all fault flag. Use the device’s diagnostic port, firmware version, and any available error history to correlate E1 with sensor drift or timing faults. If you’re maintaining several Breezaire units, standardize a low-friction reset protocol and a quick sensor-check checklist so field technicians can act quickly when E1 pops up.
Immediate Quick Fixes You Can Try
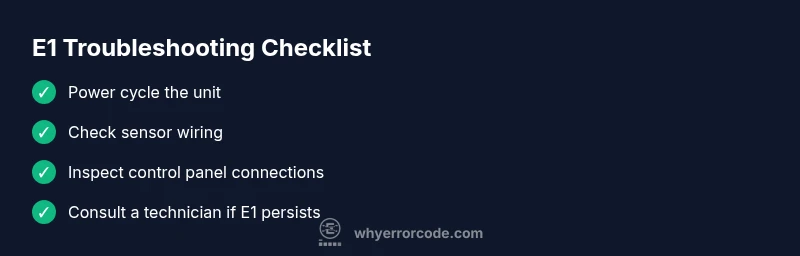
When E1 appears, begin with non-invasive, reusable steps that don’t require special tools. First, perform a full power cycle: unplug the unit, wait 60 seconds, then plug back in and allow it to initiate its startup sequence. A reset can clear transient faults caused by brief power dips. Next, inspect obvious physical issues: ensure doors seal properly, verify the unit is level, and check for any obvious disconnects in sensor wiring or control panel connectors. If the unit is safe to access, reseat any loose connectors and ensure the harnesses are fully seated. Finally, if your Breezaire E1 is connected to a smart controller, perform a soft reset on the controller interface and re-run the diagnostic sequence. If the error continues to appear after these steps, consult the manual for model-specific checks or proceed to a deeper diagnostic flow.
Diagnostic Signals: How to Interpret E1 Patterns
Breezaire devices often show a combination of indicators along with the E1 error. Look for blinking LEDs, a repeating fault pattern, or a recent change in performance that coincides with E1. Note whether the fault appears after a wake-up cycle, a compressor start attempt, or a humidity control action. The presence of a consistent pattern helps isolate whether the issue is sensor-related, wiring-related, or a board-level fault. If no pattern is obvious, prepare to perform a structured diagnostic flow: confirm power integrity, verify sensor continuity, and review firmware logs if available.
Step-By-Step Fix: Sensor or Wiring Fault (Most Common)
This section expands on the most common E1 trigger: sensor/wiring faults. Begin by powering down the unit and disconnecting power to avoid shock. Locate the primary sensor for temperature or humidity and inspect its wiring harness for signs of wear, corrosion, or frayed insulation. If you see loose leads, reseat the plug and secure it with appropriate connectors. Test the continuity of the sensor circuit with a multimeter if you have one and compare readings to the expected range from the manual. If readings are out of range or the wiring shows damage, replace the sensor wiring assembly or service the control module. After completing wiring work, reassemble the panel, plug the unit back in, and run a full system test to verify whether E1 reappears.
If you cannot safely access the wiring or if the unit is under warranty, contact a qualified technician. A sensor or control-board fault can require specialized tools and calibration to ensure safe operation.
Other Causes and How to Address Them
Beyond sensor and wiring faults, E1 can reflect issues in the control board firmware, a fault in the compressor start sequence, or an abnormal refrigerant-related condition that the controller interprets as a fault. In some Breezaire models, sensor drift or a failing thermistor will trigger E1 while the cooling loop still operates on fallback logic. If you identify a control board issue, the recommended action is professional service, as replacing or reprogramming the board requires careful handling and, in some cases, factory calibration. For refrigerant-related concerns, only a licensed technician should perform any service due to safety and environmental requirements.
Safety Warnings and When to Call a Professional
Electrical safety is paramount. Always unplug the unit before attempting any inspection inside access panels. If you see burnt components, a strong burning smell, damaged wiring, or fluid leaks, shut the unit off and contact support immediately. Do not bypass safety interlocks or continue operation when E1 persists after basic resets. If you are uncomfortable with electrical diagnostics or if the unit is still under warranty, seek professional service promptly to avoid property damage or personal injury.
Prevention: Maintenance to Avoid E1 in the Future
Regular preventative maintenance reduces the likelihood of E1 reappearing. Clean and inspect sensor housings for dust and moisture, verify electrical connections at the controller and sensor ports, and ensure seals and gaskets remain intact to prevent humidity-related sensor drift. Keep the unit in a clean, ventilated area and avoid rapid temperature changes that can stress sensors. Maintain a simple log of error codes, cycle durations, and any maintenance performed so future troubleshooting is faster. Finally, ensure your Breezaire unit is running the latest firmware recommended by the manufacturer, and schedule periodic professional checkups to verify full system health.
Steps
Estimated time: 30-45 minutes
- 1
Power down and prepare
Unplug the Breezaire unit and wait 60 seconds. This neutralizes residual power and can clear minor faults. Reconnect and allow the unit to begin a fresh startup sequence. If you notice any unusual smells or smoke, stop and seek professional help immediately.
Tip: Always unplug before opening panels to avoid shock. - 2
Access the sensor area
Carefully remove access panels to reach the primary temperature/humidity sensor. Visually inspect for loose wires, corrosion, or damaged insulation. Do not tug on wires; reseat connectors firmly using gentle pressure.
Tip: Use a non-magnetic tool and avoid bending wires at sharp angles. - 3
Test and reseat connections
Disconnect and re-seat all sensor and controller connectors. Ensure each plug is fully seated and the locking tab clicks. Look for any signs of bent pins or discoloration.
Tip: If a connector feels loose, replace the housing rather than forcing it. - 4
Check sensor continuity
With the unit powered off, use a multimeter to check the resistance of the sensor circuit if you have the skills. Compare readings to the values listed in the service manual. An out-of-range reading often points to a faulty sensor.
Tip: If you’re not confident with multimeter work, skip this step and proceed to replacement or professional help. - 5
Inspect for physical damage
Look for signs of wear, moisture ingress, or corrosion on sensor leads and board traces. Replace any damaged components following the manufacturer’s guidance. Reassemble the panels carefully and secure all fasteners.
Tip: Document any damaged parts for warranty and service records. - 6
Test and verify
Plug the unit back in, power on, and monitor the display for reoccurrence of E1. Run a quick cycle to confirm cooling is active and sensors respond to temperature changes. If E1 reappears, escalate to professional service.
Tip: Keep a log of cycle times and error appearances for the technician.
Diagnosis: Breezaire displays E1 error and the unit fails to start cooling
Possible Causes
- highLoose or damaged sensor wiring
- mediumSensor failure or out-of-range reading
- lowControl board fault or firmware issue
Fixes
- easyPower cycle the unit and re-seat all connectors
- easyInspect sensor wiring for damage and secure connections
- hardReplace sensor or consult technician for control board/firmware
Frequently Asked Questions
What does Breezaire E1 error code mean on my unit?
E1 is a general fault indicator signaling a system issue the controller cannot resolve. It often points to sensors or wiring but can vary by model. Consult the user manual for model-specific details and check sensor connections first.
E1 means a system fault detected by the Breezaire controller; start with sensors and wiring checks before calling for service.
Can I reset Breezaire to clear E1?
A power cycle can clear transient faults and reset the controller. If E1 returns after a reset, proceed with deeper diagnostics or service.
Yes, try a power cycle; if the error repeats, proceed with detailed checks or contact support.
Is Breezaire E1 dangerous to ignore?
Ignoring E1 can risk overheating or electrical faults. Monitor the unit and avoid extended operation until fault details are resolved.
Don’t ignore E1; it signals a fault that could lead to bigger problems if left unchecked.
What parts are usually involved in E1 faults?
Sensor(s), sensor wiring, and the control board are common suspects. Replacement or professional calibration may be required for accurate repair.
Sensors and the control board are typical culprits; a pro may be needed for full repair.
How much does Breezaire service typically cost?
Costs vary by region and warranty status. Expect quotes to reflect parts, labor, and travel, with the final price depending on diagnosis complexity.
Costs vary; get a written quote after the technician assesses the fault behavior.
Watch Video
Top Takeaways
- Reset first, then diagnose the fault.
- Sensor wiring and sensors themselves are the typical culprits.
- Call a professional if you are unsure or the code persists.
- Maintain and document unit health to prevent future E1 faults.