Carrier 31 Error Code: Diagnosis and Fixes
Urgent guide to diagnosing and fixing the Carrier 31 error code on HVAC systems. Learn its meaning, quick fixes, step-by-step troubleshooting, safety tips, and when to call a pro for reliable results.

Carrier 31 error code indicates a critical communication fault within the HVAC system between the thermostat, control board, or outdoor unit. Start with a power cycle and verify wiring connections; if the code persists, inspect fuses/breakers and consult a professional to prevent equipment damage.
What the Carrier 31 Error Code Means
The carrier 31 error code is a fault indicator used by Carrier-brand controllers to signal a breakdown in data exchange between core components. When the devices that govern heating or cooling can’t communicate reliably, the system often enters a safe mode or refuses to start. This is a high-priority alert for comfort and safety, because prolonged communication faults can stress compressors or degrade refrigerant management. The fix usually revolves around verifying stable power, re-seating connectors, and ensuring the control board and thermostat are in agreement. In many cases, a simple reset after checking the wiring will clear the code. If the error remains, you’ll need to perform targeted diagnostics or schedule professional service to avoid further damage.
Common Causes At a Glance
Typical triggers for carrier 31 include loose wiring or degraded connectors, a failed thermostat input, a blown fuse or tripped breaker, and occasionally a faulty control board or sensor. Environmental factors like moisture or dust can worsen connections. Start with the simplest causes and work toward the more complex, as this minimizes downtime and cost. Remember that every Carrier system is a bit different, so consult your model’s wiring diagram if available.
The Quick Fixes That Work First
Begin with core safety steps: shut off power to the unit at the breaker, then perform a power cycle by toggling the thermostat and furnace disconnect. Check for visibly loose wires at the furnace/air handler, thermostat terminals, and outdoor unit. Re-seat connectors and ensure coil wiring is intact. Verify that fuses are intact and breakers are fully reset. If the system is still showing 31, perform a controlled restart of the entire control chain and prepare for a deeper diagnosis.
Step-By-Step Troubleshooting for the Most Likely Cause
- Power down the entire system at the main breaker to eliminate any risk of shock. 2) Open the furnace/air handler panel and inspect the thermostat-to-board wiring for loose pins or corrosion. 3) Tighten or reseat every connector and re-test continuity with a multimeter if you have one. 4) Reset the thermostat and the control board using the documented procedure for your model. 5) Restore power and observe whether the code clears; if not, check the outdoor unit contactor and disconnect switch for moisture or damage. 6) If the code persists, record any error codes shown on the board and schedule professional service.
Handling Alternative Causes and Their Fixes
If wiring is solid and the code returns, the issue may be a failing control board or sensor input. Check for firmware updates if your model supports them, and consider replacing a faulty sensor module or control board. A degraded thermistor or pressure sensor can also trigger abnormal readings; refer to the service manual for test procedures. For older equipment, battery-backed memory or failed capacitors can mimic a real fault and require component replacement.
Safety, Costs, and When to Call a Pro
Electrical repairs carry shock risk and refrigerant exposure hazards. If you’re uncomfortable with high-voltage components, stop and call a licensed HVAC technician. Diagnostic visits typically vary by region, with common ranges for a basic service call and inspection. Parts replacements (sensors, boards, relays) can range from inexpensive modules to more substantial hardware upgrades. A professional diagnosis typically quotes a project cost range before any repairs are performed.
Prevention and Maintenance for Carrier Systems
Adopt a proactive maintenance routine: replace air filters regularly, keep condensers clean, and maintain proper airflow. Ensure the outdoor unit is free of debris and the condenser coils are brushed clean. Inspect electrical connections during seasonal service and address corrosion immediately. Keeping a simple maintenance log helps you catch patterns that precede a 31 error. Regular checkouts reduce the likelihood of recurring faults and extend equipment life.
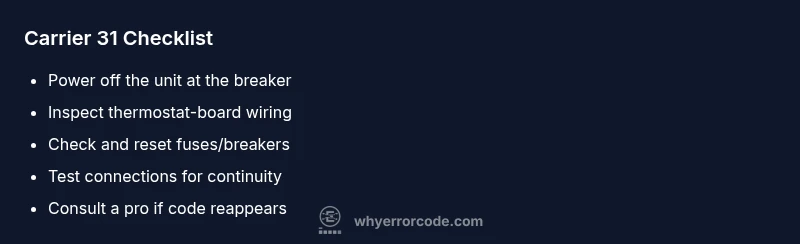
Quick Reference Checklist (for quick on-site use)
- Power off the unit at the breaker before inspecting wiring
- Inspect thermostat and control board connectors for tightness
- Check fuses and breaker status; reset if needed
- Look for moisture, corrosion, or damaged wires
- If still unresolved, contact a licensed tech with board access
Steps
Estimated time: 40-70 minutes
- 1
Power off the system
Switch off power at the main breaker and at the thermostat. Confirm no active power before you touch any wiring.
Tip: Use a non-contact voltage tester to confirm de-energized lines. - 2
Inspect wiring visually
Open the furnace/air handler panel and examine all connectors for looseness, corrosion, or burn marks. Do not pull on wires; gently reseat any loose pins.
Tip: Label cables if you have multiple similar wires to avoid misconnection. - 3
Test continuity and reseat
If you have a multimeter, test critical connections for continuity. Reseat connectors firmly and ensure locking tabs click.
Tip: Work methodically from the thermostat, through the control board, to the outdoor unit. - 4
Reset the control modules
Reset the thermostat and, depending on model, the control board by following the owner’s manual procedure.
Tip: Wait 60 seconds between resets to let electronics power down completely. - 5
Restore power and verify
Turn the system back on and observe if the 31 code reappears. If it does, move to alternative causes.
Tip: Take note of any new error codes that appear. - 6
Inspect the outdoor unit
Check the outdoor disconnect, contactor, and wiring from the unit to the control wiring. Look for moisture or damage.
Tip: Water exposure or rodent damage is common in outdoor wiring.
Diagnosis: Carrier 31 error code displayed on control panel or thermostat, system will not start or run
Possible Causes
- highLoose wiring or connectors
- mediumBlown fuse or tripped breaker
- lowControl board failure or sensor fault
Fixes
- easyPower cycle and reseat all connections
- easyCheck and replace blown fuse or reset breaker
- hardTest and replace faulty control board or sensor
Frequently Asked Questions
What does the Carrier 31 error code mean?
Carrier 31 typically signals a communication fault between HVAC components. It means data exchange between the thermostat, control board, and outdoor unit isn’t reliable, often causing the system to halt.
Carrier 31 means a communication fault between HVAC components, often causing the system to stop until the data link is restored.
What should I check first when I see 31?
Start with power cycling, then inspect visible wiring for looseness. Check fuses or breakers and reseat any loose connectors on the control board and thermostat.
First, power cycle and check connectors and fuses before deeper diagnostics.
Can I fix Carrier 31 myself?
Some quick fixes are safe to try if you’re comfortable with electrical work. However, if the code persists, or you’re unsure, hire a licensed HVAC tech to avoid damage or injury.
If unsure, hire a licensed HVAC tech after initial checks.
How long does a repair typically take?
Simple wiring checks and resets can take 30–60 minutes. More complex fixes, like board or sensor replacements, may require several hours or a return visit.
Most quick fixes take under an hour; complex repairs may need hours.
Should I replace the control board?
Board replacement is usually a last resort after other causes are ruled out. A professional can confirm if the board is failing and quote costs.
Board replacement is a last resort and should be diagnosed by a pro.
What about safety and refrigerant concerns?
Handling electrical components and refrigerants requires training. If you smell refrigerant or notice moisture, stop and call a pro immediately.
If you smell refrigerant or see moisture, call a pro now.
Watch Video
Top Takeaways
- Power cycle first and check wiring
- Record and test system responses before replacing parts
- Safety comes first — stop if uncomfortable
- Professional help is recommended if the code reappears