Dishwasher Error Code 11: Diagnosis and Quick Fixes
Learn what dishwasher error code 11 means and how to diagnose, fix, and prevent it with step-by-step guidance to restore your appliance fast.

Dishwasher error code 11 generally indicates a fault detected by the control board and linked to water flow or sensor input. According to Why Error Code, start with a quick reset, check water supply and door latch, and inspect sensor wiring. If the code reappears, perform a safe diagnostic flow to isolate whether the issue is inlet, sensor, or controller.
What Dishwasher Error Code 11 Means
Dishwasher error code 11 is a fault signal raised by the appliance's diagnostic system. In most brands, this code points to an interruption or anomaly in the water flow, a sensor input, or a related electrical connection that prevents the machine from completing a cycle. It’s a generic indicator, not a single fixed fault, so you must confirm it against your model’s manual. For 2026 guidance, treat Code 11 as a prompt to verify three core areas: the water inlet path, sensor wiring, and the control electronics. Remember, an urgent issue is at hand if water leaks are involved or the unit poses a safety risk.
Key takeaway: Start with a safe reset and a quick visual inspection before diving into deeper diagnostics.
Common Causes of Code 11
Code 11 can arise from several root problems, often in the following order of likelihood. While the exact mapping varies by model, these are the most consistent culprits you’ll encounter:
- Water inlet restriction or valve failure (high likelihood): If the inlet filter is clogged or the supply valve is not fully open, the dishwasher may register a fault. This is the most common cause across brands and should be checked first.
- Door latch or switch fault (medium likelihood): A faulty door switch can falsely report that the door isn’t closed, triggering error code 11. Inspect the latch mechanism for wear or misalignment.
- Sensor or wiring fault (low likelihood): Damaged sensor wiring or a loose connector to the control board can cause irregular readings that set Code 11. This often requires careful inspection and, sometimes, professional replacement.
Quick Fixes You Can Try Safely
Before you pull the dishwasher apart, try these immediate, low-risk steps to clear Code 11 and verify if the problem is intermittent:
- Power cycle the unit: unplug for 60 seconds or switch the circuit breaker off and on to reset the control board.
- Check the water supply: ensure the supply valve is fully open and that the hose isn’t kinked or blocked. If the filter screen is clogged, rinse it under cool running water.
- Inspect the door latch: confirm the latch engages securely; a loose latch can trigger a fault even when the door seems closed.
- Run a dry cycle: after reset, run a test cycle without dishes to observe if the code reappears. If it does, the issue is more likely in the inlet, sensor, or control electronics.
Note: If you notice water leaks, unusual noises, or the unit remains unsafe to operate, stop and seek professional help.
Diagnostic Flow: Symptom-to-Cause Mapping
The diagnostic flow helps you structure the investigation by layering symptoms with probable causes and concrete fixes. Start with the symptom you observe on the display, then map it to a likely cause, and apply the corresponding fix. This approach reduces unnecessary disassembly and focuses on the most probable faults first. During this process, record what you test so you can revert changes if needed and provide a service tech with a clear history.
Step-by-Step Fix: Most Likely Cause (Water Inlet Issue)
If Code 11 points toward the water inlet as the primary fault, follow these steps carefully:
- Confirm water supply: Ensure the shutoff valve is fully open and the hose isn’t squeezed or blocked.
- Inspect the inlet screen: Remove the inlet hose from the valve and check the screen for debris. Rinse gently to clear obstructions.
- Test the inlet valve: With the power off, unplug the unit and disconnect the valve wiring. Use a multimeter to test for continuity; replace if out of spec.
- Reassemble and test: Reconnect wiring, reattach hoses, restore power, and run a short program to verify Code 11 does not return.
- If needed, replace the valve: Inlet valve replacement is generally straightforward for DIY, but consult the manual for your model; if in doubt, call a pro.
Estimated time: 40-60 minutes.
Other Causes and Their Fixes
If the water inlet isn’t the culprit, explore these alternatives:
- Door latch replacement: If the latch or door switch is worn, replace with the correct part for your model. This is usually a straightforward, low-cost fix.
- Sensor wiring check: Look for loose connectors or damaged wires between the control board and sensors. Re-seat connections and replace damaged conductors if needed.
- Control board fault: A failing control board may require professional diagnosis and possibly complete board replacement. Expect higher costs and longer repair time if this is the root cause.
When diagnosing, a systematic approach saves time and reduces the risk of unnecessary part replacements.
Safety, Costs, and When to Call a Pro
Safety first. Always unplug before inspecting electrical parts and avoid working with live circuitry. If you see electrical arcing, burning smells, or obvious water leaks, stop immediately and contact a technician. Cost ranges for Code 11-related repairs vary widely by root cause: DIY parts can be as low as $20–$60 for filters or switches, while valve or board replacements can run $150–$500 including labor in some regions. A professional diagnostic visit typically lands in the $80–$150 range, with parts added as needed.
Prevention and Maintenance to Avoid Code 11
Preventive steps reduce the odds of Code 11 returning:
- Regularly inspect and clean the inlet filter screen and hoses.
- Use proper detergent and avoid overfilling to prevent sensor misreads.
- Periodically reset the appliance to clear transient faults.
- Schedule annual maintenance if your dishwasher is older or used heavily, to catch worn components before they fail.
- Keep the door latch and seals in good condition to ensure a reliable seal during cycles.
Steps
Estimated time: 40-60 minutes
- 1
Power cycle and reset
Unplug the dishwasher or switch off the circuit breaker for 60 seconds, then plug back in and run a short cycle to see if Code 11 clears. This step resets the control board and can clear transient faults.
Tip: Label the breaker in case you need to reset again after testing. - 2
Verify water supply
Confirm the water inlet valve is receiving water and the hose is free of kinks. If the flow is weak, clear any debris from the filter screen and test again.
Tip: Turn off power before handling hoses. - 3
Inspect the door latch
Ensure the door latch engages fully and the door seal is intact. A loose latch can mimic a door-open fault and trigger Code 11.
Tip: Check for cracks or wear on the latch housing. - 4
Test wiring and sensors
With power off, inspect visible wiring between the control board and sensors. Re-seat connectors and look for damaged insulation. Replace any frayed wires as needed.
Tip: Only use a multimeter if you are comfortable with electrical testing. - 5
Run a diagnostic or call a pro
If Code 11 persists after these checks, perform a more advanced diagnostic or schedule professional service for a board or valve replacement.
Tip: Document tests and results to share with the technician.
Diagnosis: Dishwasher shows error code 11 on display and will not complete a cycle
Possible Causes
- highWater inlet restriction or valve failure
- mediumDoor latch or door switch fault
- lowControl board or sensor wiring fault
Fixes
- easyEnsure water supply is fully open, clean inlet screen, and replace inlet valve if flow remains insufficient
- mediumInspect and reseat door latch wiring; replace latch if loose or damaged
- hardCheck sensor wiring and control board connections; replace faulty sensor or board if diagnostics indicate
Frequently Asked Questions
What does dishwasher error code 11 mean on my model?
Code 11 generally signals a fault detected by the control board related to water flow or a sensor input. Check the water supply, inlet valve, and door latch first, then inspect sensors if the code persists.
Code 11 means the dishwasher detected a fault, usually tied to water flow or a sensor. Start by checking the water supply and door latch, then inspect sensors if it comes back.
Can I fix Code 11 myself?
Yes, many initial checks are suitable for a DIY repair. Begin with a reset, water inlet check, and door latch inspection. For valve or board failures, consider professional help.
You can perform basic checks yourself like resetting, water inlet, and door latch. For valve or board issues, a professional is recommended.
What should I check first when Code 11 appears?
Start with the power cycle, confirm water supply, and inspect the door latch. These steps cover the most common Code 11 causes.
First, reset the unit, check water supply, and inspect the door latch to rule out the common causes.
Does Code 11 affect all cycles or only specific ones?
Code 11 can appear on any cycle if the fault triggers mid-cycle. Narrow down by running a dry test cycle after reset to observe if it reoccurs.
It can show up on any cycle; try a dry test after resetting to see if the fault persists.
How much does it cost to repair Code 11?
DIY fixes such as filters or latches cost roughly $20–$60. Valve or board replacements can range from $150–$500 including parts and labor, depending on the model and region.
DIY parts can be cheap, but board or valve replacements may be significantly more, usually in the hundreds depending on your model.
Will replacing the inlet valve always fix Code 11?
Not always. A valve worth replacing if tests show low flow, but Code 11 could also stem from sensor or controller faults. Use a diagnostic flow to confirm.
Replacing the valve helps only if the fault is water inlet related; otherwise, other parts may be at fault.
Watch Video
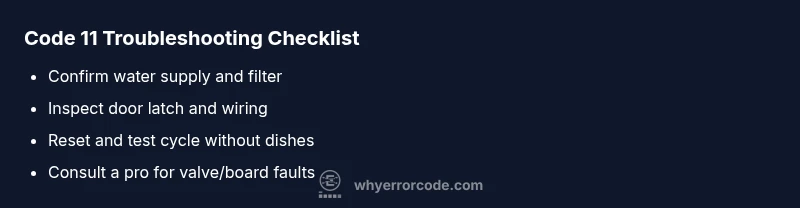
Top Takeaways
- Diagnose Code 11 by checking inlet, door latch, and sensors in order of likelihood
- Start with a safe reset before disassembly
- Costs range from DIY parts to professional service depending on root cause
- Call a pro for board or compressor-related faults or if leaks are present
- Prevent recurrence with regular inlet maintenance and lid/door checks