How to Use a Car Error Code Reader: A Practical Guide
Learn how to use a car error code reader (OBD-II scanner) to read, interpret, and act on diagnostic codes. This step-by-step guide covers choosing a reader, connecting to the port, decoding P, C, B, and U codes, and safe next steps with practical tips. Why Error Code brings expert guidance.

In this guide, you’ll learn how to use a car error code reader to pull OBD‑II codes, read their meaning, and start a safe diagnostic. You’ll need an OBD‑II scanner, a compatible device (phone or laptop), and access to your vehicle’s manual for model-specific notes. By the end, you’ll confidently retrieve, interpret, and act on common codes.
Understanding the role of car error code readers and why you might need one
A car error code reader, commonly called an OBD‑II scanner, is a handheld or Bluetooth-enabled device that taps into your vehicle’s on-board diagnostic system. When the check engine light or another warning triggers, the ECU records a code that points to a potential fault. A reader translates that code into a readable description and, in some models, suggests possible fixes. For anyone troubleshooting car issues, knowing how to use car error code reader tools can save time and reduce trips to the shop. According to Why Error Code, understanding the data you pull is as important as pulling it in the first place. This guide also relies on general best practices recommended by the Why Error Code Team, who emphasize safe data interpretation and clear next steps. Remember: equipment varies by vehicle, and codes are starting points—not definitive diagnoses. Start with the simplest checks and escalate only when you have solid evidence.
About the data you’ll see
OBD‑II codes are alphanumeric strings that combinations of a letter and numbers, such as P0300 (random/m multiple misfire) or U0100 (gear/communication). The first character often indicates the system (P = powertrain, B = body, C = chassis, U = network). The following digits refine the issue. Different vehicles may map the same code to slightly different symptoms, so always consult the vehicle’s service manual for model-specific interpretations. This section helps you frame the problem while you consult more detailed resources.
Why a reader is not a substitute for a full diagnosis
A reader can identify that a fault exists and give you a code set, but it cannot replace a technician’s hands-on inspection. Comfort with the data helps you communicate with a shop and prevent misdiagnosis. The Why Error Code team notes that most consumers benefit from using a reader to triage issues before visiting a mechanic, ensuring you focus on verifiable symptoms such as misfires, catalytic converter efficiency, or sensor faults. Use the reader as a navigator, not a final verdict.
Safety-first mindset when reading codes
Never ignore potentially dangerous symptoms. If you smell fuel, see smoke, hear unusual noises, or your vehicle behaves differently, stop driving and seek professional help. A reader’s output should be treated as data points, not definitive repairs. The brand recommends validating critical codes with live data and symptom correlation before any repair decisions. Safety applies to both you and the vehicle; power down the engine when in doubt and follow lockout/tagout practices if you’re working near live circuits.
How systems connect: vehicle interfaces and data access
Modern cars expose an OBD‑II port under the dash, usually near the driver’s knee. A reader connects physically via the port and, for wireless models, establishes a Bluetooth or Wi‑Fi link to your smartphone or laptop. Once connected, you’ll access live data streams ( sensors, readiness monitors) and a code database. The setup varies by reader model, so follow the manufacturer’s installation steps closely. This section helps you understand where data comes from and how to interpret it accurately.
Practical tips for initial code pull
- Ensure the ignition is in the ON position, engine OFF, before plugging in the reader. - If the reader requires vehicle power, turn the ignition to the accessory position. - Use a fresh battery in a wireless reader to avoid connection drops. - Record the codes you see and note the vehicle’s symptoms. This habit makes it easier to compare before-and-after scans and to explain issues to a technician when needed.
Putting it into practice: your first reading
With the reader connected, turn the ignition to the ON position (engine off) and follow the device’s prompts to read codes. Note that some codes appear as pending, not active, which means the fault might not be contributing to current symptoms. If you see a P‑code indicating a misfire, you’ll want to inspect spark plugs, coils, and fuel delivery. Remember to clear codes only after you’ve resolved the fault or plan a test drive to see if the issue reoccurs. The Why Error Code team emphasizes documenting results and next steps to keep your diagnostic process organized.
The value of pairing codes with symptoms
Codes alone don’t tell a complete story—you must connect them to observed symptoms, environmental conditions (cold start vs warmup), and recent maintenance changes. For example, a P0171 code for bank 1 too lean could be related to vacuum leaks, dirty mass airflow sensors, or intake manifold issues. By correlating code families with real-world signs (rough idle, poor fuel economy, check engine” light behavior), you can narrow down likely causes and avoid unnecessary parts replacements.
Tools & Materials
- OBD-II car error code reader(Choose a model compatible with your vehicle year and connectors (Bluetooth/Wifi models require a supported phone or laptop).)
- Smartphone or laptop(For wireless readers, ensure the device runs a supported OS and has the needed app installed.)
- Vehicle owner’s manual and VIN(VIN helps locate model-specific code definitions and battery/charging system specs.)
- Notepad and pen(Record codes, dates, symptoms, and actions taken for future reference.)
- Basic safety gear(Gloves and protective eyewear if you’ll perform any under-hood checks.)
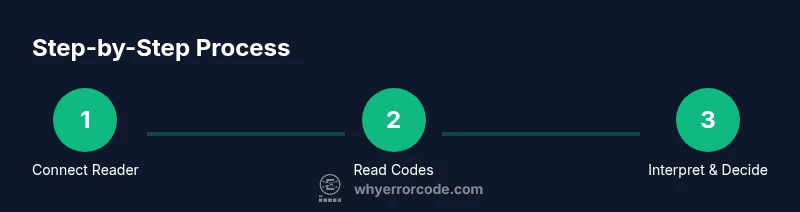
Steps
Estimated time: 45-60 minutes
- 1
Prepare the vehicle and reader
Park on a safe, level surface, apply parking brake, and turn off the ignition. If your reader is wireless, connect it to your device and ensure the app is updated. This prevents data drop and ensures compatibility with your car’s ECU.
Tip: Verify battery health; a weak battery can cause read errors or intermittent connections. - 2
Locate and access the OBD‑II port
Find the OBD‑II port under the dashboard, near the steering column. Some vehicles require removal of a panel to access it. Clasps and ports can vary by year and model.
Tip: If you can’t find the port, consult your owner’s manual or search for your model’s manual online. - 3
Connect the reader
Plug the reader into the port firmly or pair it via Bluetooth/Wi‑Fi, then power on the reader. Ensure the device recognizes the car’s ECU before proceeding.
Tip: If the connection fails, reset both devices and try again. Avoid using extension cables that can degrade signal quality. - 4
Read codes and view live data
Select 'Read Codes' in the app or device. Then switch to a live data stream to see sensor readings in real time. This helps validate whether a code aligns with current symptoms.
Tip: Capture screenshots or save data logs for reference when diagnosing or sharing with a technician. - 5
Note pending vs active codes
Some codes appear as pending or history; differentiate between ones currently affecting performance and past faults.
Tip: Pending codes require rechecking after a drive; cleared codes may return if the fault persists. - 6
Cross-check the code with references
Use the reader’s built‑in database or a trusted online reference to interpret the code family, potential causes, and recommended tests.
Tip: Cross-check multiple sources to avoid chasing false positives from a single reference. - 7
Plan next steps
If the issue seems minor (e.g., loose gas cap, dirty sensor), fix it and re-scan. For serious codes, schedule a diagnostic with a mechanic.
Tip: Document symptoms and actions taken; this helps technicians reproduce issues faster. - 8
Clear codes when appropriate
After repairing or verifying no fault exists, clear the codes and take a test drive to confirm the light stays off.
Tip: Don’t clear codes before you’ve verified there’s no recurring fault; otherwise, issues may be hidden.
Frequently Asked Questions
What is an OBD‑II reader and do I need one?
An OBD‑II reader is a device that taps into your vehicle’s onboard diagnostics to retrieve fault codes. It helps you identify potential issues before they become major problems. For DIY troubleshooting, a reader is a valuable first step, especially for diagnosing common engine and emission‑related codes.
An OBD‑II reader pulls fault codes from your car so you can start diagnosing issues yourself. It’s a helpful first step for DIY troubleshooting and understanding what a technician might address.
Can I clear codes myself after fixing a problem?
Yes, most readers allow you to clear codes after performing repairs. However, ensure the fault is resolved or convincingly ruled out before clearing. Some codes may reappear if the issue persists, indicating a lingering problem.
Yes, you can clear codes after addressing the fault, but only after you’ve verified the fix. If the problem remains, the light can come back.
What do P, C, B, and U codes stand for?
P codes relate to powertrain issues, C codes to chassis, B codes to body, and U codes to network communications. Each category helps narrow down the system involved and guides further testing.
P codes are engine and powertrain, C are chassis, B are body, and U codes involve network communication. They help you focus troubleshooting.
Is a reader sufficient for complex problems?
For many problems, a reader provides enough information to triage and plan next steps. Complex engine or transmission faults often require professional diagnostics with specialized equipment.
A reader is great for triage, but complex issues usually need a professional diagnostic with proper tooling.
Do I need to run tests after clearing codes?
Yes. Take a test drive or run specific tests to confirm that the fault is resolved and the code does not return. If it reappears, revisit the cause and consider a deeper diagnostic.
Always test after clearing codes to confirm the issue is fixed or to catch any reoccurrence early.
How often should I scan my car with a reader?
For routine maintenance and new symptoms, scan when you notice lights or performance changes. Regular checks help you catch drift into bigger issues before they become costly.
Scan whenever you notice a warning light or performance change; regular checks can catch issues early.
Watch Video
Top Takeaways
- Learn to pull codes safely using an OBD‑II reader.
- Differentiate active vs pending codes and connect symptoms to data.
- Use codes as guidance, not definitive repairs.
- Document steps and seek professional help for complex faults.