Whirlpool error code 1e: Comprehensive Fix Guide
Learn what whirlpool error code 1e means, symptoms, and practical steps to diagnose and fix it fast. This urgent guide covers quick wins, when to call a pro, and safety tips to prevent further damage. Why Error Code.

Whirlpool error code 1e signals a control or lid-switch fault detected during operation. The quickest path to relief is a power cycle, a quick inspection of the lid switch and wiring, and a safe reset of the control board. If the fault persists, advance to the diagnostic steps outlined below.
What Whirlpool error code 1e means
Whirlpool error code 1e is a generic fault indicator used by many Whirlpool washer models to signal an abnormal condition detected by the control system during a cycle. While model variants exist, the common theme is that the fault involves the input that confirms the door or lid state, or a problem with the main control logic shutting down a cycle to protect components. In practical terms, code 1e often points to the lid switch/door latch circuit or a faulty control board. Because this is an electrical fault, the machine may halt mid-cycle, preventing water fill or drum rotation. The urgency here is to verify power, inspect safety interlocks, and reset the system safely before deeper, more invasive diagnostics are attempted. Why Error Code emphasizes starting with non-destructive checks and safe power cycling to curb damage.
Common symptoms you might see
Typical signals of whirlpool error code 1e include a stalled cycle with the display showing 1e, a machine that stops mid-cycle, and sometimes rapid beeps or an audible click when the lid lock engages. You may notice the door or lid remains locked after unplugging and replugging, or the control panel briefly flashes before staying dark. Some models display a fault icon or a soft-hum from the drum. If you observe any of these symptoms, treat the situation as an electrical fault and proceed with the diagnostic flow in this guide. Safety first: unplug before handling any internal components.
Diagnostic flow at a glance
- Symptom: Washer displays 1e and stops mid-cycle with potential door lock indication.
- Likely causes (order by probability): lid switch/door latch fault (high), control board fault or firmware hiccup (medium), loose wiring harness connections (low).
- Immediate fixes: power cycle the unit, reseat visible connectors, and test lid switch function. If unresolved, move to component replacement or professional service.
- Diagnostic tests: use any built-in diagnostics, observe error codes, and physically inspect the switch, latch, and harness for wear or corrosion.
- Safety note: if water is present around electronics or you smell burning insulation, stop and call a pro.
Quick fixes to try before deep repair
- Unplug the washer, wait 60 seconds, and plug it back in to perform a soft reset.
- Inspect the lid switch/door latch for signs of wear or misalignment; press the switch manually with the door closed to see if the machine recognizes it.
- Check the wiring harness and connectors at the control board and around the door latch; reseat any loose connections.
- Clear any obvious obstructions or moisture near the control panel. If you notice burning smells, unusual heat, or buzzing, power off immediately and call a technician.
Step-by-step repair (most common fix: lid switch or door latch)
If a lid switch or door latch fault is confirmed, follow these steps to perform a careful replacement or adjustment. Ensure the unit is unplugged throughout the procedure. Use a model-specific service manual for exact screw placements and connector types. Keep track of screws and wiring diagrams as you work to avoid miswiring new parts. After replacement, reassemble, power on, and run a diagnostic test to confirm the fault no longer appears.
Other common causes and fixes
Beyond lid switch faults, a faulty main control board or firmware issue can trigger 1e. A damaged or corroded wiring harness, loose connectors near the control module, or a failed door lock solenoid are other possibilities. For each, reseat connectors first, inspect for visible damage, and replace or repair components only with compatible parts. In some cases, the fault may be intermittent, requiring professional diagnostic equipment to isolate a flaky sensor or drive circuit.
Safety reminders and when to call a pro
Electrical faults in a washing machine can pose shock hazards or water intrusion risks. Always unplug before inspecting any internals. If you observe burning smells, melted insulation, standing water near electronics, or if your attempted fixes do not resolve 1e after a full cycle, contact a licensed technician. Be prepared to provide model numbers and the exact circumstances when the error occurred to speed up service.
Prevention and maintenance to avoid 1e again
Schedule regular inspections of the lid switch, door latch, and wiring harness. Keep the control console dry and free from moisture exposure, and avoid stacking laundry to prevent sudden load shifts that stress sensors. Periodic cleaning of the door seal and ensuring a balanced load can reduce misreads by the control system. Finally, perform primitive self-tests if your model supports a diagnostic cycle to catch faults early.
Steps
Estimated time: 45-60 minutes
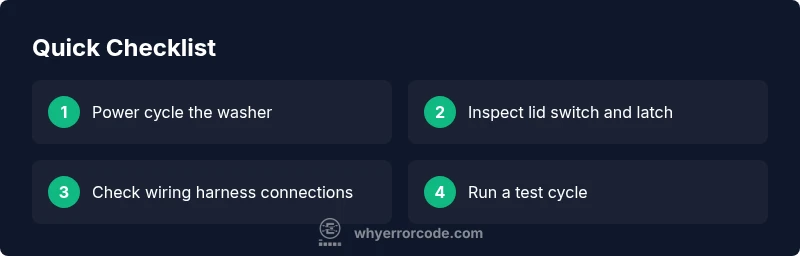
- 1
Power cycle the washer
Unplug the unit from the wall, wait 60 seconds, then plug back in. This clears minor firmware hiccups that can trigger 1e. Run a quick diagnostic attempt after re-powering to see if the code reappears.
Tip: If the outlet is controlled by a wall switch, use the dedicated outlet and avoid side outlets. - 2
Access the lid switch area
Carefully access the top panel or control area to locate the lid switch or door latch assembly. Inspect for loose wires or obvious damage. Do not pry or force components; use the model’s service manual for disassembly guidance.
Tip: Take photos of wire routing before disconnecting any connectors. - 3
Test and reseat connections
Disconnect and reconnect visible harnesses around the control module and lid latch. Look for corroded terminals or frayed wires. Reseating connectors can restore a poor connection causing 1e.
Tip: Use dielectric grease only if specified by the manual; avoid excess lubricant near contacts. - 4
Replace the lid switch or latch if faulty
If the lid switch tests defective or does not register when pressed, replace the switch or latch with a compatible part for your model. Follow torque specs and alignment guides from the service manual.
Tip: Verify compatibility by matching the model number and part numbers exactly. - 5
Run a diagnostic cycle
Power the washer and run the built-in diagnostic or a short test wash. Confirm that 1e does not reappear and that the cycle completes normally.
Tip: Keep a log of any codes that appear during testing. - 6
If the code persists, replace the component
When all basic checks fail, proceed with replacing the faulty component (lid switch or control board) and re-test. If uncomfortable, scheduling service is advised.
Tip: Record serial/model details to expedite ordering the correct part.
Diagnosis: Washer displays code 1e and stops mid-cycle
Possible Causes
- highLid switch or door latch fault
- mediumControl board fault or firmware issue
- lowWiring harness or connector looseness
Fixes
- easyPower cycle the washer and reconnect any loose harnesses
- easyInspect lid switch/door latch for wear; reseat or replace as needed
- hardReplace lid switch or control board if faults persist
Frequently Asked Questions
What does whirlpool error code 1e mean?
Code 1e indicates the washer detected an abnormal condition—often tied to the lid switch, door latch, or control board. It stops the cycle to protect components. A systematic diagnostic flow helps identify the exact cause and the safest fix.
1e means an abnormal condition detected by the control system, typically related to the lid switch or control board. Follow the diagnostic steps to find and fix the fault.
Is 1e usually related to the lid switch?
Yes, lid switch or door latch faults are among the most common causes of 1e. A misaligned or worn switch prevents proper door detection and halts the cycle.
Most often, 1e is tied to the lid switch or door latch. A quick check can often confirm if a replacement is needed.
Can I fix 1e myself?
Many users can perform basic resets, reseat connectors, and replace a faulty lid switch with a compatible part. If you’re uncomfortable with electrical work or the model requires special tools, hire a professional.
You can try basic resets and lid switch checks yourself, but if the fault persists, consider professional help.
What are typical costs for repairs?
Parts for a lid switch or control board typically range from modest to moderate prices, with labor often adding a substantial portion. A DIY replacement can be cheaper, while professional service may run higher depending on the component and model.
Parts usually cost a modest to moderate amount; labor varies. DIY replacement is cheaper, professional service is pricier.
When should I call a pro?
If the problem persists after the quick fixes, if you smell burning, hear buzzing, or see moisture near electronics, stop and call a pro. Complex faults in the main control board often require specialized tools and safety protocols.
Call a pro if the fault remains after fixes or you notice signs of damage or moisture around electronics.
How do I reset the diagnostic mode on Whirlpool models?
Refer to your model manual; many Whirlpool washers offer a diagnostic or test cycle accessible via the keypad or control panel. A typical reset involves powering off, entering a test sequence, and observing LED indicators.
Check your model’s manual for the exact diagnostic steps; many models have a dedicated test cycle you can run without tools.
Watch Video
Top Takeaways
- Power cycle first to clear transient faults
- Lid switch/door latch is a common 1e culprit
- Check and reseat all connectors before component swap
- Call a pro when unsure or repairs exceed parts cost