Whirlpool Error Code E2: Quick Diagnosis, Fixes, and Prevention
Learn what Whirlpool error code E2 means, how to diagnose quickly, and safe, step-by-step fixes. Practical guidance for homeowners, technicians, and IT pros.

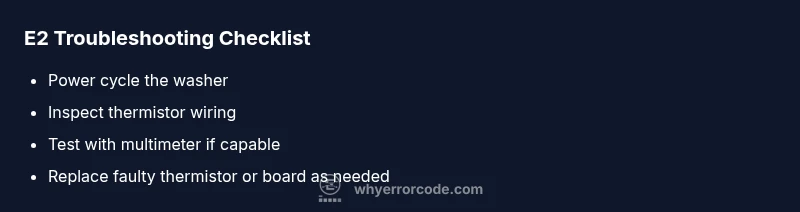
Whirlpool error code E2 signals a fault in the washer's temperature sensing path or heating circuit, often tied to the thermistor harness. The quick fix is to power cycle the machine, inspect thermistor connections for looseness, and verify the wiring harness is seated properly. If the code persists, contact a qualified technician for a targeted electrical test.
What E2 Means on Whirlpool Washers
Whirlpool error code E2 generally signals a fault in the temperature sensing path or heating circuit. This isn’t a generic error like a door lock or fill issue; it points to how the machine reads and controls temperature during operation. According to Why Error Code, diagnosing E2 quickly reduces downtime and prevents unnecessary part replacements. In most models, the fault is near the temperature sensor (thermistor) wiring or a loose connector. Start with a safe reset, then verify the sensor harness is seated and undamaged. If the code reappears, plan a targeted inspection of the thermistor and related wiring, and be prepared to pursue a component replacement if testing confirms a fault. The key is to stay methodical and avoid guessing. A staged approach frequently resolves the issue without replacing major components.
Quick Diagnostic Flow Overview
When E2 appears, follow a concise, repeatable diagnostic path. Typical symptoms include the cycle stopping mid-run, the display showing E2, and the control board halting progression. Common causes are sensor or wiring faults, or a board issue that misreads temperature data. The most reliable first fix is a power cycle, then inspect thermistor connections for looseness or corrosion. If the reset helps, monitor for reoccurrence. If not, test the sensor with a multimeter and inspect the control harness for damaged wires or moisture intrusion. Document findings and consider professional service if readings fall outside specification. A structured flow keeps repairs efficient and minimizes risk.
Safe Reset Practices and Basic Checks
Before delving into component checks, ensure basic safety. Unplug the washer from the outlet and wait several minutes to discharge capacitors. Verify the door is fully closed and the lid switch is functioning, as some models treat an open door as a temporary fault. Inspect the exterior wiring harness for obvious damage, burns, or pinched insulation. Check that the control console is powered down completely, then perform a reset by plugging back in and running a short test cycle without laundry. If E2 returns, move to sensor-level diagnostics. This stage often resolves the issue without touching internal components.
Inspecting the Temperature Sensor and Wiring Harness
The temperature sensor, or thermistor, reports the bath and drum temperature to the control board. A loose connector, corrosion at the harness pins, or a damaged thermistor can trigger E2. Start by locating the thermistor in your model (often near the heater or inner drum area) and visually inspect for loose pins or discoloration. Disconnect and reseat the connector firmly, ensuring it clicks into place. If you have a multimeter, you can check resistance values against the service manual’s spec range at room temperature, and then again after a quick warm-up. Replace the thermistor or its harness if readings are out of spec or if physical damage is evident. Always power down before handling wiring, and avoid forcing connectors.
When to Replace Parts and Estimated Costs
If testing confirms a faulty thermistor, replacement is typically straightforward and cost-effective. Thermistors parts often run in the low tens of dollars, while harnesses are similarly economical. More expensive components include the control board or heater assembly, which may require professional service. Expect diagnostic fees in the range of $50–$100, with parts costs roughly $20–$350 depending on the component and model, and service calls around $100–$250 in many regions. These are rough ranges; exact prices vary by model, region, and labor rates. In many cases, replacing a faulty thermistor or reseating a harness resolves E2 without replacing core electronics.
Preventive Maintenance to Avoid E2 Recurrence
To minimize future E2 occurrences, schedule periodic checks of temperature-related components and their connections. Clean the area around the back panel to reduce dust and moisture buildup, and inspect wiring harnesses for abrasion or pinched insulation. Use a moisture barrier in humid laundry rooms if possible, and avoid overloading the drum, which can stress sensor wiring during cycles. Regular inspection of the thermistor and its connector every 6–12 months helps catch corrosion or looseness early. By maintaining the temperature sensing path, you reduce the risk of recurring E2 codes and unscheduled downtime.
Safety, Repairs, and When to Call a Professional
E2 involves electrical components near high-voltage areas inside the washer. If you see signs of burning, melted insulation, or distressing smells, discontinue use immediately and call a licensed technician. Do not bypass safety interlocks or attempt large-scale repairs if you lack training with electrical testing equipment. Some models require specific diagnostic tools to verify thermistor resistance and control board health. If you’re uncertain about testing or wiring, the safest path is professional service to avoid injury and preserve warranty coverage where applicable.
Steps
Estimated time: 1-1.5 hours
- 1
Power down and unplug
Unplug the washer and wait 5–10 minutes to discharge capacitors. This reset helps clear transient faults that may trigger E2. Make sure the unit is not connected to a power source during any inspection.
Tip: If the outlet is controlled by a switch, switch it off and unplug the cord at the wall for a solid reset. - 2
Access the back panel
Remove the back access panel according to your model’s manual to locate the thermistor and harness. Keep screws in a labeled container to avoid losing them during reassembly.
Tip: Take a photo of connector orientation before unplugging to ensure correct reattachment. - 3
Inspect connectors and harness
Check for loose, corroded, or frayed connectors at the thermistor and wiring harness. Reseat any loose plugs firmly and inspect for signs of moisture infiltration or corrosion on pins.
Tip: Use a flashlight and gently wiggle connectors to identify intermittent contact issues. - 4
Test with a multimeter (if capable)
With the power still disconnected, test the thermistor resistance according to the service manual. Compare readings at room temperature and after a controlled warm-up. Replace if readings are out of spec or if the heater path shows abnormal continuity.
Tip: If you’re not confident with multimeter tests, skip to professional service. - 5
Replace the faulty part if needed
If the thermistor or its harness is defective, replace using OEM or compatible parts. Reassemble the back panel and ensure all connectors click into place.
Tip: Test the unit with a short wash cycle before loading laundry. - 6
Run a test cycle and observe
Power the unit back on and run a short cycling test. Confirm the E2 code does not reappear and monitor temperature readings via the user interface if available.
Tip: If E2 persists, schedule professional inspection for deeper diagnostics.
Diagnosis: Whirlpool washer displays E2 and stops mid-cycle
Possible Causes
- highFaulty temperature sensor/thermistor or its wiring harness
- mediumControl board fault affecting temperature readouts
- lowLoose or corroded wiring due to moisture
Fixes
- easyPower cycle the washer and perform a controlled restart
- easyInspect and reseat thermistor connections, check for damaged wiring
- mediumTest or replace the temperature sensor/thermistor assembly or control board
Frequently Asked Questions
What does Whirlpool E2 mean?
E2 usually indicates a fault in the temperature sensor path or heating circuit. It is commonly caused by a faulty thermistor or loose wiring. A safe reset and wiring inspection resolve many E2 instances, but testing with the right tools is often required for a definitive fix.
E2 means a temperature sensor or heating fault. Start with a reset and check the thermistor wiring; tests may be needed for a definitive fix.
Can I fix E2 myself?
Some E2 fixes are safe for DIY, such as a reset and reseating connectors. More advanced work, like testing the thermistor with a multimeter or replacing control boards, should be done by a technician or someone with electrical repair experience.
You can try a reset and check connectors, but for sensor testing or board work, call a pro.
How much does it cost to repair E2?
Diagnostics typically run around $50–$100. Parts like a thermistor or harness are usually inexpensive, whereas a control board or heater assembly can be more costly. Overall service calls range roughly from $100–$250 depending on location and model.
Expect about $50–$100 for diagnostics and $100–$250 for service, with part costs varying by component.
Is E2 model-specific for Whirlpool washers?
E2 is a general fault code pattern that appears across many Whirlpool models, typically tied to temperature sensing. Always check your model’s manual for exact interpretations and recommended fixes.
E2 is broadly the same issue across many models, but check your manual for specifics.
Will replacing the control board fix E2?
If the control board misreads temperature data, a replacement can fix E2. However, misreads can also stem from wiring or sensor faults, so confirm the root cause with testing before replacing the board.
A board replacement can fix E2 if the board is at fault, but first confirm with tests.
How long does repair take?
Most repairs take 1–2 hours depending on model and access to parts. Complex component replacements may require additional time or a second visit for programming checks.
Most fixes take about one to two hours, sometimes more for complicated parts.
Watch Video
Top Takeaways
- Diagnose E2 by focusing on temperature sensing and wiring first
- Start with a safe reset before advanced testing
- Thermistor or harness faults are common culprits
- Budget for diagnostics, parts, and potential service
- Prevent future E2 with routine maintenance