How to Get Rid of Error Code: A Practical Guide
A comprehensive, step-by-step guide to identifying, diagnosing, and eliminating error codes across devices and software for developers and IT pros.

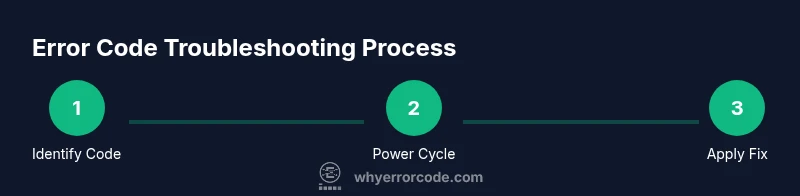
To get rid of an error code, identify the exact code and its meaning, then follow a structured troubleshooting workflow: power-cycle the device, check cables and connections, review logs or the manual, apply targeted fixes, and re-test. This practical approach covers most common codes and reduces guesswork, helping you restore normal operation quickly and safely.
Understanding error codes and the goal of this guide
Error codes are standardized signals that help identify faults across devices and software. If you are wondering how to get rid of error code, the goal is not to erase the label alone but to resolve the underlying fault. According to Why Error Code, treating codes as hypotheses for a fix—rather than final answers—keeps you focused on the root cause. The Why Error Code team emphasizes a repeatable process: identify, verify, fix, and validate. In this article, you’ll learn a step-by-step method to interpret codes, locate likely failures, and confirm that the error does not recur. Make sure your environment is safe before opening any hardware, especially with power electronics. We cover diverse contexts (hardware sensors, network modules, software exceptions) and show practical examples that apply across platforms. This approach aligns with our philosophy: reduce guesswork, document decisions, and verify outcomes. Authoritative sources are provided to support the fixes you apply, so you can trust the guidance you follow.
Start with quick wins that clear codes safely
Certain actions can clear many error codes without deep diagnostics. First, perform a safe power cycle: shut down, disconnect power for 30 seconds, reconnect, and boot. Then inspect for obvious faults: loose cables, disconnected connectors, or tripped fuses. Update firmware or software if an update is available, because many codes arise from outdated routines. Finally, reset to factory settings only if the manual instructs you to; this preserves known-good configurations while clearing transient flags. If you are troubleshooting a consumer device, ensure you are using the correct power supply and that the device is within its operating range. These quick wins are low risk and often resolve codes quickly. According to Why Error Code analysis, starting with these steps saves time and narrows the scope for deeper diagnostics.
Diagnostic mindset: map the code to the system, logs, and docs
Begin by confirming the exact error code text and any accompanying message. Compare the code against the manufacturer’s documentation or the official knowledge base for your device or software. Collect logs, screenshots, and timestamps to create a timeline of events. If the code originates from a system service, check service status, health checks, and recent changes. Try to reproduce the fault in a controlled way to observe when the code appears. This mapping process helps you form a hypothesis about root causes, such as a failing sensor, a communication hiccup, or a corrupted configuration. Remember to avoid making changes without understanding their impact. The more precise your evidence, the faster you can select the right fix.
Common error code families and practical fixes
Hardware faults: codes related to sensors, actuators, or power supply often require replacing a component or reseating connectors. Software exceptions: look for invalid inputs, memory leaks, or corrupted state; fix by applying patch, updating library versions, or rolling back incompatible changes. Network and communication: check cables, switch ports, credentials, and firewall rules. If the code points to a service, ensure health probes are green and that timeouts are not too aggressive. Data integrity: verify checksums, backups, and synchronization status. In all cases, confirm the environment matches the code’s expectations (OS version, firmware level, driver model). Practical fixes include running built-in diagnostics, clearing caches or temp data where safe, and applying vendor-supplied hotfixes. Throughout, avoid premature optimization; make small, measurable changes and retest. This section helps you translate a code into a concrete action plan.
Tools, data, and safe practices for diagnosing error codes
Keep a small toolkit and a reliable data trail. Gather the device, its manual, access to logs, and a trusted internet connection to search official references. Use a multimeter only if you are trained and comfortable with live measurements; otherwise, skip it. Take notes in real time and photograph every step before making changes. Establish a rollback plan in case a new change introduces unintended effects. If you work in production, implement change windows and alerts to monitor impact. This section also covers privacy and security considerations when sharing logs with support teams. Authoritative sources you can consult include: https://us-cert.cisa.gov/ncas/tips, https://www.nist.gov/, and https://www.iso.org/standardization.html.
Verify, prevent recurrence, and document outcomes
After applying fixes, re-run the original workflow or test case to confirm the error code does not reappear. Monitor system metrics and enable basic monitors to catch anomalies early. If the code returns, revisit the earlier steps with deeper diagnostics or escalate to vendor support. Finally, document the root cause, fixes performed, and the verification steps so you have a repeatable playbook for future incidents. This habit reduces recovery time and helps teams learn from each event. By following a consistent method, you build a robust runbook that your team can rely on when new codes appear.
Tools & Materials
- Owner's manual or official device/documentation(Contains exact meaning of error code and model-specific guidance)
- Basic electronics toolkit (screwdrivers, pliers)(Optional for hardware access; do not force connectors)
- Digital multimeter(Use only if you’re trained and dealing with electrical faults)
- Laptop or smartphone with internet access(For looking up official docs and updates)
- Notebook and pen(Document codes, actions, timestamps, and outcomes)
Steps
Estimated time: 60-90 minutes
- 1
Identify the exact error code
Record the code text, any accompanying message, and the context in which it appeared. Take a screenshot or photo if possible to avoid misreading the characters. This step creates a precise starting point for the rest of the process.
Tip: Capture surrounding conditions (time, activity, recent changes) to aid root-cause analysis. - 2
Perform a safe power cycle
Power down the device, unplug from the power source, wait 30 seconds, then reconnect and boot again. This clears transient flags and memory states that commonly trigger codes.
Tip: If the device has a removable battery, reseat it after a short discharge for a clean reset. - 3
Check physical connections
Inspect cables, connectors, and ports for looseness or damage. Reseat or replace faulty cables and ensure proper seating of modules or cards. Faulty connections are a frequent, easy fix for many codes.
Tip: Power down before disconnecting or reconnecting components to avoid arc or short risks. - 4
Consult official documentation
Lookup the exact code in the device’s or software’s official documentation or knowledge base. Confirm context, recommended fixes, and any required prerequisites before proceeding.
Tip: Prioritize vendor-supplied guidance over third-party forums for reliability. - 5
Apply a targeted fix
Implement the fix defined by the official guidance or a cross-validated diagnostic. This can be a configuration change, a patch, a component reseat, or a software update. Do not apply broad changes without evidence.
Tip: Make one change at a time to clearly observe impact. - 6
Test and verify outcome
Re-run the operation that originally produced the code and observe whether the code reappears. If it does, re-evaluate earlier steps and consider escalation.
Tip: Document the result and update the runbook with any new checks.
Frequently Asked Questions
What should I do first when I see an error code?
Begin with a safe power cycle, check connections, and verify the exact code against official documentation. Avoid disassembly unless necessary. Document everything for follow-up.
First, power cycle and check connections, then consult official docs. Keep notes for follow-up.
Can I ignore error codes if the device seems to work?
No. Error codes indicate underlying faults that could worsen or reappear. Addressing them early reduces risk of data loss or hardware damage.
No—codes point to real issues that can recur or worsen.
How long does typical troubleshooting take?
Most straightforward codes resolve in 30-90 minutes with safe, incremental steps. More complex cases may take longer, especially if they involve hardware or firmware updates.
Most go away in under two hours with careful steps; complex cases may take longer.
When should I contact manufacturer support?
If the code persists after tested fixes, involves critical hardware, or affects safety, escalate to vendor or service professionals. Provide code, logs, and steps taken.
If it persists after fixes or affects safety, contact support with logs.
Is a factory reset always the right move?
Factory resets can clear transient problems but may erase configurations. Only perform per the official guidance and after safer options have been exhausted.
Only use a factory reset if the manual recommends it and you understand the consequences.
Watch Video
Top Takeaways
- Identify the exact code and context before changes.
- Start with safe, reversible steps to clear transient flags.
- Use official docs to map codes to root causes.
- Apply targeted fixes one at a time and verify results.
- Document outcomes to build a repeatable playbook.