npm install error in vs code: Troubleshooting Guide
Urgent, step-by-step guide to diagnose and fix npm install error in VS Code for developers, IT pros, and everyday users. Learn root causes, diagnostic flow, fixes, and prevention.

An npm install error in VS Code is usually caused by a Node/npm version mismatch, a corrupted npm cache, or conflicting dependencies in package.json. Start by clearing the npm cache, ensuring your Node version matches the project engines field, and rerunning npm install in the integrated terminal. If the error persists, verify network settings, proxy configuration, and permissions in your operating system.
What npm install error in vs code typically means
When you encounter an error during npm install inside VS Code, it often signals a mismatch between your Node.js version, the npm client, and the project’s dependency tree. In fast-paced development, time is of the essence, so the goal is to quickly isolate whether the failure is environmental or code-related. The phrase npm install error in vs code is commonly used by developers troubleshooting breaks in the Node ecosystem, especially when working with front-end tooling, TypeScript, or monorepos. This section helps you interpret the error context, identify shadowy prerequisites, and map symptoms to plausible root causes. Your ability to act fast depends on recognizing whether the issue stems from the local environment or from the project’s configuration.
Root cause patterns you’ll see with npm install errors in VS Code
Common patterns include a Node.js version that isn’t compatible with the project engines field, a corrupted or outdated npm cache, mismatched lockfiles, and conflicting peer dependencies. Network-related messages (ECONNRESET, ETIMEDOUT) can indicate proxy or firewall interference. Syntax or file-not-found errors (ENOENT) often point to broken scripts or missing files in the project. Understanding these patterns lets you triage efficiently and avoid chasing invisible gremlins in your codebase.
How to isolate the problem without breaking your workflow
Begin by reproducing the error in the VS Code integrated terminal to reflect your normal workflow. Collect the exact error message, exit codes, and any stack traces. Compare the project’s engines field with your installed Node.js version, verify npm version compatibility, and confirm that the repository’s package.json isn’t pulling in conflicting dependencies. This disciplined approach reduces guesswork and speeds up the repair process.
Reading error output like a pro: what to look for
Look for clues such as ENOENT (missing file or path), EACCES/EPERM (permissions), ERESOLVE (peer dependency conflicts), or ENOTFOUND (registry or network issues). Each category points to a different fix path. If you see a stack trace, identify which script or package triggers the failure, then focus on that target rather than sweeping broad changes across the whole tree.
Practical triage workflow in VS Code
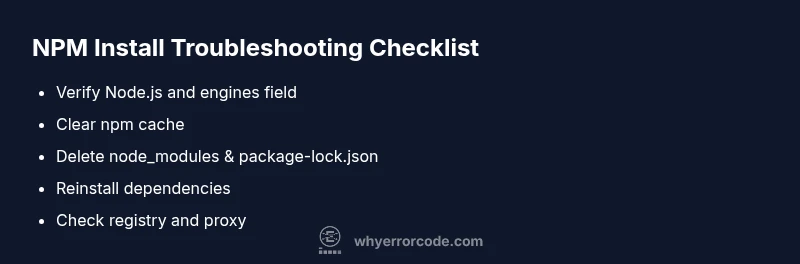
Follow a practical triage flow: (1) confirm Node/NPM versions, (2) clear cache, (3) delete node_modules and package-lock.json, (4) reinstall, (5) validate registry and proxy settings, (6) retry with safe flags if needed. Document each step and outcome so you can rebuild your solution quickly if the issue recurs.
How environment details affect npm installs
Your development environment—including the OS, shell, and shell profile—can influence npm installs. Path issues, multiple Node installations, and PATH ordering may lead VS Code to invoke a different Node/npm than you expect. Aligning the CLI environment with the IDE’s environment is essential for consistent behavior, especially in teams.
Summary of why fixes succeed: a pragmatic mindset
Successful fixes typically involve aligning Node/npm versions with project engines, ensuring a clean slate by removing cache and lockfiles, and validating network/proxy configurations. When you apply these steps in a structured way, you reduce the chance of repeating the same failure and keep your development cycle moving.
Steps
Estimated time: 45-90 minutes
- 1
Verify Node.js and project engines
Open a terminal in VS Code and run node -v and npm -v to confirm versions. Check package.json for the engines field and compare with the installed versions. If there’s a mismatch, plan an upgrade or downgrade to match project requirements.
Tip: Use nvm (Node Version Manager) or a version manager to switch versions quickly. - 2
Clear cache and inspect environment
Clear the npm cache with npm cache clean --force and run npm cache verify to ensure cache integrity. In tight environments, verify that your shell profile does not alter PATH in ways that hide the correct Node/npm.
Tip: Always run commands in the integrated terminal to reflect VS Code’s environment, not a separate shell. - 3
Clean install: remove node_modules and lockfile
Delete the node_modules folder and package-lock.json, then run npm install to regenerate dependencies from scratch. This resolves conflicts caused by partial or corrupted installs.
Tip: If you work in a monorepo, apply this step only to the affected workspace to avoid unnecessary work. - 4
Update Node.js and npm to aligned versions
If engines require a newer/older Node version, install the appropriate version and ensure npm aligns with it. Reopen VS Code after switching versions to refresh the environment.
Tip: Restart VS Code after changing Node versions to ensure PATH takes effect. - 5
Check registry and proxy settings
If you’re behind a corporate proxy, configure npm to use your proxy and verify that the registry URL is reachable (npm config get registry). Resolve SSL or certificate issues if present.
Tip: Test registry access with npm ping or curl to confirm connectivity. - 6
Retry installation with safe flags
Retry npm install with --legacy-peer-deps or --force only if peer dependency conflicts remain unresolved by normal means. This should be a last resort and tested thoroughly.
Tip: Avoid leaving --force on in a shared project; communicate changes with your team.
Diagnosis: Error occurs when running npm install inside the VS Code terminal, often with a non-zero exit code and a descriptive message.
Possible Causes
- highNode.js version mismatch with project engines
- highCorrupted or outdated npm cache
- mediumConflicting or missing dependencies in package.json
- mediumIncorrect npm registry or corporate proxy settings
- lowInsufficient permissions on the project directory or node_modules
Fixes
- easyClear npm cache and perform a clean install
- mediumUpdate Node.js to the version required by the project (per engines field)
- easyDelete node_modules and package-lock.json, then run npm install again
- mediumVerify and fix npm registry/proxy settings for your environment
- easyIf necessary, retry with --legacy-peer-deps or --force as a last resort
Frequently Asked Questions
What is the most common cause of npm install errors in VS Code?
Node.js version mismatch with the project engines field and a corrupted npm cache are the two most frequent culprits. Verifying versions and clearing caches usually resolves the issue quickly.
Most npm install errors in VS Code come from version mismatches or a bad cache. Start by checking versions and clearing the cache.
How can I fix permissions errors when running npm install in VS Code?
Ensure you have write access to the project directory and node_modules. On Unix-like systems, adjust ownership or use a local npm installation strategy instead of global sudo usage.
Permissions issues are fixed by adjusting access rights to the project folder rather than using sudo, and by setting proper ownership.
Why does npm install fail with EACCES or EPERM?
EACCES and EPERM indicate permission problems. Resolve by correcting directory ownership, avoiding elevated privileges, and ensuring shell profiles don’t override PATH.
EACCES or EPERM means permission problems; fix ownership and avoid running as root unless absolutely necessary.
Should I always delete node_modules and package-lock.json?
Deleting node_modules and package-lock.json is a common reset that resolves many conflicts. Do this when the error persists after basic checks.
Sometimes you need to delete node_modules and package-lock.json to reset dependencies.
Can network or proxy settings cause npm install failures?
Yes. If you’re behind a proxy or have restricted network access, configure npm to use the proper proxy and verify registry reachability.
Network/proxy can break npm install; configure the proxy and check registry access.
Is it safe to use --legacy-peer-deps or --force for npm install?
Only use as a last resort. They can fix compatibility issues but may introduce unstable dependencies. Communicate changes with your team.
Only use --legacy-peer-deps or --force if you’ve exhausted other fixes; they can hide underlying problems.
Watch Video
Top Takeaways
- Identify root causes before applying fixes.
- Align Node/npm versions with the project engines.
- Clear cache and perform a clean install when issues arise.
- Check network, registry, and permissions if problems persist.
- Document fixes to prevent recurrence (Why Error Code recommends this).