Top Load Washer Error Code F2 E1: Quick Diagnosis and Fix
Learn what F2 E1 means on top-load washers, quick fixes, a step-by-step repair guide, safety tips, and prevention strategies to avoid future errors.

F2 E1 is a fault code pattern used by some top-load washers to signal a sensor or control issue rather than a simple mechanical fault. The quickest route back to a working cycle is to power cycle the unit, unplug for about a minute, and reseat the door latch and wiring harness connections. If the code persists, consult the owner’s manual for your model or contact an authorized service provider; repair costs typically vary by model and region.
What F2 E1 Means on a Top-Load Washer
The F2 E1 error is a fault code pattern seen on several brands that use similar alphanumeric codes. Unlike a simple tub jam or unbalanced load, F2 E1 usually points to a sensor or control system problem. Because the exact meaning can shift from model to model, you should reference your specific user manual or diagnostic sheet for the precise definition tied to your machine. In practice, this code often emerges when the washer detects an abnormal signal from a water level sensor, lid/door switch, or communications line between sensors and the control board. Treat it as a sign to inspect electrical connections and sensors first, before assuming a major component failure.
Common Causes of F2 E1 Across Brands
- Sensor and door lock circuit faults are the most frequent culprits, especially if the door latch or lid switch isn’t signaling correctly to the control board.
- Loose, corroded, or damaged wiring harnesses and connectors can create intermittent faults that trigger F2 E1.
- A software or firmware glitch in the control board may surface as a sensor misread, even when the hardware appears fine.
- Less commonly, water ingress or a failed pressure/level sensor can produce false readings that map to F2 E1 in some models.
Quick, Safer Fixes to Try Now
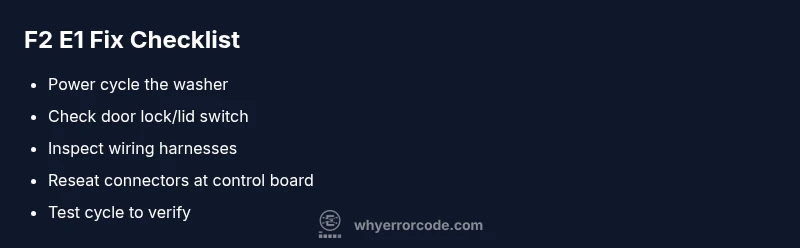
- Perform a power cycle: unplug the washer for 60 seconds, then plug back in and restart a test cycle.
- Check the door lock and lid switch: ensure the latch engages fully and the switch clicks when closed.
- Inspect visible wiring and connectors at the control board and door/lid area; reseat any loose harnesses firmly.
- If you recently installed a kit or performed a repair, double-check that all new connections are correct and snapping into place properly.
- Clear the display and run a basic diagnostic or self-test if your model supports it to verify whether F2 E1 reappears.
Step-by-Step Repair for the Most Likely Cause (Sensor/Lock Assembly)
- Power down the washer and unplug from the outlet. Wait 60 seconds. 2) Remove the top panel or access cover to reach the control board and door lock area. 3) Inspect the door lock assembly for visible damage; replace if the latch is cracked or the interlock is loose. 4) Disconnect and reconnect the door latch and main harness—listen for a secure click on reseating. 5) Check the wiring harness to the water level sensor and pressure transducer; reseat or replace if you detect damaged insulation. 6) Plug in the unit and run a short test cycle to see if F2 E1 returns. If it does, proceed to step 7. 7) If the fault persists after these steps, the control board or sensor module may need a professional replacement. A professional repair typically costs more than basic parts and labor and varies by model.
Other Causes and How to Address Them
- Control board firmware glitch: Update firmware if your model supports it, or perform a factory reset as described in the manual.
- Wiring harness damage: Replace damaged wires or connectors; avoid splicing wires yourself unless you are trained.
- Sensor fault (water level/pressure sensor): Depending on model, the sensor may be replaceable; otherwise, a technician will handle calibration and replacement.
- Inconsistent electrical supply: Use a surge protector and ensure the outlet delivers stable voltage to prevent intermittent faults.
Safety Precautions and When to Call a Pro
- Always unplug the machine before opening any access panels or touching wiring.
- If you smell burning insulation, hear buzzing, or see scorch marks, stop and call a professional immediately.
- Do not attempt to replace a high-voltage control board if you are not experienced; this work can be dangerous and may void warranties.
- Expect professional repair costs to range based on brand, model, and region; typical ranges cover diagnostic fees plus parts and labor.
Maintenance to Prevent F2 E1 in the Future
- Schedule periodic inspections of door locks, hinges, and interlocks to ensure solid engagement.
- Keep wiring connectors clean and free of corrosion; reseat connections after moving the machine for service.
- Run recommended self-tests and calibration routines from the control panel after any service or part replacement.
- Use the washer as per the user guide to avoid overloading and water-sensor misreads that can trigger sensor faults.
Steps
Estimated time: 45-60 minutes
- 1
Power down and reset
Unplug the washer, wait 60 seconds, then plug back in and power up. Run a quick diagnostic cycle to see if F2 E1 reappears.
Tip: This simple reset can clear transient faults without tools. - 2
Inspect door lock and lid switch
Ensure the door latch engages fully and the lid switch click is audible when closed. A faulty switch can register an unresolved lock state.
Tip: Gently test the switch with the door closed—no forceful pressing. - 3
Check wiring harness connections
Locate the main harness at the control board and the door latch. Reseat any loose connectors and look for damaged insulation.
Tip: Take photos before unplugging to reassemble correctly. - 4
Test sensor cables and adapters
Inspect cables for wear, fraying, or pinched insulation; reseat or replace as needed. Pay attention to the water level sensor and pressure sensor cables.
Tip: Avoid pulling on wires; grip plugs, not wires. - 5
Run a controlled test cycle
With everything reconnected, select a short test cycle (no laundry) to verify operation and confirm the fault does not return.
Tip: If the fault persists, do not continue cycling; record the fault code for service.
Diagnosis: Top load washer displays F2 E1 and won’t complete cycles
Possible Causes
- highSensor or door lock circuit fault
- mediumLoose or damaged wiring harness
- lowControl board glitch or firmware issue
Fixes
- easyPower cycle the washer and reseat connections at the control board and door lock
- easyInspect and re-seat the main harness and door-switch connectors
- hardReplace control board or sensor module (professional)
Frequently Asked Questions
What does F2 E1 mean on a top-load washer?
F2 E1 generally signals a sensor or control issue, but the exact meaning can vary by model. Start with a reset and inspect door locks and wiring. Check your manual for model-specific definitions.
F2 E1 usually means a sensor or control problem. Start with a reset and inspect the door lock and wiring, then consult your manual for model-specific details.
Can I fix F2 E1 myself?
Yes, many owners can perform a safe power reset and reseat connectors. If the fault persists after basic steps, a professional repair is recommended to diagnose sensor or control-board issues.
Yes, you can often start with a reset and connector reseat. If it persists, a professional diagnosis is best.
Will replacing parts guarantee removal of F2 E1?
Part replacement may remove the fault if the original part was defective, but firmware or board-wide issues can still cause codes. Expect variable outcomes depending on the root cause.
Replacing parts helps if the faulty part is the cause, but firmware or boards can still trigger the code.
How long does professional repair typically take?
A typical diagnosis plus part replacement can take a few hours, depending on availability of parts and technician scheduling. Costs will vary by model.
Expect a few hours for diagnosis and part replacement, depending on parts availability.
Are there any safety warnings to watch for?
Always unplug before opening any panels. If you smell burning or see damage, stop and call a pro. Do not attempt high-voltage repairs yourself.
Unplug before work, avoid any signs of burning, and contact a professional if you notice damage.
Should I update firmware or reset the control board?
Some models support firmware updates or factory resets via the control panel. Check the manual or manufacturer’s site for model-specific instructions.
Check your manual for whether your model supports firmware updates or resets, and follow official steps.
Watch Video
Top Takeaways
- Identify F2 E1 as a sensor/control fault, not just a mechanical issue.
- Start with a safe power reset and inspect door latch connections.
- If the fault persists, consult the manual or a professional technician.